

How to determine bike size for kids
To determine a child’s bike size, measure the child’s standing height and inseam, compare height with the wheel-size table, then confirm stand-over clearance, reach, brake control and confidence on the actual bicycle.
Measure the rider first
Have the child wear the shoes they will normally use for riding. Measure standing height against a wall, with feet flat and posture relaxed. Record the result in inches or centimetres.
Next, measure inseam from the floor to the crotch. This measurement does not select a wheel size by itself, but it helps you check whether the child can stand over the bicycle without the frame pressing uncomfortably into the body. Keep both measurements available when comparing a product’s geometry or consulting its manual.
Age is only a starting clue. Children of the same age can differ substantially in height, proportions, coordination and confidence, so measured fit should decide the size.
Compare height with the XBikes starting points
| Wheel size | Age starting point | Rider height |
|---|---|---|
| 12 Inch | 3–4 | 34–40 in / 86–102 cm |
| 14 Inch | 3–6 | 37–45 in / 94–114 cm |
| 16 Inch | 4–7 | 40–48 in / 102–122 cm |
| 18 Inch | 5–9 | 43–52 in / 109–132 cm |
| 20 Inch | 7–12 | 48–60 in / 122–152 cm |
| 24 Inch | 10–14 | 54–64 in / 137–163 cm |
| 26 Inch | Youth and adults | Over 60 in / 153 cm |
Where ranges overlap, do not automatically choose the larger wheel. Use the child’s inseam, reach and present riding ability to compare both candidates in person. An oversized bike bought for future growth can be harder to mount, stop and steer.
Perform an individual fit check
- Check stand-over: Ask the child to straddle the bicycle with both feet flat. The frame should not prevent a stable stance. Use the exact product manual for any model-specific clearance guidance.
- Check the riding position: With the saddle adjusted within the manufacturer’s permitted range, the child should reach the handlebar without stretching, locking the elbows or losing a balanced posture.
- Check steering: The rider should turn the handlebar in both directions while remaining controlled and comfortably centred.
- Check braking: The child must be able to reach and operate the bicycle’s brakes reliably with their hands in a normal riding position.
- Check confidence: Have the child start, stop, mount and dismount in a controlled area. If the nominal size makes these actions hesitant or unstable, compare the smaller overlapping size.
Do not alter components beyond the ranges or procedures in the exact product manual. For uncertain assembly, adjustment, compatibility or maintenance, use a qualified bicycle mechanic.
How the supplied models help with comparison
These catalog options cover several listed wheel-size starting points, so they can help you compare adjacent sizes after measuring the rider. They do not replace an individual fit check, and a listed size should be considered only when the child’s measurements and control support it.
 XJD Light Purple Girls Bike with Basket, Training Wheels, 12/14/16/20 Inch
Available in 12 Inch, 14 Inch and 16 Inch SKU labels, this training-wheel bike helps compare the smaller overlapping XBikes height ranges after measuring the child and confirming individual fit.
 XJD Kids Beach Cruiser Bicycle, Rear Rack & V-Brakes, Mint Green
Its available 20 Inch, 24 Inch and 26 Inch labels make this beach cruiser relevant for taller riders; confirm stand-over, reach, confidence and comfortable operation of its V-brakes.
 XJD Girls BMX Bike 12/14/16 Inch with Training Wheels – Pink Blue
With available 12 Inch, 14 Inch and 16 Inch SKU labels, this kids’ BMX bike provides comparison options for smaller riders whose measured height falls within the corresponding XBikes ranges.
The XJD Light Purple Girls Bike with Basket, Training Wheels, 12/14/16/20 Inch has available SKU labels of 12 Inch, 14 Inch and 16 Inch. Compare those labels with the corresponding height ranges above; the 20-inch wording in the title is not an available SKU label in the supplied facts.
The XJD Girls BMX Bike 12/14/16 Inch with Training Wheels – Pink Blue also has available 12 Inch, 14 Inch and 16 Inch labels. It is relevant when measurements place the child within those overlapping ranges, subject to the same stand-over, reach and control checks.
For taller riders, the XJD Kids Beach Cruiser Bicycle, Rear Rack & V-Brakes, Mint Green has available 20 Inch, 24 Inch and 26 Inch labels. Confirm that the child can comfortably reach and operate its V-brakes; the size label alone does not prove fit.
None of these supplied products has an 18 Inch SKU label. If measurement points toward 18 Inch, the available 16 Inch and 20 Inch products are nearest-size comparison points, not substitutes, and neither should be treated as equal to an 18 Inch bicycle.
Make the final size decision
Choose the wheel size whose height range includes the measured rider and whose actual bicycle lets the child stand securely, reach naturally, steer confidently and operate the brakes. If two sizes appear possible, have the child try both and reject any option that requires stretching or reduces control. Finish by fitting a bicycle helmet level on the head, with its straps adjusted according to the helmet manufacturer’s instructions.
Record the child’s height and inseam now, shortlist the matching wheel size or overlapping pair, and complete the five fit checks before selecting the bicycle.
Bikes for your next adventure
-
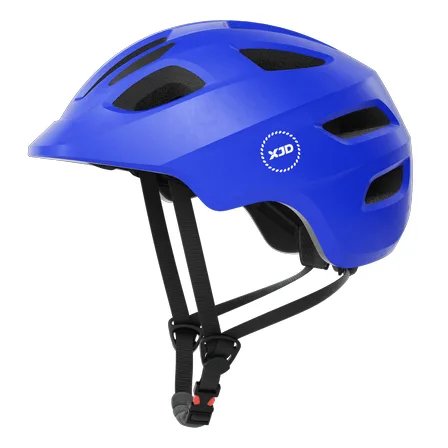
Blue XJD Kids Bike Helmet for Boys & Girls
The Blue XJD Kids Bike Helmet is a lightweight, adjustable multi-sport helmet fo…$59.99
$99 -
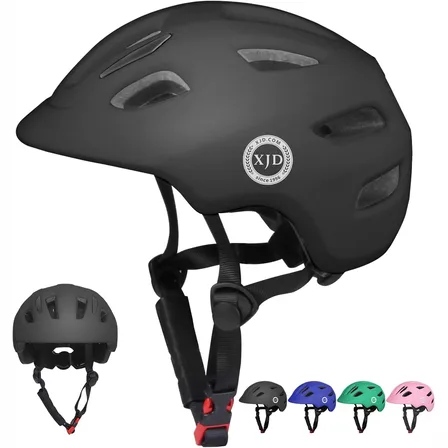
Black XJD Toddler Bike Helmet, Adjustable – Kids' Protective Helmet
The XJD Toddler Bike Helmet in black is an adjustable protective helmet for kids…$20.39
-

Kids Bike Helmet by XJD for Girls – Pink
The XJD Kids Bike Helmet in Pink is a lightweight multi-sport helmet for girls r…$59.99
$99