

What size bike for youth
Choose a youth bike by measured height first, then confirm inseam clearance, reach, brake control and confidence during an actual fit check.
Start with height, not age alone
Measure the child without shoes, standing straight against a wall. Record height from the floor to the top of the head. Then measure inseam from the floor to the crotch, using a book held level between the legs to represent the saddle area.
Compare measured height with the XBikes starting points below. Age can narrow the search, but overlapping ranges are normal. It cannot confirm fit because children of the same age may differ in proportions, reach and riding ability.
| Wheel size | Age starting point | Rider height starting point |
|---|---|---|
| 12 Inch | 3–4 | 34–40 in / 86–102 cm |
| 14 Inch | 3–6 | 37–45 in / 94–114 cm |
| 16 Inch | 4–7 | 40–48 in / 102–122 cm |
| 18 Inch | 5–9 | 43–52 in / 109–132 cm |
| 20 Inch | 7–12 | 48–60 in / 122–152 cm |
| 24 Inch | 10–14 | 54–64 in / 137–163 cm |
| 26 Inch | Youth and adults | Over 60 in / 153 cm |
Use the overlap to create a shortlist
If the measured height appears in two ranges, treat both sizes as candidates rather than automatically choosing the larger one. For example, a rider at 44 inches falls within the 14-, 16- and 18-inch starting ranges. Their inseam, reach, control and present confidence should decide which bike fits—not the hope that a larger bicycle will last longer.
Do not size up solely for growth. An oversized bicycle can make mounting, stopping, steering and reaching the controls harder. A child near the edge of a range needs an individual comparison, especially when confidence is still developing.
Check the child on the actual bicycle
Have the rider try each shortlisted bike. With the child standing over it, check that the frame does not prevent comfortable stand-over. The rider should be able to mount and dismount without struggling or leaning the bicycle excessively.
Next, observe the seated position. The child should reach the handlebar without stretching, locking the elbows or losing a balanced posture. Ask them to operate the brakes and confirm that they can reach and control them comfortably. Finally, watch a supervised start, turn and stop in a suitable traffic-free area.
- Reject the fit if the child cannot stand over, reach the controls or stop with control.
- Compare again if both sizes seem possible but one produces a noticeably more natural posture or greater control.
- Recheck adjustments using the exact product manual, or ask a qualified bicycle mechanic when setup or compatibility is uncertain.
Where the supplied training-wheel bikes fit
The supplied catalog options help when the height-based shortlist is 12, 14 or 16 inches and training wheels are relevant to the rider’s current confidence. Each offers those same three SKU labels, so the decision still begins with measurement and an in-person fit check.
 Blue XJD Girls Bike with Training Wheels – 12/14/16 Inch
Relevant when a measured-height shortlist indicates 12, 14 or 16 inches and training wheels suit the rider’s current confidence; confirm the selected size with an individual fit check.
 XJD Boys 12/14/16" Training Wheel Bike – Blue
A Training Wheel Bikes option offered in 12 Inch, 14 Inch and 16 Inch labels. Use height to shortlist a label, then verify stand-over, reach and control on the actual bicycle.
 XJD Kids' Training Wheel Bike for Boys & Girls, 12/14/16 Inch – White
Provides 12 Inch, 14 Inch and 16 Inch choices in the Training Wheel Bikes category. It is relevant only when measurement points to one of those sizes and the child passes a fit check.
Blue XJD Girls Bike with Training Wheels – 12/14/16 Inch is listed under Training Wheel Bikes and has 12 Inch, 14 Inch and 16 Inch options. XJD Boys 12/14/16" Training Wheel Bike – Blue has the same category and size labels. XJD Kids' Training Wheel Bike for Boys & Girls, 12/14/16 Inch – White is likewise listed with those three available labels.
These titles distinguish catalog options, but wording such as “girls,” “boys” or “kids” does not establish fit. Use the selected wheel-size range and the child’s actual control instead. No supplied product offers an 18-, 20-, 24- or 26-inch label; for riders needing one of those sizes, these products are comparison points only and are not substitutes.
Confirm setup and helmet fit
Before riding, follow the exact product manual for assembly, adjustments, maintenance, compatibility, load limits and torque. If the instructions are unavailable or any part of the setup is uncertain, use a qualified bicycle mechanic rather than guessing.
A bicycle helmet must fit properly, sit level and have its straps adjusted according to the helmet manufacturer’s instructions. Helmet fit does not correct a poorly fitting bicycle, so verify both separately.
Make the final size decision
Write down height and inseam, shortlist sizes from the table, and try the child on those bicycles. Choose only the size on which the rider has suitable stand-over clearance, relaxed reach, reliable brake control and present confidence. If those checks fail, reject that size—even when its age range appears to match or the larger frame promises room to grow.
Bikes for your next adventure
-
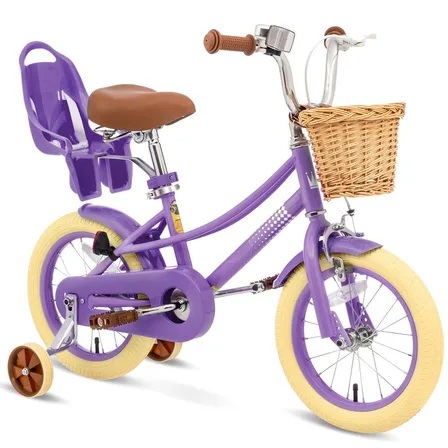
XJD Girls' Bike with Training Wheels, 12/14/16/20 Inch – Purple
The XJD girls' bike with training wheels in Purple is built to grow with your ri…$139
$159 -
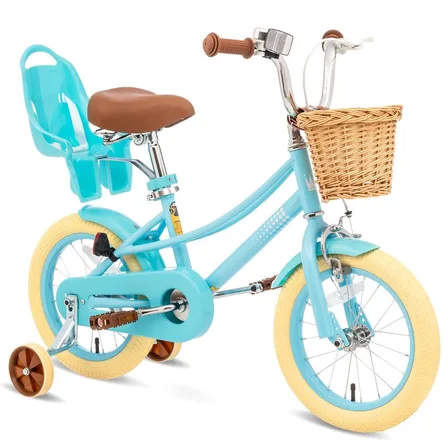
Girls' Training Wheel Bike by XJD, 12–20 Inch Wheels – Blue
This XJD girls' training wheel bike in Blue covers one of the widest fit ranges …$139
$159 -

Kids Bike Helmet by XJD for Girls – Pink
The XJD Kids Bike Helmet in Pink is a lightweight multi-sport helmet for girls r…$59.99
$99