

When should kids ride a bike
Kids should ride a bike when they can fit the bicycle, control it confidently and follow basic safety directions—not simply when they reach a certain age.
Look for readiness before choosing a bike
A child is ready to begin when they show interest, can listen to simple instructions and can stay attentive in a quiet practice area. They should have enough balance and coordination to sit on the bike, hold the handlebar and move without immediately losing control.
Confidence matters too. Hesitation is not failure, and pressure rarely helps. Start with brief, calm sessions. If the child becomes frightened, cannot concentrate or repeatedly loses control, pause and try again later rather than moving to a larger or faster bicycle.
Measure the rider, then compare wheel sizes
Measure the child’s height without shoes. Also measure inseam from the floor to the crotch while the child stands naturally. Height provides a starting wheel-size range; inseam helps you judge stand-over clearance when the child tries the actual bicycle.
| Wheel size | Starting age | Starting rider height |
|---|---|---|
| 12 Inch | 3–4 | 34–40 in / 86–102 cm |
| 14 Inch | 3–6 | 37–45 in / 94–114 cm |
| 16 Inch | 4–7 | 40–48 in / 102–122 cm |
| 18 Inch | 5–9 | 43–52 in / 109–132 cm |
| 20 Inch | 7–12 | 48–60 in / 122–152 cm |
| 24 Inch | 10–14 | 54–64 in / 137–163 cm |
| 26 Inch | Youth and adults | Over 60 in / 153 cm |
These ranges are starting points, not permission to order by age alone. Where sizes overlap, compare the real bicycles and choose according to measured height, inseam, reach, brake control and the rider’s current confidence.
Check the actual fit before the first ride
Have the child try the bicycle. The American Academy of Pediatrics advises against buying an oversized bike merely for future growth. A bike that is too large can make mounting, stopping and steering harder now.
- Stand-over: Check that the child can straddle the bicycle with practical clearance rather than being pressed against it.
- Reach: The child should hold the handlebar without stretching, locking their arms or leaning excessively.
- Brake control: Confirm that they can reach and operate the bicycle’s controls comfortably. Do not assume this from wheel size.
- Low-speed control: Ask them to start, steer, slow and stop in a clear area while an adult stays close.
If any check fails, compare another size or bicycle. Do not treat a tiptoe reach, strained posture or inability to stop reliably as something the child will simply grow into.
How the supplied XBikes options fit this decision
The two supplied training-wheel models are useful comparison points because their available wheel-size labels cover several early-rider ranges. Compare only sizes that match the child’s measurements, then perform the individual stand-over, reach, brake-control and confidence checks.
 Girls' Training Wheel Bike by XJD with Basket – Purple
A training-wheel bike offered in 14 Inch, 16 Inch and 20 Inch labels, making it relevant for comparing those XBikes starting size ranges after measuring the rider.
 Flower Pink XJD Girls Bike with Doll Seat & Basket
A training-wheel bike offered in 12 Inch, 14 Inch and 16 Inch labels, relevant to early-rider size comparisons when confirmed by an individual fit check.
Girls' Training Wheel Bike by XJD with Basket – Purple is listed in 14 Inch, 16 Inch and 20 Inch options. Those labels let families compare three distinct XBikes starting ranges, but they do not prove that any one option fits a particular child.
Flower Pink XJD Girls Bike with Doll Seat & Basket is listed in 12 Inch, 14 Inch and 16 Inch options. It may be relevant when the measured rider falls within those starting height ranges and is considering a training-wheel bike.
Both supplied products are training-wheel bikes. Training wheels can be relevant when a child is not yet confident balancing independently, but their presence does not correct poor sizing or replace supervision. For assembly, maintenance, load limits, compatibility and torque requirements, follow the exact product manual or use a qualified bicycle mechanic.
Prepare the child and riding area
Use a bicycle helmet that fits properly. Following U.S. Consumer Product Safety Commission guidance, position it level and adjust its straps according to the helmet manufacturer’s instructions. Recheck the fit instead of relying on how the helmet looked during a previous season.
Choose a quiet, open practice space away from traffic, steep slopes and obstacles. An adult should supervise and explain where the child may ride. Before each session, look for an obvious fit or control problem and stop if the bicycle is damaged or operating unexpectedly; consult its manual or a qualified bicycle mechanic.
Decide whether today is the right time
Let the child ride today only if the measured height points to an appropriate starting size, the actual bike passes stand-over and reach checks, the child can operate its controls and they remain calm enough to follow directions. If one of those conditions is missing, the next step is specific: remeasure, try a different size, adjust only as the manual permits, seek mechanical help or postpone practice. Readiness is the combination of fit, control and confidence—not a birthday.
Bikes for your next adventure
-

Black XJD Kids Bike for Boys – 12, 14 & 16 Inch Sizes
For a son between roughly 3 and 8 years old, the XJD Kids Bike in Black covers t…$169
$199 -

XJD Kids Bike for Girls – Pink, 12/14/16/20 Inch with Training Wheels
The XJD Kids Bike for Girls in Pink is a training-wheel bike built to carry your…$139
$159 -
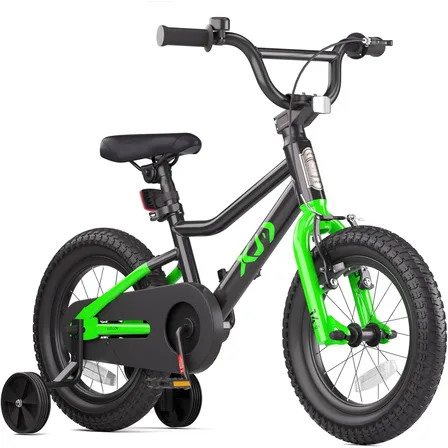
Black XJD Kids' BMX Bicycle with Training Wheels
The XJD Kids' BMX Bicycle with Training Wheels is built for children roughly 3 t…$99.99
$119.99