

When will my child learn to ride a bike
Most children learn to ride independently when bike fit, balance, braking and confidence come together—not at one fixed age. Measure your child now, check control on the actual bike, and practise in small, pressure-free steps.
Readiness matters more than a birthday
Age can suggest a starting wheel size, but it cannot predict the week or year when a child will ride alone. A child is moving toward readiness when they want to practise, can follow simple directions, and can steer while looking ahead. They should also be able to start, stop and put a foot down without panic.
Progress is rarely smooth. A cautious child may need many short sessions; another may balance quickly but require more time to learn controlled stopping. Pausing after frustration is useful, not failure. Compare your child with their own previous attempt rather than with siblings or friends.
Measure before choosing a bike
Measure standing height and inseam in the shoes your child will normally wear. For inseam, have them stand straight with feet slightly apart and measure from the floor to the crotch. Use measured height to find a starting wheel size, then confirm fit on the assembled bicycle.
| Wheel size | Age starting point | Rider height |
|---|---|---|
| 12 Inch | 3–4 | 34–40 in / 86–102 cm |
| 14 Inch | 3–6 | 37–45 in / 94–114 cm |
| 16 Inch | 4–7 | 40–48 in / 102–122 cm |
| 18 Inch | 5–9 | 43–52 in / 109–132 cm |
| 20 Inch | 7–12 | 48–60 in / 122–152 cm |
| 24 Inch | 10–14 | 54–64 in / 137–163 cm |
| 26 Inch | Youth and adults | Over 60 in / 153 cm |
These ranges overlap because children of the same age differ. Never move up merely to leave growing room. On the actual bike, check that your child can stand over it comfortably, reach the handlebars without stretching, turn them under control, operate the brakes confidently and get a foot down. If any of those checks fail, the age label or height range does not make the bike suitable.
What to practise next
Choose a flat, open area away from traffic and obstacles. Keep sessions short enough that concentration remains high. A properly fitting bicycle helmet should sit level and fit securely, with its straps adjusted according to the helmet manufacturer’s instructions.
- Walking: Let the child walk the bike while steering, stopping and turning.
- Balance: Practise brief glides and controlled foot-down stops when the bike and its manual permit the chosen setup.
- Starting: Rehearse looking ahead, pushing off and placing feet securely.
- Stopping: Make smooth, deliberate stops part of every run, not an afterthought.
- Independence: Reduce physical help gradually while staying close enough to supervise.
Do not introduce slopes, traffic or crowded paths merely because the child can pedal. First look for repeatable starts, straight riding, turns, braking and calm recovery after a wobble.
How training-wheel models relate
The supplied catalog choices are relevant when measurements and an individual fit check point to a 12, 14 or 16 Inch training-wheel bike. Their three available size labels let a parent compare adjacent starting points without assuming that one size fits every learner.
 XJD Boys 12/14/16" Training Wheel Bike – Blue
A Training Wheel Bike offered in 12 Inch, 14 Inch and 16 Inch SKU labels; relevant only when the rider’s measurements, reach, brake control and confidence confirm one of those sizes.
 Black XJD Kids Bike for Boys – 12, 14 & 16 Inch Sizes
This Training Wheel Bike provides 12 Inch, 14 Inch and 16 Inch size labels for comparison. Age alone should not determine the choice; confirm the individual child’s fit and control.
 XJD Kids' Training Wheel Bike for Boys & Girls, 12/14/16 Inch – White
Cataloged as a Training Wheel Bike with 12 Inch, 14 Inch and 16 Inch SKU labels. It is relevant to early-size comparisons, subject to measured height and an actual fit check.
XJD Boys 12/14/16" Training Wheel Bike – Blue, Black XJD Kids Bike for Boys – 12, 14 & 16 Inch Sizes, and XJD Kids' Training Wheel Bike for Boys & Girls, 12/14/16 Inch – White are all cataloged as Training Wheel Bikes and offer 12 Inch, 14 Inch and 16 Inch SKU labels. Based on the supplied facts, their useful comparison is size label and exact listed title; no other performance or fit difference can be inferred.
These options are not relevant if your child’s measurements and control check point to 18, 20, 24 or 26 Inch wheels. They are smaller-size comparison points, not substitutes for those sizes. Training wheels can support early pedalling confidence, but independent riding still requires balance, steering and braking practice.
When to change the plan
Recheck the setup if your child repeatedly struggles to start, cannot reach or operate the brakes comfortably, stretches for the bars, cannot put a foot down reliably, or appears frightened by the bicycle’s size. A different fit or a return to simpler balance practice may help more than extra encouragement.
Follow the exact product manual for assembly, adjustments, maintenance, compatibility, load limits and torque. If the instructions are missing or the setup is uncertain, use a qualified bicycle mechanic rather than guessing.
Your decision today
Measure height and inseam, select only a starting wheel-size range, and have your child try the actual bicycle. Buy neither by age alone nor for future growth. If stand-over clearance, reach, brake operation and confidence all work together, begin with short supervised practice; otherwise, change the size or setup before asking the child to ride.
Bikes for your next adventure
-
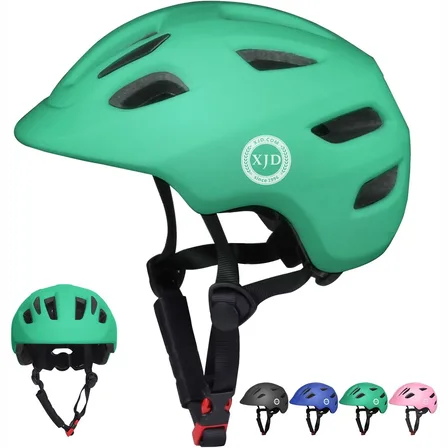
Green XJD Toddler Bike Helmet with Adjustable Fit, XS (46–51 cm)
The XJD toddler bike helmet in Green is built for the youngest riders — the size…$20.39
$23.99 -

Kids Bike Helmet by XJD for Boys & Girls – Black, Blue, Green, Pink, Purple
The XJD Kids Bike Helmet covers a wide 2-to-8-year age range thanks to two head-…$59.99
-

Kids Bike Helmet by XJD for Girls – Pink
The XJD Kids Bike Helmet in Pink is a lightweight multi-sport helmet for girls r…$59.99
$99