

Why can t my child learn to ride a bike
Your child may be struggling because the bike does not fit, the learning method asks for too many skills at once, or fear is interrupting practice. Measure fit, simplify the task, and rebuild confidence before assuming they cannot learn.
Check fit before changing the lesson
Measure your child’s height and inseam without shoes, then have them try the bicycle. Age is only a starting point. Compare the measurements with the bike’s wheel-size range, but make the final decision from stand-over clearance, reach, brake control and current confidence.
When standing over the bike, the child needs enough clearance to feel comfortable and get off promptly. Seated, they should be able to reach the handlebar without stretching or locking their arms. They also need to operate the brakes confidently. If reaching the ground, steering or braking looks difficult, do not buy or keep using an oversized bicycle merely to allow room for growth.
| Wheel size | XBikes starting age | Rider height |
|---|---|---|
| 12 Inch | 3–4 | 34–40 in / 86–102 cm |
| 14 Inch | 3–6 | 37–45 in / 94–114 cm |
| 16 Inch | 4–7 | 40–48 in / 102–122 cm |
| 18 Inch | 5–9 | 43–52 in / 109–132 cm |
| 20 Inch | 7–12 | 48–60 in / 122–152 cm |
| 24 Inch | 10–14 | 54–64 in / 137–163 cm |
| 26 Inch | Youth and adults | Over 60 in / 153 cm |
These ranges overlap deliberately: two wheel sizes can match the same height, while their reach and control may feel different. A real fit check decides between them.
Identify the skill that is actually blocking progress
“Riding a bike” combines balancing, pedaling, steering, looking ahead, starting, stopping and braking. Watch one short attempt and identify where the sequence breaks down.
- Wobbling immediately: balance or steering may need isolated practice.
- Looking at the pedals: the child may be concentrating on foot placement rather than direction.
- Freezing when released: fear, not physical ability, may be the main obstacle.
- Starting but not stopping: brake reach or stopping practice needs attention.
- Leaning or struggling to turn: recheck bike size, posture and reach.
Work on only one weak link at a time. A child who can coast and steer but cannot start needs a different lesson from one who pedals confidently but fears stopping.
Reduce the number of tasks
Choose a flat, open area away from traffic and obstacles. Begin with mounting, walking the bike and controlled stops. Then practise short glides while looking ahead. Add pedaling only after balance and steering become less demanding.
Keep sessions brief enough that technique does not collapse from fatigue or frustration. Give one clear cue at a time. Avoid surprise releases, pressure to match another child, or repeated corrections during every attempt. Predictable practice makes it easier to distinguish a skill problem from anxiety.
When training-wheel options are relevant
The Purple XJD Girls' Bike with Doll Seat & Basket is catalogued as a Training Wheel Bike and is offered in 12 Inch, 14 Inch and 16 Inch SKU labels. Those options are relevant when comparing the three smaller XBikes starting ranges and considering a training-wheel format; the title and category do not establish individual fit.

Use your child’s measured height to choose which labeled size to try, then compare stand-over clearance, reach, brake operation and confidence in person. If the child falls outside all three height ranges, this supplied product is not an appropriate size comparison. Its training-wheel category may help with pedaling familiarity and initial stability, but it does not by itself teach the balance required for independent two-wheel riding.
Rule out equipment and safety problems
Before practice, check that the bicycle appears correctly assembled and operates normally. For assembly, adjustments, maintenance, compatibility, load limits or torque, follow the exact product manual or ask a qualified bicycle mechanic; do not guess at procedures or settings.
A bicycle helmet should fit properly, sit level and have its straps adjusted according to the helmet manufacturer’s instructions. Also choose clothing and footwear that allow comfortable movement and cannot interfere with the bicycle.
Decide what to do next
- Measure height and inseam, then compare height with the XBikes starting ranges.
- Have the child try the bicycle and check stand-over, reach, brake control and confidence.
- Name the single skill that fails first.
- Practise that skill in short, low-pressure sessions before rebuilding the full sequence.
- If fit, control or mechanical condition remains uncertain, pause riding and consult a qualified bicycle mechanic.
If the bike fits and progress appears in isolated skills, continue gradually. If the child still cannot control the bike comfortably, change the fit or learning setup before asking them to try harder.
Bikes for your next adventure
-
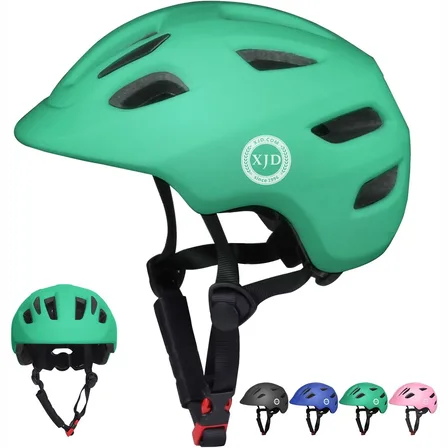
Green XJD Toddler Bike Helmet with Adjustable Fit, XS (46–51 cm)
The XJD toddler bike helmet in Green is built for the youngest riders — the size…$20.39
$23.99 -

Kids Bike Helmet by XJD for Boys & Girls – Black, Blue, Green, Pink, Purple
The XJD Kids Bike Helmet covers a wide 2-to-8-year age range thanks to two head-…$59.99
-

Kids Bike Helmet by XJD for Girls – Pink
The XJD Kids Bike Helmet in Pink is a lightweight multi-sport helmet for girls r…$59.99
$99