

Why cant my kids learn to ride a bike
Your child may be struggling because the bike does not fit, the controls are hard to reach, or the learning steps demand too much balance and pedaling at once. Measure first, then simplify the practice.
Check fit before judging ability
A child cannot learn comfortably when they are stretched toward the handlebars, cannot operate the brakes, or feel trapped above the frame. Do not choose an oversized bicycle for future growth. Have the rider try the actual bike and judge present control.
Measure the child’s standing height and inseam without shoes. Then compare those measurements with the bicycle while the child wears the shoes used for riding. They should be able to straddle the bike, get on and off without being caught by the frame, reach the handlebars without an extreme stretch, and steer while looking ahead.
Test brake reach and control before riding. The child must be able to reach and operate the fitted braking controls without losing their grip or body position. If the setup, adjustment, or brake operation is uncertain, follow the exact product manual or ask a qualified bicycle mechanic.
Compare measured height with wheel-size starting points
Age is only an initial clue. Use measured height to narrow the options, then confirm inseam, stand-over space, reach, brake control, and confidence on the individual bicycle.
| Wheel size | Starting age | Rider height |
|---|---|---|
| 12 Inch | 3–4 | 34–40 in / 86–102 cm |
| 14 Inch | 3–6 | 37–45 in / 94–114 cm |
| 16 Inch | 4–7 | 40–48 in / 102–122 cm |
| 18 Inch | 5–9 | 43–52 in / 109–132 cm |
| 20 Inch | 7–12 | 48–60 in / 122–152 cm |
| 24 Inch | 10–14 | 54–64 in / 137–163 cm |
| 26 Inch | Youth and adults | Over 60 in / 153 cm |
These ranges overlap intentionally. If height suggests two sizes, compare both in person rather than automatically choosing the larger one. A smaller catalog age label or a familiar wheel-size name does not override how the child actually fits and controls the bike.
Identify exactly where learning stops
Watch one short attempt and name the first failure rather than saying the child “cannot ride.” Different stopping points call for different changes:
- They hesitate before moving: check whether they can mount, put a foot down, and get off easily. Fear here often points to fit or an unfamiliar stopping method.
- They wobble immediately: separate balance practice from pedaling. Use a flat, open practice area and let them rehearse looking ahead, steering gently, and stopping.
- They pedal but cannot steer: shorten the attempt and practice one predictable path without obstacles or sharp turns.
- They cannot stop on command: pause riding until brake reach, operation, and the stopping sequence are understood.
- They manage briefly, then refuse: reduce pressure. Several calm, short sessions are more useful than continuing after fatigue or frustration.
Use support without hiding the missing skill
Training wheels can provide lateral support while a child becomes familiar with pedaling, steering, and stopping. They do not by themselves teach the balance needed for two-wheel riding. If the child depends on them, include separate, controlled balance practice rather than removing support and expecting every skill to appear at once.
Do not hold the handlebars and steer for the rider. If physical support is needed, keep it light enough that the child still makes steering and balance corrections. Give one instruction at a time: look ahead, start, steer, or stop.
How the supplied bicycles help with comparison
The catalog options show several relevant size and support configurations. The two training-wheel models let families compare 12-, 14-, and 16-inch choices, with one also offering 20 Inch. The cruiser provides 24- and 26-inch comparison points for taller riders. They are useful only when their available size matches the child’s measurements and individual fit check.
 Pink XJD Beach Cruiser Bike, 24"/26", U-Brake
A 24- or 26-inch comparison option for taller riders. Confirm measured height, inseam, reach, stand-over position, brake control, and confidence on the actual bicycle.
 Light Pink XJD Girls' Bicycle with Basket & Training Wheels
Offers 12-, 14-, 16-, and 20-inch sizes with training wheels, making it relevant for supported practice after measured height and an individual fit check identify an appropriate size.
 Blue XJD Girls Bike with Training Wheels – 12/14/16 Inch
Offers 12-, 14-, and 16-inch sizes with training wheels. It may suit supported skill practice, but its available size must match the child’s measurements and current control.
Light Pink XJD Girls' Bicycle with Basket & Training Wheels is offered in 12 Inch, 14 Inch, 16 Inch, and 20 Inch. Its training wheels may be relevant when a child needs supported practice, but select among those sizes using measured height and actual control.
Blue XJD Girls Bike with Training Wheels – 12/14/16 Inch offers 12 Inch, 14 Inch, and 16 Inch choices with training wheels. Compare it only within those supplied sizes; the wording in the title is not evidence that it fits a particular child.
Pink XJD Beach Cruiser Bike, 24"/26", U-Brake is available in 24 Inch and 26 Inch. It is relevant as a comparison for riders whose measurements reach those starting points, not as a substitute for a smaller learning bike. Confirm brake control on the actual bicycle.
Make the next session a fit test
- Record the child’s height and inseam.
- Use the table to choose a starting wheel size, prioritizing height over age.
- Have the child straddle, mount, reach, steer, brake, and dismount the actual bike.
- Fit a bicycle helmet so it sits level, fits properly, and uses its straps according to the helmet manufacturer’s instructions.
- Practice one missing skill at a time in a flat, open area, stopping before frustration takes over.
If your child still cannot ride after the bike fits and the task has been simplified, identify the first skill that fails and repeat only that step. Change the bicycle when fit or control is the obstacle; change the practice method when balance, steering, stopping, or confidence is the obstacle.
Bikes for your next adventure
-
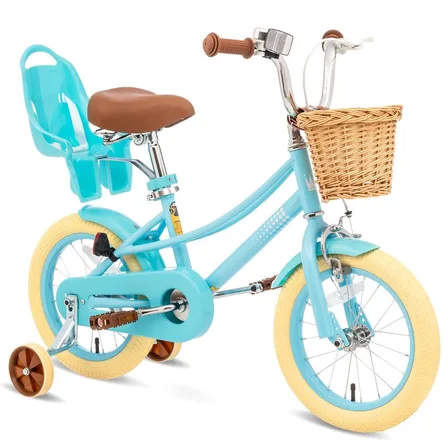
Girls' Training Wheel Bike by XJD, 12–20 Inch Wheels – Blue
This XJD girls' training wheel bike in Blue covers one of the widest fit ranges …$139
$159 -

Black XJD Kids Bike for Boys – 12, 14 & 16 Inch Sizes
For a son between roughly 3 and 8 years old, the XJD Kids Bike in Black covers t…$169
$199 -
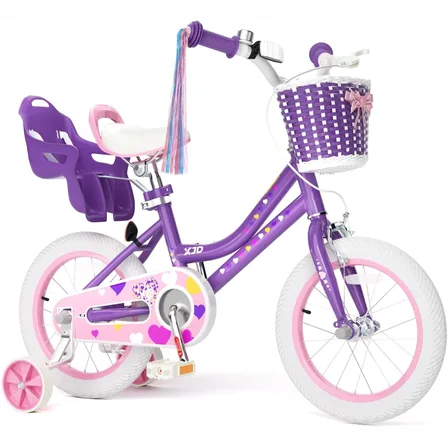
XJD Light Purple Girls Bike with Basket, Training Wheels, 12/14/16/20 Inch
The XJD Girls Bike with Basket in Light Purple is a single-speed training-wheel …$99.99
$119.99