

Why won't my kids ride bikes with me
Your child may be refusing because the bike feels too large, hard to control, uncomfortable, frightening, or simply less enjoyable than the ride you planned. Measure the rider and check the fit first; then offer a short, low-pressure ride at the child’s pace.
Ask what “I don’t want to” means
Do not begin by persuading. Ask one concrete question: “What part makes you not want to ride?” A child might identify starting, stopping, balancing, reaching the brakes, traffic, hills, speed, distance, or pressure to keep up. If the answer is vague, let the child show you while the bike remains stationary.
Also compare expectations. A parent may picture a continuous family ride while the child wants ten minutes of practice, frequent stops, or time to explore. Reluctance can be useful information rather than defiance.
Measure the rider before changing the bike
Record the child’s height and inseam without shoes. Then have the child try the actual bicycle. Check whether they can stand over it comfortably, reach the handlebar without an awkward stretch, steer predictably, and operate the brakes with control. Follow the bicycle manual when adjusting permitted components.
Use age only as a starting point. The XBikes wheel-size ranges below help narrow the comparison, but measured height, inseam, reach, brake control, and current confidence decide whether an individual bike fits.
| Wheel size | Starting age | Rider height |
|---|---|---|
| 12 Inch | 3–4 | 34–40 in / 86–102 cm |
| 14 Inch | 3–6 | 37–45 in / 94–114 cm |
| 16 Inch | 4–7 | 40–48 in / 102–122 cm |
| 18 Inch | 5–9 | 43–52 in / 109–132 cm |
| 20 Inch | 7–12 | 48–60 in / 122–152 cm |
| 24 Inch | 10–14 | 54–64 in / 137–163 cm |
| 26 Inch | Youth and adults | Over 60 in / 153 cm |
Do not buy or keep an oversized bicycle merely to allow room for growth. If the child cannot manage stand-over clearance, reach, steering, or braking now, a future fit does not solve today’s refusal.
Compare the problem with the child’s behavior
- They avoid mounting or stopping: recheck stand-over clearance, saddle setup allowed by the manual, and whether they can put a foot down confidently.
- They weave or tense their arms: assess handlebar reach, steering control, riding space, and whether your pace is too fast.
- They hesitate before descents or intersections: verify brake reach and operation, then choose a flatter, simpler practice area.
- They ride briefly but resist family outings: shorten the route and remove the expectation that they must match an adult’s distance.
- They refuse after a fall or scare: rebuild confidence through stationary controls, starts, stops, and a child-chosen turnaround point.
Reset the next ride
Choose a quiet, open place away from traffic and steep slopes. Agree on a small goal before starting: for example, practice mounting and stopping, or ride to a visible point and return. Let the child set a comfortable speed, and finish while the experience is still manageable.
Avoid surprise distance, racing ahead, repeated correction, or comparing siblings. Give one instruction at a time. If the child says the bike hurts, feels uncontrollable, or makes braking difficult, stop and investigate rather than treating the concern as a motivation problem.
When these catalog options are relevant
These particular XBikes options help only when the measured rider falls near the 12, 14, or 16 Inch starting ranges, passes an individual fit check, and wants a training-wheel bicycle format. They are comparison points for addressing a possible fit or confidence mismatch, not proof that a new bicycle will create interest.
 XJD Pink Girls' Bike – Kids 12/14/16 Inch Training Wheel Bicycle
A 12, 14, or 16 Inch training-wheel option to compare only after measuring the rider and checking stand-over, reach, braking, control, and confidence.
 XJD Girls Bike for Kids Ages 3-8, 12/14/16 Inch with Training Wheels – Purple
Listed with 12, 14, and 16 Inch choices and training wheels. Treat “Ages 3-8” in the title as a catalog label, not individual fit evidence.
 Girls 12/14/16 Inch Kids Bike by XJD with Training Wheels – Peach
A peach training-wheel bicycle listed in 12, 14, and 16 Inch versions; relevant when measurement suggests one of those starting ranges and the actual fit check succeeds.
XJD Pink Girls' Bike – Kids 12/14/16 Inch Training Wheel Bicycle is listed in 12 Inch, 14 Inch, and 16 Inch versions. XJD Girls Bike for Kids Ages 3-8, 12/14/16 Inch with Training Wheels – Purple offers the same supplied size choices; “Ages 3-8” is part of its catalog title, not fit evidence. Girls 12/14/16 Inch Kids Bike by XJD with Training Wheels – Peach is likewise listed in those three sizes.
Compare the three by exact wheel-size option and the child’s preference among the stated color descriptions. The supplied facts do not establish differences in brakes, weight, materials, adjustability, or other components. If the rider needs 18 Inch, 20 Inch, 24 Inch, or 26 Inch based on measurement and a fit check, none of these products supplies that size; the 12/14/16 Inch choices are not substitutes.
Check equipment before blaming enthusiasm
Inspect the bicycle before riding. For assembly, maintenance, fastener torque, load limits, or compatibility, follow the exact product manual or ask a qualified bicycle mechanic. Stop using a bicycle with uncertain assembly, damaged parts, unreliable controls, or a fit that prevents confident operation.
A bicycle helmet should fit properly, sit level, and have its straps used according to the helmet manufacturer’s instructions. A helmet does not correct an oversized bicycle, inaccessible brakes, or a route beyond the child’s present control.
Make the next decision specific
- Ask the child to name or demonstrate the hardest part.
- Measure height and inseam, then compare the likely wheel-size range.
- Try the actual bike and assess stand-over, reach, steering, braking, and confidence.
- Correct a verified fit or mechanical issue before planning another outing.
- Offer one short, child-paced ride with an agreed stopping point.
If the bike fits, works correctly, and the child still declines, respect the answer and try another day or another shared activity. The immediate goal is not to complete your route; it is to discover whether fit, control, fear, or the ride itself is making your child say no.
Bikes for your next adventure
-
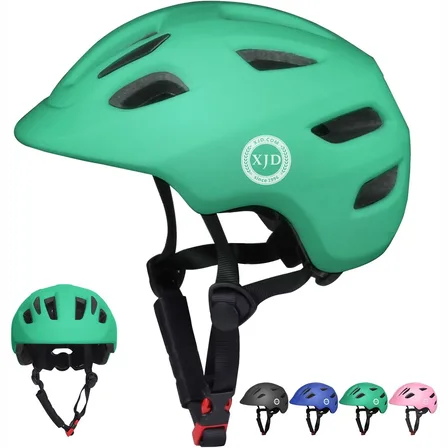
Green XJD Toddler Bike Helmet with Adjustable Fit, XS (46–51 cm)
The XJD toddler bike helmet in Green is built for the youngest riders — the size…$20.39
$23.99 -

Kids Bike Helmet by XJD for Boys & Girls – Black, Blue, Green, Pink, Purple
The XJD Kids Bike Helmet covers a wide 2-to-8-year age range thanks to two head-…$59.99
-

Kids Bike Helmet by XJD for Girls – Pink
The XJD Kids Bike Helmet in Pink is a lightweight multi-sport helmet for girls r…$59.99
$99