

BMX Pedal Thread Direction: Identify Left and Right Before Assembly
BMX pedal thread direction matters before a wrench touches the bicycle. The usual right and left pedals install in different turning directions, so a pedal that will not start is not an invitation to apply more force. Identify the sides, confirm the markings and follow the actual component instructions. On an unfamiliar assembly, getting competent help early can prevent a small installation question from becoming a damaged crank.
Orient BMX pedal thread direction from the rider’s position
Left and right refer to the rider sitting on the bicycle facing forward. The right side is normally the drivetrain side. Then view the outside of the relevant crank when interpreting clockwise or counterclockwise rotation. Keeping those two reference points explicit is clearer than advice to turn toward the front or back, which can become confusing when the bicycle or the person changes position.

Find the pedal identification before fitting
Look for an L or R marking on the pedal spindle or other identification specified by its instructions. Keep each pedal with the correct side while the bicycle is supported. The conventional right pedal installs clockwise into the right crank; the left pedal installs counterclockwise into the left crank. If a marking is absent, unclear or inconsistent with the parts, ask for identification instead of testing both pedals with a tool.
Treat difficult engagement as a reason to stop
Correctly identified compatible threads should be started carefully as the component guidance describes, before final tool tightening. Stop if the spindle will not engage normally, enters at an angle or feels damaged. Do not use the wrench to force the first turns or try to reshape a thread with a spare bolt. If an earlier attempt may have damaged the crank, tell the service provider before the next installation attempt.
Keep the exact Blue BMX configuration in view
The XBikes Blue Basic Freestyle listing is a 20-inch single-speed bicycle without pegs. Its description records a 165 mm crank and a 36-tooth chainring for that wheel version. Crank length and chainring tooth count are different measurements from pedal-thread diameter and pitch. Those catalog numbers therefore do not identify a replacement pedal thread or justify borrowing pedals from a different children’s bicycle.
Complete fastening through the actual instructions
Confirm the specified tool, any required thread preparation and tightening value for the fitted parts. This guide does not supply a universal torque or thread size. Have a qualified mechanic finish the work when those details or the required tools are unavailable. Before use, check the completed pedals and crank assembly along with the rest of the bicycle. The no-pegs description is a separate equipment fact, not an instruction to modify the pedals.
Model details relevant to this task
The linked Blue 20-inch BMX gives a real model to identify, but its published crank-length and chainring numbers cannot establish the pedal interface. Keep the original component information with the assembly request. A compatible pedal must be correctly matched and installed, not merely turned in the expected direction. The linked model details are available for Blue XJD Freestyle BMX Bike, 20-Inch – No Pegs.
Quick checklist
- Identify left and right from the rider.
- Read the pedal markings.
- Use the outside-crank viewpoint.
- Stop for difficult engagement.
- Confirm tools and tightening requirements.
Common questions
Are both pedals tightened clockwise?
No. In the conventional arrangement the right installs clockwise and the left counterclockwise, viewed from outside the respective crank.
Does a 20-inch wheel mean a standard pedal thread?
Wheel diameter does not establish the pedal interface. Confirm the actual crank and pedal requirements.
Can a longer wrench help a pedal that will not start?
Do not force the initial engagement. Stop and have compatibility, orientation and thread condition checked.
Related collections
The XBikes BMX model details and other children’s bicycle equipment provide further model details. Check the exact selected configuration when planning fit, handling and care.
Before the next outing
Use BMX pedal thread direction as the first assembly check, followed by exact component matching and the prescribed fastening procedure. Clear side identification and an early pause for resistance protect the repair process.
Bikes for your next adventure
-
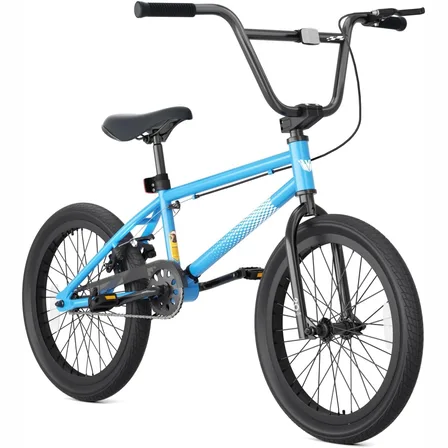
Blue XJD Freestyle BMX Bike, 20-Inch – No Pegs
The XJD 20-Inch Blue Freestyle BMX is an entry-level BMX bike for boys and girls…$189.99
-

XJD Boys 12/14/16" Training Wheel Bike – Blue
The XJD Boys Bike in Blue is a training wheel bike for riders 71–122 cm tall—rou…$169
$199 -

Black XJD Kids Bike for Boys – 12, 14 & 16 Inch Sizes
For a son between roughly 3 and 8 years old, the XJD Kids Bike in Black covers t…$169
$199