

Can you put a baby bike seat on any bike
No—you cannot put a baby bike seat on every bike. The seat, bicycle, mounting area, rider, and child must all meet the seat maker’s compatibility and load requirements.
Start with the seat’s mounting system
Identify the exact seat model before assessing a bicycle. Baby seats commonly attach to a rear rack, the bicycle frame, or a front mounting point, but those systems are not interchangeable. Read the seat manual to learn which mounting method it uses and which bicycle shapes, dimensions, and components it permits.
Do not assume that a flat-looking area, an existing rack, or enough visual clearance makes a bike compatible. A rack-mounted seat needs a rack explicitly accepted by the seat manufacturer. A frame-mounted seat needs an approved tube shape and enough unobstructed space for its bracket. If the instructions are missing or the fit is ambiguous, ask a qualified bicycle mechanic to inspect the exact bicycle and seat together.
Measure and compare these points
Use a tape measure and compare the bicycle with every dimension stated in the baby-seat manual. Record the bicycle model and seat model, then check:
- Mounting location: Measure the relevant frame tube or rack dimensions and note its shape.
- Clearance: Confirm the seat, bracket, and child’s feet cannot contact a wheel, tire, moving component, saddle, handlebar, or the rider’s body.
- Cables and fittings: Look for brake or shift cables, batteries, suspension parts, bottle bosses, clamps, or accessories occupying the mounting area.
- Load approval: Compare the child’s current weight and the seat’s weight with all limits in the bicycle, rack, and seat manuals.
- Rider space: Check that the adult can mount, pedal, steer, brake, and put a foot down without striking the seat.
Do not invent a substitute dimension, fastener, adapter, or tightening value. Use only approved parts and follow the exact manuals for assembly, maintenance, compatibility, load limits, and torque.
Bikes that often require a firm “not yet”
Do not install the seat if any required measurement falls outside the manual, the mounting point is damaged, the approved bracket cannot sit correctly, or the child-plus-seat load exceeds any applicable limit. The same applies when the manuals prohibit the bicycle’s frame shape, rack, suspension layout, or other configuration.
Small children’s bicycles are generally not substitutes for an adult bicycle designed and approved to carry a baby-seat system. Training wheels, wheel diameter, or a basket do not establish passenger-seat compatibility. A child riding such a bike also needs full control of a correctly fitted bicycle; carrying another child should never be inferred from the bike’s appearance.
How the supplied kids’ bikes relate
The two catalog options below help separate two different decisions: choosing a child’s own training-wheel bike and choosing a bicycle that can accept a baby seat. Their supplied facts describe wheel-size choices and training wheels, but provide no baby-seat compatibility, rack approval, load limit, or mounting information. They therefore are comparison points for independent young riders, not evidence that either can carry a baby seat.
 Girls 12/14/16 Inch Kids Bike by XJD with Training Wheels – Peach
A training-wheel bike offered in supplied 12, 14, and 16 Inch SKU labels. It is relevant only as a child’s own-bike comparison; no baby-seat compatibility or load information is supplied.
 XJD Light Purple Girls Bike with Basket, Training Wheels, 12/14/16/20 Inch
This Training Wheel Bike has supplied available SKU labels of 12, 14, and 16 Inch. Its basket and training-wheel description do not establish suitability for mounting or carrying a baby seat.
Girls 12/14/16 Inch Kids Bike by XJD with Training Wheels – Peach is categorized as a Training Wheel Bike and is supplied in 12 Inch, 14 Inch, and 16 Inch SKU labels. XJD Light Purple Girls Bike with Basket, Training Wheels, 12/14/16/20 Inch is also categorized as a Training Wheel Bike; the supplied available SKU labels are 12 Inch, 14 Inch, and 16 Inch. The “20 Inch” wording remains part of its exact catalog title, but it is not in the supplied available-SKU list.
Neither product is a substitute for a bicycle confirmed by the baby-seat manufacturer and bicycle manufacturer as compatible. If you are considering one as the older child’s own bike, choose its wheel size through an individual fit check rather than using it as a passenger-carrying solution.
If an older child needs a separate bike
XBikes’ starting points are 12 Inch for ages 3–4 and heights 34–40 in (86–102 cm), 14 Inch for ages 3–6 and 37–45 in (94–114 cm), and 16 Inch for ages 4–7 and 40–48 in (102–122 cm). These ranges are starting points only.
Measure the child’s height and inseam, then have the child try the bike. Prioritize stand-over clearance, comfortable reach, reliable brake control, and current confidence over age. Do not buy an oversized bike merely for growth. Age or size wording in a product title is a catalog label, not proof of fit.
Do a final check before riding
- Confirm written compatibility across the baby-seat, bicycle, and any rack manuals.
- Verify every required measurement and load limit with the child’s current measurements.
- Install only as directed, using the specified hardware and torque; otherwise use a qualified bicycle mechanic.
- Recheck steering, braking, pedaling, mounting clearance, restraints, and foot protection before each ride.
- Give every rider the appropriate properly fitting helmet. A bicycle helmet should sit level, fit properly, and have its straps adjusted according to its manufacturer’s instructions.
The practical decision is simple: install the baby seat only when the exact seat and exact bicycle pass every documented measurement, clearance, mounting, and load check; otherwise choose a compatible setup or have a qualified mechanic identify one.
Bikes for your next adventure
-
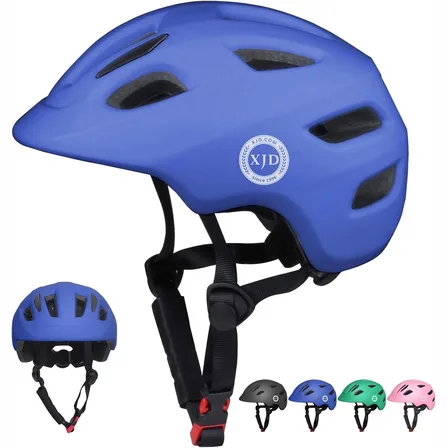
Blue XJD Kids' Bike Helmet, Adjustable Fit – Sizes XS & S
The Blue XJD Kids' Bike Helmet is a lightweight, adjustable helmet for toddlers …$20.39
-

Kids Bike Helmet by XJD for Boys & Girls – Black, Blue, Green, Pink, Purple
The XJD Kids Bike Helmet covers a wide 2-to-8-year age range thanks to two head-…$59.99
-

Kids Bike Helmet by XJD for Girls – Pink
The XJD Kids Bike Helmet in Pink is a lightweight multi-sport helmet for girls r…$59.99
$99