

Can you put a baby seat on any bike
No—you cannot put a baby seat on every bike. The bike, seat and mounting system must match, and the bicycle must safely support the intended load.
What determines whether a baby seat will fit?
Start with the instructions for both the bicycle and the baby seat. Confirm that the bicycle manufacturer permits a child carrier and that the seat manufacturer approves the bike’s frame, rack, wheel size, brakes and mounting area. A seat that can be physically attached is not necessarily compatible.
Baby seats commonly mount either to the frame or to a rear rack. A frame-mounted model needs the exact type, shape and clear space specified by its manufacturer. A rack-mounted model needs a compatible rack that is explicitly rated for that seat and its full carried load. The presence of a rear rack alone does not establish this.
Do not improvise with clamps, adapters or altered hardware. If either manual is missing or unclear, ask the manufacturers or have a qualified bicycle mechanic inspect the complete combination.
Measure and compare before buying
Record the bike’s exact model and wheel size, then inspect the proposed mounting location. Compare these details with the baby-seat manual:
- Frame tube shape, diameter and available straight mounting space.
- Rear-rack model, attachment method and stated load limit, if using a rack seat.
- Clearance above the rear wheel and around the saddle, brake parts, cables and moving components.
- Approved wheel sizes and any restrictions involving the frame, suspension or brake arrangement.
- The combined load of the seat, child and anything else carried on the bike.
Also check whether the rider can mount, dismount, steer, stop and place a foot down while the loaded seat changes the bicycle’s balance. The rider’s reach and brake control matter as much as static measurements.
A practical compatibility decision
- Check permission: Both manuals must allow the proposed installation.
- Match the mount: Every required tube or rack specification must agree with the seat instructions.
- Check capacity: Use only the manufacturers’ stated limits for the bicycle, rack and seat; the lowest applicable limit governs.
- Check clearance: Nothing may contact the wheel, brakes, cables or other moving parts.
- Verify installation: Follow the supplied hardware and exact torque instructions. If those instructions are unavailable, use a qualified bicycle mechanic.
- Try the loaded handling: In a controlled area, confirm that the adult rider retains stable steering, braking and ground reach before carrying a child.
If any answer is unknown, conflicting or dependent on improvised parts, treat the combination as unsuitable until its manufacturer or a qualified mechanic confirms otherwise.
How the supplied XBikes option relates
The XJD Kids Beach Cruiser Bicycle, Rear Rack & V-Brakes, Mint Green is offered in 20 Inch, 24 Inch and 26 Inch labels. Its rear rack makes it a useful comparison point when asking where a rack-mounted seat might attach, while its V-brakes identify one component that must remain unobstructed.
However, the catalog information does not state that its rack accepts a baby seat, provide a rack or bicycle load limit, or confirm child-carrier compatibility. Its wheel-size choices are not substitutes for those missing checks. Because this is a kids bicycle, also consider who will operate it: a baby seat requires a capable rider who can control the added load, not merely a bicycle with a rack.
This particular catalog option helps illustrate why rack presence, wheel size and brake type are only starting points—not approval to install a carrier.

Fit the bicycle to its rider too
If the bicycle is being selected for a young rider, use measured height only as a starting point: 20 Inch corresponds to 48–60 in / 122–152 cm, 24 Inch to 54–64 in / 137–163 cm, and 26 Inch to youth and adults over 60 in / 153 cm. Age starting points are 7–12 for 20 Inch and 10–14 for 24 Inch; the 26 Inch guidance is based on height rather than a numbered age range.
Have the rider try the bicycle. Check stand-over clearance, inseam, reach, brake access and present confidence. Do not choose an oversized bicycle simply to allow growth. These fit checks determine whether the rider controls the bike; they do not certify that any size can carry a baby seat.
Before the first ride
Recheck the installation exactly as the seat and bicycle manuals direct, including fasteners, restraints and permitted accessories. Keep straps and clothing away from the wheel, and follow the manuals for maintenance and inspection intervals. A qualified bicycle mechanic should resolve uncertain assembly, compatibility, load-limit or torque information.
The adult rider and child should each use an appropriate bicycle helmet that fits properly, sits level and has straps adjusted according to its manufacturer’s instructions. Follow applicable local rules on child passengers and carriers.
Your next step is simple: identify the exact bike and seat, compare both manuals line by line, measure the required mounting area, and proceed only when every mounting, clearance, load and rider-control requirement is confirmed.
Bikes for your next adventure
-
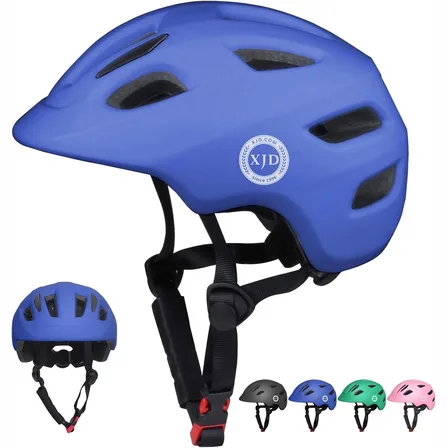
Blue XJD Kids' Bike Helmet, Adjustable Fit – Sizes XS & S
The Blue XJD Kids' Bike Helmet is a lightweight, adjustable helmet for toddlers …$20.39
-

Kids Bike Helmet by XJD for Boys & Girls – Black, Blue, Green, Pink, Purple
The XJD Kids Bike Helmet covers a wide 2-to-8-year age range thanks to two head-…$59.99
-

Kids Bike Helmet by XJD for Girls – Pink
The XJD Kids Bike Helmet in Pink is a lightweight multi-sport helmet for girls r…$59.99
$99