

Can you put breaks on kids bike
Yes, you can often put brakes on a kids bike, but only when the bike, wheel and controls accept a compatible brake system. Check fit and compatibility before buying parts.
First, check whether adding brakes is practical
Look at the bicycle’s exact model and current equipment. Some kids bikes are designed for a particular brake arrangement, while others may lack the required mounting points, suitable wheel surfaces, cable routing or compatible controls. Do not assume that a brake kit will fit because the wheel diameter matches.
Find the model information and product manual, then identify any manufacturer-approved brake type and parts. If the manual does not cover adding a brake, ask a qualified bicycle mechanic to inspect the bike. The mechanic should confirm that the frame or fork, wheel, handlebar controls and routing can work together safely. Follow the manual for assembly, adjustment, compatibility and torque requirements rather than using a generic procedure.
Measure the child before changing the controls
A brake is useful only if the rider can operate it while maintaining control. Have the child sit on the bike in a normal riding position and check these points:
- Standing clearance: The child should be able to straddle the bike comfortably rather than stretching over an oversized frame.
- Reach: The rider should reach the handlebar without locking the elbows, leaning excessively or losing a stable posture.
- Brake reach: With hands in their usual position, the child must be able to reach and pull each brake control without releasing the grip or twisting the wrist awkwardly.
- Confidence: The child should understand which control operates which brake and be able to slow smoothly under supervision.
If the lever is beyond the child’s fingers, do not treat that as something the rider will simply grow into. A different compatible control, professional adjustment or a better-fitting bicycle may be necessary.
Confirm that the bike itself is the right size
Age is only a starting point. Measure the child’s current standing height and inseam, then have them try the bicycle. Do not buy an oversized bike merely to allow room for growth. Height, stand-over clearance, reach, brake control and current confidence should decide the fit.
| Wheel size | Starting age | Rider height |
|---|---|---|
| 12 Inch | 3–4 | 34–40 in / 86–102 cm |
| 14 Inch | 3–6 | 37–45 in / 94–114 cm |
| 16 Inch | 4–7 | 40–48 in / 102–122 cm |
| 18 Inch | 5–9 | 43–52 in / 109–132 cm |
| 20 Inch | 7–12 | 48–60 in / 122–152 cm |
| 24 Inch | 10–14 | 54–64 in / 137–163 cm |
| 26 Inch | Youth and adults | Over 60 in / 153 cm |
These ranges are XBikes starting points, not proof that a particular bike fits. Inseam and frame geometry also affect stand-over clearance, and two children of the same height may have different reach and control needs.
What to compare before choosing parts
Record the exact bike model, wheel-size label and existing brake arrangement. Ask the manufacturer or mechanic to compare the proposed parts with the frame and fork mounts, wheel and braking surface, handlebar and control fit, cable or hose routing, and the child’s hand reach. All parts must belong to one compatible system.
After approved parts are installed, the controls should move correctly, the brake should engage predictably, and nothing should rub, loosen or interfere with steering. Because the required adjustment and torque depend on the actual components, use the exact product manual or have a qualified bicycle mechanic complete and inspect the work.
How the supplied XBikes options are relevant
The Black XJD Kids' BMX Bicycle with Training Wheels and the Pink Girls' 12/14/16" Bike by XJD – Basket & Doll Seat are useful size comparison points because both have 12 Inch, 14 Inch and 16 Inch SKU labels. Their supplied catalog information does not identify brake type, brake mounts or retrofit compatibility, so neither should be selected as proof that a particular brake can be added.
 Black XJD Kids' BMX Bicycle with Training Wheels
Available in 12 Inch, 14 Inch and 16 Inch SKU labels, this kids' BMX bike is relevant for size comparison. The supplied facts do not establish its brake type or retrofit compatibility.
 Pink Girls' 12/14/16" Bike by XJD – Basket & Doll Seat
This training wheel bike has 12 Inch, 14 Inch and 16 Inch SKU labels, making it useful for wheel-size comparison. Its supplied catalog facts do not confirm brake equipment, mounting points or retrofit compatibility.
Compare the child’s measured height with the relevant wheel-size starting point, then perform an individual stand-over, reach and brake-control check. Treat wording in a product title as a catalog label, not independent evidence that the bicycle fits a particular child.
What to do next
- Measure the child’s height and inseam, and note the current bike’s exact model and wheel-size label.
- Have the child demonstrate comfortable stand-over clearance, steering reach and access to any existing brake controls.
- Check the exact manual for an approved brake system and required parts.
- If compatibility or installation is not explicitly documented, take the complete bicycle to a qualified bicycle mechanic rather than guessing.
- Before riding, provide a properly fitting bicycle helmet that sits level, with its straps used according to the helmet manufacturer’s instructions.
Add brakes only after compatibility and child control are confirmed. If the bike cannot accept an approved system, or the child cannot reach it securely, choose a correctly fitting bicycle with suitable controls instead of forcing a retrofit.
Bikes for your next adventure
-
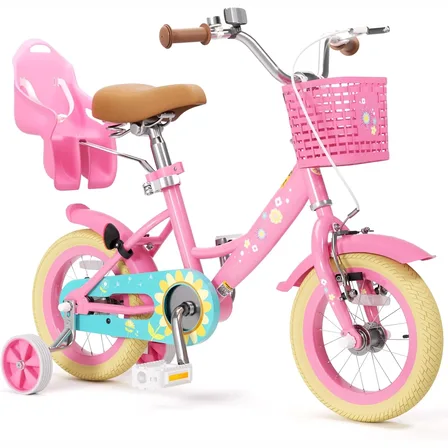
Flower Pink XJD Girls Bike with Doll Seat & Basket
The XJD Flower Pink girls' bike is made for riders 71–122 cm tall (roughly ages …$69.99
-
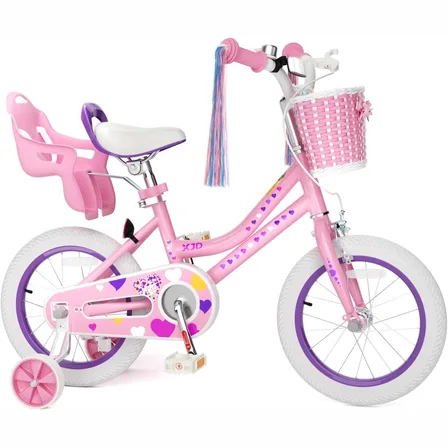
Pink Girls' 12/14/16" Bike by XJD – Basket & Doll Seat
The XJD Pink Girls' Bike with Basket & Doll Seat is made for riders 71–122 cm ta…$75.99
$99.99 -
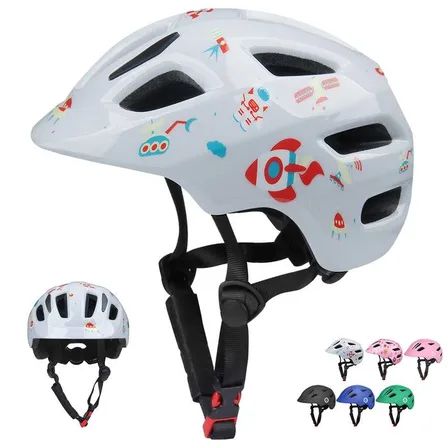
White Astronaut Bike Helmet for Kids by XJD – Toddler to Youth Sizes
4 reviews
The XJD White Astronaut kids' bike helmet is made for toddlers through younger e…$59.99