

How does baby bike seat attach
A baby bike seat attaches to the adult bicycle at the frame, rear rack or handlebars, depending on the seat. Match both manuals before buying.
Identify the attachment system first
Most child seats use one of three mounting locations. A frame-mounted rear seat clamps to an approved part of the bicycle frame and holds the seat behind the rider. A rack-mounted rear seat locks onto a compatible rear carrier. A front-mounted seat attaches near the handlebar or steering area and places the child in front of the rider.
The mounting location alone does not prove compatibility. The child-seat manual must permit the bicycle’s frame shape, tube location, rack design or steering-area arrangement. The bicycle manual must also allow a child seat and the intended mounting point. If either manual is unclear, ask the seat manufacturer or a qualified bicycle mechanic.
What to measure and compare
- Mounting area: Measure the exact frame tube or rack dimensions requested by the child-seat manufacturer. Check available straight, unobstructed space as well as diameter or width.
- Rear rack: For a rack-mounted seat, compare the rack’s design and stated load limit with every requirement in the seat manual. A rack that merely looks suitable is not enough.
- Clearance: Confirm that the seat, mounting hardware and child’s legs will clear the wheel, tire, brakes, cables, pedals and the rider’s heels throughout normal riding and steering.
- Bicycle approval: Look in the bicycle manual for restrictions involving child carriers, clamps, racks or handlebar-area accessories.
- Seat limits: Compare the child’s current measurements with the child-seat manufacturer’s stated size and load limits. Do not estimate or invent a limit.
How attachment should proceed
- Read the complete bicycle and baby-seat manuals, including compatibility warnings.
- Confirm the intended mounting surface is approved, correctly sized and undamaged.
- Install every supplied bracket, fastener, safety strap and foot restraint exactly as the seat manufacturer directs.
- Use only the specified tightening method and torque. Those values differ by product; if they are missing, stop and consult the manufacturer or a qualified bicycle mechanic.
- Check that steering and braking remain unrestricted and that no strap, footrest or loose item can reach a wheel.
- Before carrying a child, verify that the seat is locked, cannot rotate or slide, and has all required clearances. Recheck it at the intervals stated in the manual.
Do not improvise with substitute clamps, extra holes or an unspecified rack. If the bicycle and seat instructions conflict, the combination is not established as compatible.
Why wheel size does not answer compatibility
A bicycle’s wheel size describes the wheels, not the frame tubes, rack capacity or approved accessory mounts. Therefore, a 20-inch bicycle is not automatically compatible with a baby seat. The two XBikes catalog options below are useful only as kids-bike comparison points: their supplied facts identify wheel-size choices and bicycle categories, but provide no baby-seat mounting, load-limit or compatibility information.
 Blue XJD Freestyle BMX Bike, 20-Inch – No Pegs
This 20-inch Kids’ BMX Bike is only a comparison point. The supplied facts do not confirm a rack, approved mounting area, load limit or baby-seat compatibility; compare both exact manuals before attaching any seat.
 Pink 12/14/16/20" XJD Girls Bike with Training Wheels & Basket
This Training Wheel Bike comes in 12-, 14-, 16- and 20-inch versions, but wheel size, basket wording and category do not establish baby-seat compatibility. Check the exact size’s bicycle manual against the seat manual.
Blue XJD Freestyle BMX Bike, 20-Inch – No Pegs is listed as a 20-inch Kids’ BMX Bike. That description does not establish an approved frame, rack or front mount, so do not buy a baby seat for it without the exact bicycle and seat manuals confirming the same attachment system.
Pink 12/14/16/20" XJD Girls Bike with Training Wheels & Basket is listed in 12-, 14-, 16- and 20-inch versions as a Training Wheel Bike. Its basket and training-wheel wording does not prove child-seat compatibility, and each size may require a separate manual check. Neither supplied product is itself a baby bike seat.
Keep rider fit separate from seat mounting
If these bicycles are being considered for a child to ride independently, use measured fit rather than assuming that a catalog size will work. XBikes starting points are 12 Inch for 34–40 in (86–102 cm), ages 3–4; 14 Inch for 37–45 in (94–114 cm), ages 3–6; 16 Inch for 40–48 in (102–122 cm), ages 4–7; and 20 Inch for 48–60 in (122–152 cm), ages 7–12.
These ranges are starting points, not substitutes for trying the bicycle. Prioritize measured height, inseam, stand-over clearance, reach, brake control and current confidence. Do not choose an oversized bicycle merely for growth. A properly fitting bicycle helmet should sit level and use its straps according to the helmet manufacturer’s instructions.
Make the final attachment decision
Proceed only when the baby-seat manual names an attachment method your bicycle manual permits, every requested measurement matches, the stated loads are respected and full wheel, brake, pedal and steering clearance remains. If you cannot verify any one of those points, do not attach the seat; take the bicycle, seat and both manuals to a qualified bicycle mechanic.
Bikes for your next adventure
-

Light Pink XJD Girls' Bicycle with Basket & Training Wheels
The Light Pink XJD Girls' Bicycle with Basket & Training Wheels is a retro-style…$109.99
$129.99 -

Blue XJD Girls Bike with Training Wheels – 12/14/16 Inch
If you're shopping for a first pedal bike for a daughter roughly 3 to 8 years ol…$149
$169 -
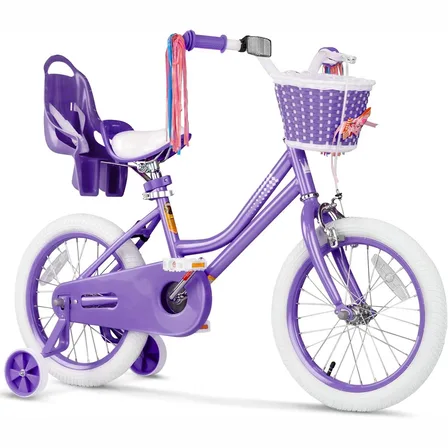
XJD Girls Bike for Kids Ages 3-8, 12/14/16 Inch with Training Wheels – Purple
The XJD Girls Bike in Purple is a training-wheel bicycle for kids ages 3 to 8, f…$149
$169