

How old can a child learn to ride a bike
A child can start learning to ride a bike at about age 3, when the XBikes 12-inch starting range begins, but age alone does not determine readiness. Measure the child and check control on the actual bicycle before deciding.
Start with readiness, not a birthday
The useful question is not simply whether a child is old enough. It is whether the child fits the bicycle, can control it and feels confident enough to practise. The XBikes age ranges are starting points for choosing what to try; they are not guarantees that a given wheel size will fit every child of that age.
A child should be able to stand over the bicycle, reach the handlebars without being uncomfortably stretched, steer while staying balanced and operate the brakes reliably. Have the child try the bicycle whenever possible. Do not choose an oversized bike solely to leave room for growth, because extra size can make starting, stopping and steering harder to manage.
Measure before comparing wheel sizes
Measure height without shoes, with the child standing straight against a wall. Measure inseam from the floor to the crotch using a book held level between the legs. Height identifies a sensible wheel-size range; inseam helps you assess stand-over fit on the specific frame. Because frame shapes differ, wheel diameter alone cannot confirm clearance or reach.
| Wheel size | Age starting point | Rider height starting point |
|---|---|---|
| 12 Inch | 3–4 | 34–40 in / 86–102 cm |
| 14 Inch | 3–6 | 37–45 in / 94–114 cm |
| 16 Inch | 4–7 | 40–48 in / 102–122 cm |
| 18 Inch | 5–9 | 43–52 in / 109–132 cm |
| 20 Inch | 7–12 | 48–60 in / 122–152 cm |
| 24 Inch | 10–14 | 54–64 in / 137–163 cm |
| 26 Inch | Youth and adults | Over 60 in / 153 cm |
Where ranges overlap, compare the actual bicycles rather than automatically selecting the larger wheel. Give more weight to measured height, inseam, reach, brake control and present confidence than to age.
Use a short fit-and-control check
- Check stand-over: Ask the child to straddle the frame with both feet planted. There should be usable clearance rather than contact with the frame.
- Check the riding position: Confirm that the child can sit, hold the handlebars and turn them without leaning or stretching excessively.
- Check braking: The child must be able to reach and operate the bicycle's brakes with control. Do not assume a brake is usable merely because the hand can touch it.
- Check starting and stopping: In a traffic-free practice area, see whether the child can mount, look ahead, steer and stop without panic.
- Check confidence: If the fit appears suitable but the child freezes or cannot follow simple stopping instructions, pause and practise later rather than moving to a larger bicycle.
When the supplied training-wheel bikes are relevant
The three catalog options are relevant when measurements point to a 12-, 14- or 16-inch starting point and a training-wheel bike suits the child's current confidence. Each offers those same three labeled wheel sizes, so the meaningful first comparison is fit and size, not an unsupported assumption based on color or title wording.
 XJD Boys 12/14/16" Training Wheel Bike – Blue
A Training Wheel Bike offered with 12 Inch, 14 Inch and 16 Inch SKU labels; relevant when the child's measurements and individual fit check point to one of those sizes.
 Black XJD Kids Bike for Boys – 12, 14 & 16 Inch Sizes
This Training Wheel Bike has 12 Inch, 14 Inch and 16 Inch size labels. Its catalog title is not fit evidence, so confirm height, inseam, reach and control.
 XJD Kids' Training Wheel Bike for Boys & Girls, 12/14/16 Inch – White
A Training Wheel Bike available under 12 Inch, 14 Inch and 16 Inch SKU labels. Consider it only after matching the rider's measurements and checking the actual bicycle fit.
XJD Boys 12/14/16" Training Wheel Bike – Blue is listed as a Training Wheel Bike with 12 Inch, 14 Inch and 16 Inch SKU labels. Black XJD Kids Bike for Boys – 12, 14 & 16 Inch Sizes has the same supplied category and size labels. XJD Kids' Training Wheel Bike for Boys & Girls, 12/14/16 Inch – White is also a Training Wheel Bike offered under those three size labels.
Wording such as “boys,” “kids” or “boys & girls” is part of each catalog title, not evidence that the bike fits a particular child. Choose which size to try from the measurements, then verify the individual bicycle's stand-over, reach and brake operation.
When these products are not the answer
These options are not appropriate substitutes when the fit check points to an 18-, 20-, 24- or 26-inch bicycle, because none of the supplied products has those wheel-size labels. They are also not automatically suitable merely because the child falls within an overlapping age range. If the child cannot stand over, steer or brake comfortably on the appropriate labeled size, keep comparing bicycles rather than sizing up or forcing the fit.
For assembly, adjustments, maintenance, load limits, compatibility and torque requirements, follow the exact product manual or use a qualified bicycle mechanic. No procedure or limit should be guessed.
Make the first practice session controlled
Use a properly fitting bicycle helmet that sits level, with straps adjusted according to the helmet manufacturer's instructions. Practise in a flat area away from traffic and other hazards, with close adult supervision. Begin with mounting, looking forward, steering and deliberate stops before expecting longer independent riding.
The next decision is simple: record the child's height and inseam, identify the matching starting range, and have the child try that size. Proceed only when stand-over, reach, braking and confidence all work together—whether that happens at age 3 or later.
Bikes for your next adventure
-

Black XJD Kids Bike for Boys – 12, 14 & 16 Inch Sizes
For a son between roughly 3 and 8 years old, the XJD Kids Bike in Black covers t…$169
$199 -

Blue XJD Girls Bike with Training Wheels – 12/14/16 Inch
If you're shopping for a first pedal bike for a daughter roughly 3 to 8 years ol…$149
$169 -
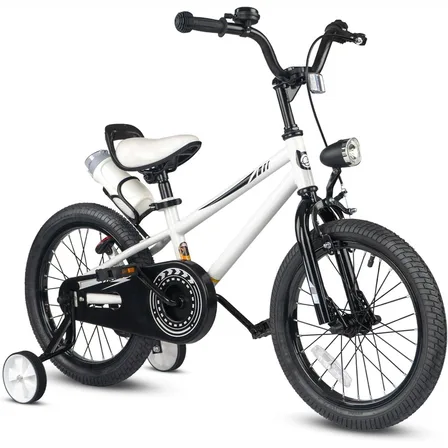
XJD Kids' Training Wheel Bike for Boys & Girls, 12/14/16 Inch – White
The XJD kids' training wheel bike in White is made for riders ages 3–8 (roughly …$169
$199