

How to carry baby on bike
To carry a baby on a bike, use a purpose-built child seat or bicycle trailer that is compatible with your adult bicycle, fits the child, and is installed exactly as its manual requires. Never carry a baby in your arms, in a sling, or on an ordinary basket or rack.
Check whether the child is ready
Before buying equipment, read the carrier manufacturer’s minimum requirements for the child’s size, physical development and helmet use. Measure the child’s current height and weight, then compare both with the carrier’s stated limits. Do not estimate or assume that a product is suitable because the child appears comfortable in it.
The child must meet every requirement in the exact carrier manual. If the baby cannot maintain the posture required by that manual, or you are uncertain about readiness, do not ride yet. Ask the child’s healthcare professional for guidance specific to the child.
Choose how the baby will travel
The usual purpose-built choices are a front-mounted child seat, rear-mounted child seat or bicycle trailer. Compare them by checking the manufacturer’s fit requirements against your bicycle and intended route. The important questions are not which type looks most convenient, but whether it is approved for the child’s present measurements and compatible with the bicycle.
- Child seat: Confirm the required mounting location, frame or rack compatibility, child restraints, foot containment and bicycle clearances in the manual.
- Bicycle trailer: Confirm hitch compatibility, child requirements, restraint instructions and whether the bicycle manufacturer permits towing that trailer.
If the bicycle, seat or trailer instructions disagree, treat that as incompatibility until the manufacturers or a qualified bicycle mechanic confirm otherwise. Never improvise brackets, straps or mounting points.
Measure and compare before installation
Bring the exact measurements and bicycle details to the comparison. Record the child’s height and weight, and identify the bicycle’s make, model, frame size and any installed rack. Then check the carrier manual for its child limits, mounting requirements and load limit.
Also compare the available mounting space with the carrier’s specified clearances. Check that the adult rider can still mount, steer, pedal, operate both brakes and place a foot down without striking the carrier. A qualified bicycle mechanic should assess compatibility when any required dimension or mounting detail is unclear.
Install and check the complete setup
Follow the exact product manual for assembly, fasteners, torque, restraints and any rack or hitch requirements. Those details vary, so a general article cannot safely replace the instructions. Have a qualified bicycle mechanic inspect the installation if you cannot verify every step.
- Check the bicycle and carrier for loose, damaged or missing parts before each ride.
- Secure the child using every restraint required by the carrier manufacturer.
- Keep clothing, straps, hands and feet contained as the manual directs and away from moving parts.
- Fit a bicycle helmet that is the correct size for the child. It should sit level, with straps adjusted according to the helmet manufacturer’s instructions.
- With no child aboard, practise starting, stopping, turning and balancing in a traffic-free area. Added passenger equipment changes handling.
- Begin only when the complete setup feels controllable. Choose a calm route and avoid conditions beyond your current confidence.
Never leave a child unattended in a bicycle seat or trailer. Stabilize the bicycle before loading or unloading, and follow the carrier instructions for the correct sequence.
Why the supplied XBikes product is not a baby carrier
The Light Pink XJD Girls' Bicycle with Basket & Training Wheels is listed as a Training Wheel Bike in 12 Inch, 14 Inch, 16 Inch and 20 Inch options. It can help distinguish a child’s own bicycle from passenger-carrying equipment, but none of the supplied facts identifies it as a child seat, trailer or baby-carrying device. Its basket and training wheels must not be treated as passenger supports.
The catalog option below is therefore relevant only as a comparison showing equipment intended for a child rider. It is not a substitute for a compatible, purpose-built baby carrier or trailer.

When that bicycle may become relevant
Later, when the child is choosing a bicycle to ride independently, measure the rider rather than relying on age alone. XBikes uses these starting points for the supplied sizes: 12 Inch for 34–40 in (86–102 cm), 14 Inch for 37–45 in (94–114 cm), 16 Inch for 40–48 in (102–122 cm), and 20 Inch for 48–60 in (122–152 cm).
Those ranges are only starting points. Have the child try the bicycle and check stand-over space, inseam, reach, brake control and current confidence. Do not buy an oversized bicycle for growth. For carrying a baby now, set this training-wheel bicycle aside and choose only a passenger system whose child limits, bicycle compatibility and installation instructions you can verify completely.
Bikes for your next adventure
-

XJD Kids Bike for Girls – Pink, 12/14/16/20 Inch with Training Wheels
The XJD Kids Bike for Girls in Pink is a training-wheel bike built to carry your…$139
$159 -

XJD Boys 12/14/16" Training Wheel Bike – Blue
The XJD Boys Bike in Blue is a training wheel bike for riders 71–122 cm tall—rou…$169
$199 -
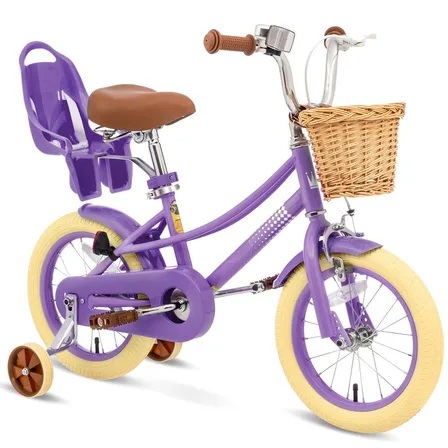
XJD Girls' Bike with Training Wheels, 12/14/16/20 Inch – Purple
The XJD girls' bike with training wheels in Purple is built to grow with your ri…$139
$159