

How to carry child on bike
Carry a child on a bike only in a purpose-built child seat, trailer or cargo-bike passenger system that fits the child, bicycle and rider. Never improvise a perch on the handlebar, frame or an ordinary rack.
Choose the carrying method first
Start with the child’s measured height, body position and ability to remain properly secured. Then compare the carrying system’s stated fit range and load limit with the exact bicycle and child. Follow the manuals for both products; limits and compatibility cannot be inferred from appearance.
- Child seat: Check that the seat and its mounting hardware are explicitly compatible with the bicycle. Confirm that the child fits its harness and that feet, hands and clothing remain clear of wheels and moving parts.
- Trailer: Verify the hitch is approved for the bicycle and installed exactly as directed. Account for the trailer’s extra width and different turning and stopping behavior.
- Cargo bike: Use only the passenger position, restraints, foot protection and accessories specified by its manufacturer.
If either manual leaves mounting, load capacity or compatibility unclear, do not carry the child until a qualified bicycle mechanic has checked the complete setup.
Measure and compare before mounting anything
Record the child’s current height and weight, then check any other measurements required by the carrier manufacturer. Compare those measurements with every stated minimum and maximum. Also verify the bicycle model, frame or rack compatibility, attachment points and total permitted load in the relevant manuals.
Next, assess the adult rider. With the carrier fitted and loaded according to its instructions, the rider must still be able to mount, balance, steer, brake and put the bicycle under control. Added weight can change handling. Practise away from traffic before making a journey, and stop if the bicycle feels unstable or braking and steering are not fully manageable.
Secure the child for every ride
- Inspect the carrier, hitch or mount for looseness, damage or incorrect positioning using the manufacturer’s pre-ride procedure.
- Fasten the child with the supplied restraint system exactly as its instructions specify. Secure feet where the design requires it, and keep loose straps, laces and clothing away from moving parts.
- Fit a bicycle helmet properly. It should sit level, and its straps should be adjusted according to the helmet manufacturer’s instructions.
- Check that no part of the child or carrier interferes with steering, pedalling, wheels or brakes.
- Begin slowly in a controlled area. Recheck the child and attachment if anything shifts, rattles or affects control.
Do not guess at assembly steps, fastener torque, maintenance intervals or load limits. Use the exact product manual or ask a qualified bicycle mechanic.
When the child is ready to ride instead
The supplied XBikes products are independent children’s bicycles with training wheels, not equipment for carrying a passenger on an adult bicycle. They become relevant when the goal changes from transporting the child to helping the child ride their own correctly fitted bike.
These particular catalog options help answer the title by showing the available 12, 14 and 16 Inch alternatives for a child who may be ready to ride separately; they do not replace a child seat, trailer or cargo-bike passenger system.
 Blue XJD Girls Bike with Training Wheels – 12/14/16 Inch
A Training Wheel Bike offered in 12 Inch, 14 Inch and 16 Inch labels. It is relevant only if the child will ride independently, not as equipment for carrying a passenger.
 XJD Boys 12/14/16" Training Wheel Bike – Blue
This blue Training Wheel Bike has 12 Inch, 14 Inch and 16 Inch SKU labels. Compare it after measuring a child who is ready to ride; no passenger-carrying function is supplied.
Blue XJD Girls Bike with Training Wheels – 12/14/16 Inch and XJD Boys 12/14/16" Training Wheel Bike – Blue are both cataloged as Training Wheel Bikes. Each has 12 Inch, 14 Inch and 16 Inch SKU labels. On the supplied facts, wheel-size availability is the meaningful comparison; no carrier compatibility, load limit or passenger-carrying function is provided.
Fit a separate child’s bike by measurement
If the child will ride rather than be carried, use these XBikes wheel-size ranges only as starting points:
| Wheel size | Starting age | Rider height |
|---|---|---|
| 12 Inch | 3–4 | 34–40 in / 86–102 cm |
| 14 Inch | 3–6 | 37–45 in / 94–114 cm |
| 16 Inch | 4–7 | 40–48 in / 102–122 cm |
| 18 Inch | 5–9 | 43–52 in / 109–132 cm |
| 20 Inch | 7–12 | 48–60 in / 122–152 cm |
| 24 Inch | 10–14 | 54–64 in / 137–163 cm |
| 26 Inch | Youth and adults | Over 60 in / 153 cm |
Measure height and inseam, then have the child try the bicycle. Check stand-over clearance, reach, brake control and present confidence. Do not buy an oversized bicycle for growth. Age is secondary to measured fit and control, and wording in a product title is not fit evidence.
The two supplied bikes cover only 12, 14 and 16 Inch choices. If measurement points to 18, 20, 24 or 26 Inch, treat these products only as smaller-size comparison points, not substitutes; another wheel size is not equivalent.
Make the title-specific decision
If the child needs transport, select a purpose-built carrier only after its manual confirms child fit, bicycle compatibility and load capacity, then verify the installation and your control. If the child can ride independently, measure first and try the correctly sized bicycle rather than adapting a children’s bike into a passenger carrier.
Bikes for your next adventure
-

XJD Kids Bike for Girls – Pink, 12/14/16/20 Inch with Training Wheels
The XJD Kids Bike for Girls in Pink is a training-wheel bike built to carry your…$139
$159 -

XJD Boys 12/14/16" Training Wheel Bike – Blue
The XJD Boys Bike in Blue is a training wheel bike for riders 71–122 cm tall—rou…$169
$199 -
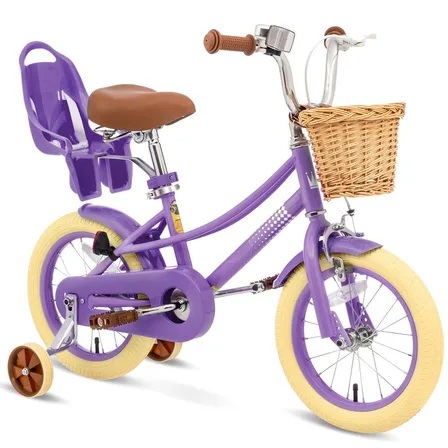
XJD Girls' Bike with Training Wheels, 12/14/16/20 Inch – Purple
The XJD girls' bike with training wheels in Purple is built to grow with your ri…$139
$159