

How to carry child on city bike
To carry a child on a city bike, use a purpose-built child seat, trailer or passenger-rated cargo setup that is compatible with the bicycle and sized for the child. Never improvise a seat or carry a child on an ordinary rack.
Choose the carrying method first
A front or rear child seat keeps the child on the bicycle, while a trailer places the child behind it. A passenger-rated cargo bike or cargo attachment may suit a larger child, but only when its manufacturer explicitly permits that use.
Compare the options by how they affect steering, balance, mounting and dismounting, parking, visibility, weather protection and the space needed on your usual route. Before buying anything, check local passenger and helmet rules.
Measure and compare before you buy
Record the child's current height and weight, then compare both with the passenger system's exact manual. Do not estimate weight or assume that apparent space means the system is suitable.
- Child fit: Confirm the stated size and load limits, harness position, head clearance, legroom and secure foot containment.
- Bicycle compatibility: Identify the city bike's exact model, frame design, wheel size, rack or mounting points and any manufacturer restrictions.
- Combined load: Include the child, carrier and luggage. Use only the limits stated by the bicycle, rack and passenger-system manufacturers.
- Control: Make sure the adult rider can reach the brakes, steer, start, stop and place a foot down while managing the added load.
If a required limit, compatibility detail or mounting specification is missing, consult the exact product manual or a qualified bicycle mechanic. Do not infer compatibility from appearance.
Have the system installed correctly
Follow the passenger system and bicycle manuals together. Required hardware, attachment points and tightening instructions vary, so there is no universal mounting procedure or torque value. A qualified bicycle mechanic should resolve any conflict or uncertainty.
After installation, check that the carrier cannot interfere with steering, braking, wheels or moving parts. Confirm that straps, clothing and feet remain contained. Use the specified restraint every ride, even for a short journey.
Prepare the child and practise without traffic
The child needs a properly fitting bicycle helmet that sits level, with straps adjusted according to the helmet manufacturer's instructions. The adult rider should also wear an appropriate helmet.
First practise with the carrier empty in a traffic-free area, then repeat with the child secured. Rehearse getting on and off, straight-line starts, gentle turns, controlled stops and parking. Added passenger weight can change balance and stopping behavior. If the bike feels unstable or the adult cannot control it confidently, stop and reconsider the setup.
Before each trip, inspect the mounting hardware, restraint, wheels, tires and brakes as directed by the relevant manuals. Keep early rides short and use calm routes until both rider and passenger are comfortable.
When these XBikes products are relevant
The supplied catalog products are not child seats, trailers or passenger-rated cargo equipment, so they do not answer the carrying need directly. They become relevant only when the child is ready to ride a separate training-wheel bike. Their 12, 14 and 16 Inch variants provide nearby comparison points for that different decision.
 XJD Boys 12/14/16" Training Wheel Bike – Blue
A Training Wheel Bike offered in 12 Inch, 14 Inch and 16 Inch variants. It is relevant only as an independent-riding option, not as equipment for carrying a child on a city bike.
 Black XJD Kids Bike for Boys – 12, 14 & 16 Inch Sizes
This Training Wheel Bike has 12 Inch, 14 Inch and 16 Inch SKU labels. Compare it only after measuring a child who is ready to ride separately; it is not a passenger carrier.
 XJD Kids' Training Wheel Bike for Boys & Girls, 12/14/16 Inch – White
A white Training Wheel Bike available in 12 Inch, 14 Inch and 16 Inch variants. It supports the separate-bike alternative but should not be treated as a child seat, trailer or cargo solution.
XJD Boys 12/14/16" Training Wheel Bike – Blue, Black XJD Kids Bike for Boys – 12, 14 & 16 Inch Sizes and XJD Kids' Training Wheel Bike for Boys & Girls, 12/14/16 Inch – White are all cataloged as Training Wheel Bikes and offer 12 Inch, 14 Inch and 16 Inch SKU labels. Title wording such as “Boys” or “Boys & Girls” is a catalog label, not proof of individual fit.
| Wheel size | XBikes starting point |
|---|---|
| 12 Inch | Ages 3–4; height 34–40 in / 86–102 cm |
| 14 Inch | Ages 3–6; height 37–45 in / 94–114 cm |
| 16 Inch | Ages 4–7; height 40–48 in / 102–122 cm |
These ranges are starting points only. Have the child try the bicycle; prioritize measured height, inseam, stand-over clearance, reach, brake control and current confidence. Do not buy an oversized bicycle merely to allow room for growth.
Make the final decision
Choose carrying equipment only after confirming the child's measurements, the city bike's explicit compatibility and every applicable load limit in the manuals. Then have uncertain installation details checked by a qualified mechanic and complete a controlled practice ride. If the goal has changed to independent riding, measure the child and compare the three supplied training-wheel bikes in the correct 12, 14 or 16 Inch size—do not treat them as passenger-carrying equipment.
Bikes for your next adventure
-

XJD Kids Bike for Girls – Pink, 12/14/16/20 Inch with Training Wheels
The XJD Kids Bike for Girls in Pink is a training-wheel bike built to carry your…$139
$159 -

XJD Boys 12/14/16" Training Wheel Bike – Blue
The XJD Boys Bike in Blue is a training wheel bike for riders 71–122 cm tall—rou…$169
$199 -
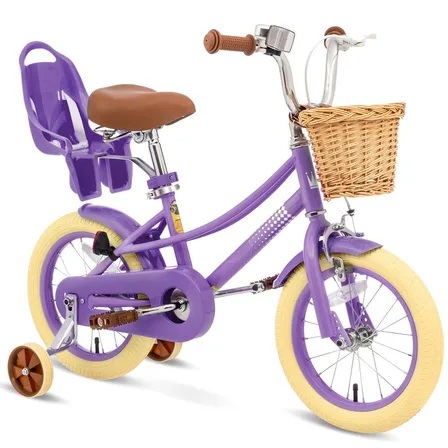
XJD Girls' Bike with Training Wheels, 12/14/16/20 Inch – Purple
The XJD girls' bike with training wheels in Purple is built to grow with your ri…$139
$159