

How to get kids to ride a bike
To get kids to ride a bike, remove pressure, choose a bike they can control, practise in short sessions, and let confidence set the pace.
Start with readiness, not persuasion
Ask what is stopping your child: fear of falling, an uncomfortable bike, difficulty braking, or simply no interest today. Address that specific barrier instead of offering bigger rewards or extending a frustrating session. A child who feels heard is more likely to try again.
Make the first goal deliberately small: sit on the bike, walk it forward, coast a short distance, or stop at a marker. End after a successful attempt while the child still has energy. Avoid comparisons with siblings or friends; progress can mean better control even before independent pedalling.
Measure before choosing a wheel size
Measure the child’s height without shoes and check inseam as part of an actual fitting. Age is only a starting point. The rider should try the bicycle and demonstrate comfortable stand-over clearance, reach to the controls, reliable brake operation and enough confidence to start and stop. Do not buy an oversized bicycle merely to allow room for growth.
| Wheel size | XBikes starting age | Rider height |
|---|---|---|
| 12 Inch | 3–4 | 34–40 in / 86–102 cm |
| 14 Inch | 3–6 | 37–45 in / 94–114 cm |
| 16 Inch | 4–7 | 40–48 in / 102–122 cm |
| 18 Inch | 5–9 | 43–52 in / 109–132 cm |
| 20 Inch | 7–12 | 48–60 in / 122–152 cm |
| 24 Inch | 10–14 | 54–64 in / 137–163 cm |
| 26 Inch | Youth and adults over 60 in | Over 60 in / 153 cm |
Overlapping ranges are comparison points, not proof that either size fits. If two sizes appear plausible, compare them in person and favour the one that gives the child better stand-over, reach, braking and low-speed control.
Create an easy first practice
Choose a quiet, open, level area away from traffic and obstacles. Begin with mounting, looking ahead and stopping. Once those actions feel predictable, add pushing, coasting, steering between widely spaced markers and then pedalling. Teach one change at a time.
- Fit a bicycle helmet so it sits level and secure the straps according to the helmet manufacturer’s instructions.
- Let the child rehearse using the brakes before gaining speed.
- Walk beside the rider without pulling the handlebar or forcing the pace.
- Pause when concentration fades, fear rises or control becomes inconsistent.
Use calm, specific feedback such as “you looked ahead and stopped at the marker.” That tells the child what worked and makes the next attempt understandable.
Decide whether training wheels address the barrier
Training wheels can make pedalling practice feel more approachable for a child who is not ready to balance independently. They do not replace correct sizing, brake control or supervised practice, and they may be irrelevant when the main problem is poor fit, uncomfortable reach or fear created by too much pressure.
The supplied catalog options are useful when you are comparing training-wheel bikes in 12-, 14- or 16-inch sizes. They help narrow the format and wheel-size choice after measuring the rider, but the names and appearance do not establish fit.
 Girls 12/14/16 Inch Kids Bike by XJD with Training Wheels – Peach
A training-wheel bike offered under supplied 12 Inch, 14 Inch and 16 Inch SKU labels; relevant after the rider’s measurements and control checks indicate one of those sizes.
 XJD Light Purple Girls Bike with Basket, Training Wheels, 12/14/16/20 Inch
A training-wheel bike whose title identifies a basket. Supplied available SKU labels are 12 Inch, 14 Inch and 16 Inch, so its title’s 20 Inch wording does not confirm a currently supplied 20 Inch option.
Girls 12/14/16 Inch Kids Bike by XJD with Training Wheels – Peach is categorized as a training-wheel bike and is supplied in 12 Inch, 14 Inch and 16 Inch SKU labels. XJD Light Purple Girls Bike with Basket, Training Wheels, 12/14/16/20 Inch is also categorized as a training-wheel bike; although “20 Inch” appears in its catalog title, the supplied available SKU labels are only 12 Inch, 14 Inch and 16 Inch.
Compare these two options by the verified available wheel-size label and the child’s individual fit. The second title identifies a basket; no basket is stated for the first. No supplied facts establish brake type, weight, material, load limit or other performance differences, so do not infer them. For assembly, adjustments, maintenance, compatibility or torque requirements, follow the exact product manual or use a qualified bicycle mechanic.
Know what to do next
Measure height, shortlist the matching starting sizes, and have the child try each realistic candidate. Confirm stand-over clearance, comfortable reach, dependable brake use and calm starting and stopping. If none fits those checks, do not substitute enthusiasm for control—keep looking.
Then schedule one short, low-pressure practice with a single goal. If the child finishes wanting another turn, stop there and set the next ride; willingness built on a correctly fitted bike is the clearest route to riding again.
Bikes for your next adventure
-
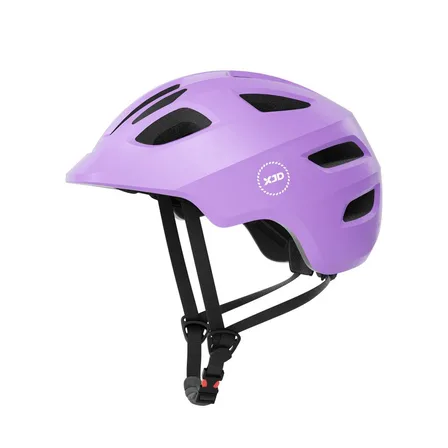
Girls' Bike Helmet from XJD – Purple
The XJD kids bike helmet in purple is a multi-sport helmet built for toddlers an…$59.99
$49 -

XJD Boys 12/14/16" Training Wheel Bike – Blue
The XJD Boys Bike in Blue is a training wheel bike for riders 71–122 cm tall—rou…$169
$199 -

Light Pink XJD Girls' Bicycle with Basket & Training Wheels
The Light Pink XJD Girls' Bicycle with Basket & Training Wheels is a retro-style…$109.99
$129.99