

How to get my kid to ride a bike
To get your kid to ride a bike, remove pressure, choose a bike they can confidently control, and practice one small skill at a time in a quiet, open area.
Find out what is stopping them
Before changing the bike or planning another lesson, ask what feels difficult. A child may be worried about falling, unable to reach the brakes comfortably, stretched toward the controls, or simply uninterested that day. Watch them sit, stand over, push, stop and turn; their movements often reveal more than an age label.
Acknowledge the concern without promising that riding is effortless. Offer a short, specific choice such as practicing pushes or practicing stops. End the session while the child still feels composed. Progress comes from repeatable successes, not from keeping them on the bike until they are frustrated.
Measure first, then check the actual bike
Measure the child’s standing height and inseam. Use height to identify a starting wheel size, then have the child try the bicycle. Age is only a rough reference, and an oversized bike bought for future growth can make learning harder.
| Wheel size | Starting age | Rider height |
|---|---|---|
| 12 Inch | 3–4 | 34–40 in / 86–102 cm |
| 14 Inch | 3–6 | 37–45 in / 94–114 cm |
| 16 Inch | 4–7 | 40–48 in / 102–122 cm |
| 18 Inch | 5–9 | 43–52 in / 109–132 cm |
| 20 Inch | 7–12 | 48–60 in / 122–152 cm |
| 24 Inch | 10–14 | 54–64 in / 137–163 cm |
| 26 Inch | Youth and adults | Over 60 in / 153 cm |
These ranges overlap, so the deciding evidence comes from the individual fit check. The rider should be able to stand over the bike, reach the controls without straining, steer without feeling stretched and operate the brakes reliably. Compare their inseam with the bicycle’s stand-over position rather than assuming wheel size settles the fit.
Make the first sessions easier to accept
- Pick a calm setting: use a quiet, open practice area away from traffic and avoid adding an audience.
- Begin with control: let the child become comfortable holding the bike, sitting on it and moving it at their own pace.
- Practice stopping: ask them to demonstrate that they can reach and operate the brakes before building speed.
- Add one challenge: work on a push, a short glide, pedaling or a gentle turn rather than combining everything at once.
- Finish on a success: name the specific improvement they made and agree on the next small skill.
Avoid surprise pushes, comparisons with siblings or demands to ride a set distance. Ask permission before physically steadying the bike. If fear rises, return to the last action the child could perform calmly.
Use equipment that supports confidence
A bicycle helmet must fit properly, sit level and have its straps adjusted according to the helmet manufacturer’s instructions. Recheck the fit rather than treating “wearing a helmet” as sufficient by itself.
For the bicycle, confirm that assembly, adjustments and maintenance follow the exact product manual. If the controls cannot be positioned for comfortable reach, something seems loose, or the correct procedure is unclear, use a qualified bicycle mechanic. Do not improvise torque settings or compatibility decisions.
When the supplied cruiser is relevant
The XJD Kids Beach Cruiser Bicycle, Rear Rack & V-Brakes, Mint Green is available with 20 Inch, 24 Inch and 26 Inch SKU labels. Those sizes make it a relevant comparison only when the child’s measured height points toward one of those ranges and an individual test confirms stand-over clearance, reach, steering control and brake control. Its rear rack and V-brakes are catalog features, but neither proves that the bicycle fits a particular rider.
These particular catalog options help by letting families compare three larger wheel-size starting points on one named model after measuring the rider. They are not substitutes for a 12, 14, 16 or 18 Inch bike when that smaller size is indicated.

Use the 20 Inch label as a starting comparison for a rider 48–60 in / 122–152 cm, the 24 Inch label for 54–64 in / 137–163 cm, and the 26 Inch label for youth or adults over 60 in / 153 cm. Do not move up merely because the child is near a boundary or because a larger size may last longer.
Decide what to do next
Measure height and inseam today, shortlist the matching wheel-size starting point, and arrange an actual fit check. If the child can stand over the bike, reach and operate the brakes, steer comfortably and practice without being overwhelmed, schedule another short session. If any of those checks fail, change the fit or bike before asking them to ride again.
Bikes for your next adventure
-
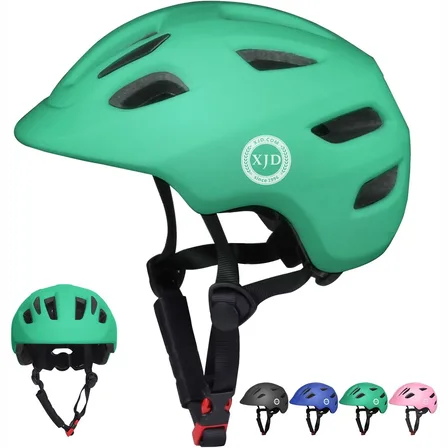
Green XJD Toddler Bike Helmet with Adjustable Fit, XS (46–51 cm)
The XJD toddler bike helmet in Green is built for the youngest riders — the size…$20.39
$23.99 -

Kids Bike Helmet by XJD for Boys & Girls – Black, Blue, Green, Pink, Purple
The XJD Kids Bike Helmet covers a wide 2-to-8-year age range thanks to two head-…$59.99
-

Kids Bike Helmet by XJD for Girls – Pink
The XJD Kids Bike Helmet in Pink is a lightweight multi-sport helmet for girls r…$59.99
$99