

How to haul children on a bike
To haul children on a bike, choose a purpose-built child seat, trailer or cargo-bike setup that fits your bicycle, child and route. Verify compatibility and load limits in the exact manuals before riding.
Choose the carrying setup first
A child seat carries one child on the bicycle, a trailer rolls behind it, and a cargo bike carries passengers in a dedicated front or rear area. Compare them by the number and size of children you need to carry, the bicycle you own, your route, storage space and whether the adult can balance and control the loaded setup.
Do not treat a basket, ordinary rear rack or child-sized bicycle as passenger equipment. A rack is suitable for carrying a child only when the bicycle, rack and child-passenger system are explicitly compatible and used within every stated limit. If the documentation is missing or unclear, ask a qualified bicycle mechanic.
Measure the child, bicycle and route
Before buying equipment, record the child’s current height and weight, then check any additional measurements required by the carrier manufacturer. For the adult bicycle, identify its exact model, frame size, wheel size, rack or mounting points, brake arrangement and any components near the proposed mounting area.
- Child: current height, weight, ability to sit as the carrier requires and helmet fit.
- Bicycle: exact model, mounting provisions, tire clearance and manufacturer restrictions.
- Adult rider: ability to start, stop, turn, balance and place a foot down with the system loaded.
- Route: hills, traffic, rough surfaces, tight turns, curbs and parking or storage constraints.
Compare the measured information with both the bicycle manual and the carrier manual. Follow their instructions for compatibility, assembly, maintenance, load limits and torque. Never guess a missing specification.
Check the complete combination
A carrier fitting one component does not prove that the whole setup works together. Confirm that the bicycle, carrier, mounting hardware and any rack or adapter are approved for the intended use. Check that moving parts, straps and the child’s hands and feet remain protected as directed by the manual.
Have a qualified bicycle mechanic inspect the combination if mounting instructions conflict, parts are missing, braking or handling changes unexpectedly, or you cannot confirm a stated limit. An oversized load or improvised attachment is not made acceptable by riding slowly.
Prepare before carrying a child
- Assemble and adjust the system exactly as its manufacturer specifies.
- Inspect tires, brakes, fasteners and the carrier’s restraints before departure, following the relevant manuals.
- Practice mounting, starting, turning, stopping and parking without the child, using an appropriate non-living practice load only if the manufacturer permits it.
- Fit the child’s bicycle helmet properly. It should sit level, with its straps used according to the helmet manufacturer’s instructions.
- Secure the child exactly as the carrier manual directs, then begin on a quiet, predictable route.
Stop if the bicycle feels unstable, braking is inadequate, a restraint will not adjust correctly or any attachment moves. Recheck the instructions or use a qualified mechanic before trying again.
Where the supplied XBikes products fit
The supplied catalog choices are children’s bicycles, not verified passenger carriers. They help answer when hauling may give way to independent riding and which wheel sizes are available for comparison. They do not establish compatibility with a child seat, trailer or cargo system, and they should not be used to carry another child unless an exact manual explicitly permits it.
 XJD Boys & Girls BMX Bike with Training Wheels, 12/14/16" – Blue
A child’s BMX bicycle offered in 12, 14 and 16 Inch sizes; relevant for comparing an independently ridden bike, not as verified equipment for hauling a child.
 XJD Pink Beach Cruiser for Girls – Rear Rack & V-Brake
Offered in 20, 24 and 26 Inch sizes. Its catalog-listed rear rack does not establish that it can carry a child; consult the exact manual and a qualified mechanic.
 Girls' Training Wheel Bike by XJD with Basket – Purple
A training-wheel bicycle offered in 14, 16 and 20 Inch sizes; useful when considering a transition to independent riding, not as a child-passenger carrying system.
XJD Boys & Girls BMX Bike with Training Wheels, 12/14/16" – Blue offers 12, 14 and 16 Inch choices. Girls' Training Wheel Bike by XJD with Basket – Purple offers 14, 16 and 20 Inch choices. These are relevant when a child is ready to ride rather than be transported.
XJD Pink Beach Cruiser for Girls – Rear Rack & V-Brake is offered in 20, 24 and 26 Inch sizes. Its catalog-listed rear rack does not by itself make it a child-passenger carrier; consult the exact product manual and a qualified mechanic about any intended load or accessory.
Decide when the child can ride instead
For an independently ridden bicycle, use measured height as the starting point, not age alone. XBikes places 12 Inch at 34–40 in (86–102 cm), 14 Inch at 37–45 in (94–114 cm), 16 Inch at 40–48 in (102–122 cm), 20 Inch at 48–60 in (122–152 cm), 24 Inch at 54–64 in (137–163 cm), and 26 Inch for riders over 60 in (153 cm). These ranges are starting points, not substitutes for trying the bicycle.
Check the child’s inseam, stand-over clearance, reach, brake control and current confidence. Do not buy an oversized bicycle merely for growth. Have the child try the exact size and confirm that they can control it comfortably.
Make the next decision
If the child still needs transport, shortlist only purpose-built carrying systems whose manuals confirm compatibility with your measured child and exact bicycle. If the child is ready to ride, compare the supplied wheel sizes against measured height and complete an individual fit check before choosing.
Bikes for your next adventure
-
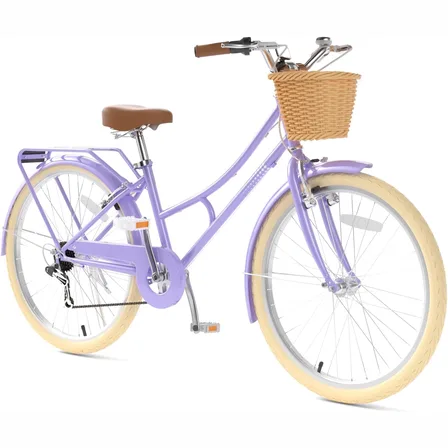
26-Inch XJD Beach Cruiser Bike for Girls – Purple, V-Brake
This XJD 26-inch purple beach cruiser is sized for big kids and teens — suggeste…$218.49
$229.99 -

Kids Bike Helmet by XJD for Boys & Girls – Black, Blue, Green, Pink, Purple
The XJD Kids Bike Helmet covers a wide 2-to-8-year age range thanks to two head-…$59.99
-

Kids Bike Helmet by XJD for Girls – Pink
The XJD Kids Bike Helmet in Pink is a lightweight multi-sport helmet for girls r…$59.99
$99