

How to haul kid on bike
To haul a kid on a bike, choose a child-carrying system approved for both the child and the bicycle, confirm every load and compatibility limit, then test the fully loaded bike in a traffic-free area before riding.
Choose how the child will ride
Start with the child carrier, because it determines what the bicycle must support. Common choices include a front-mounted seat, rear-mounted seat, trailer, or purpose-built cargo-bike passenger setup. These are not interchangeable: each attaches differently and can change steering, braking, balance, mounting, and parking.
Read the carrier manual for its permitted child size, attachment method, bicycle requirements, and restrictions. Then compare those requirements with the exact bicycle, rack, frame, fork, axle, wheels, and brakes you intend to use. A rack being present does not by itself establish that it can carry a child seat.
Measure before buying or fitting anything
Record the child's current height and weight for comparison with the carrier manufacturer's limits. Check whether the child meets every developmental requirement stated in that manual. Do not estimate or assume that a seat intended for an older or larger child will work for a smaller passenger.
Measure the adult rider too. Note standing height and inseam, then check reach to the handlebar and whether both brakes can be operated confidently. The parent must be able to start, stop, turn, and place a foot down while the carrier changes the bike's weight distribution.
Also identify the bicycle's exact model and wheel-size label. Inspect the frame and any rack for a model marking, then consult their manuals for total load, rack load, mounting compatibility, required hardware, and torque. If those facts are missing or unclear, use a qualified bicycle mechanic rather than improvising an attachment.
Use wheel size only to shortlist the adult bicycle
XBikes wheel-size ranges are starting points, not proof of fit. For the person controlling the loaded bike, compare measured height first, then verify inseam clearance, reach, brake control, and present confidence. Do not buy an oversized bicycle merely to allow for growth.
| Wheel size | Starting age | Rider height |
|---|---|---|
| 12 Inch | Ages 3–4 | 34–40 in / 86–102 cm |
| 14 Inch | Ages 3–6 | 37–45 in / 94–114 cm |
| 16 Inch | Ages 4–7 | 40–48 in / 102–122 cm |
| 18 Inch | Ages 5–9 | 43–52 in / 109–132 cm |
| 20 Inch | Ages 7–12 | 48–60 in / 122–152 cm |
| 24 Inch | Ages 10–14 | 54–64 in / 137–163 cm |
| 26 Inch | Youth and adults | Over 60 in / 153 cm |
This chart applies to the person riding and controlling the bicycle. It does not determine whether a passenger fits a child seat or trailer; use the carrier manufacturer's criteria for that decision.
Compare the supplied XBikes option carefully
The XJD Pink Beach Cruiser for Girls – Rear Rack & V-Brake is available with 20 Inch, 24 Inch, and 26 Inch SKU labels. Its rear rack makes it a relevant comparison point when investigating a rear-carried setup, while its V-brake is a known feature to include in a mechanic's compatibility and control review. Neither fact proves that a particular child seat fits, that the rack can bear a passenger, or that the complete bicycle stays within its permitted load.
This catalog option helps answer the hauling question by showing three wheel-size starting points and a bicycle equipped with a rear rack. Select among those sizes only from the adult rider's measured fit, then verify the exact rack, carrier, and bicycle manuals before treating it as a child-hauling candidate.

Check the complete system before riding
- Confirm the bicycle, rack, and carrier manuals permit the proposed combination and total load.
- Use only the specified mounting hardware, installation procedure, and torque values.
- Make sure the carrier cannot interfere with steering, pedaling, wheels, cables, or braking.
- Check that the child restraints and any foot or spoke protection are positioned exactly as the carrier manufacturer directs.
- Fit a bicycle helmet to the child so it sits level, fits properly, and uses its straps according to the helmet manufacturer's instructions. The adult rider should also use a properly fitted helmet.
If any manual is unavailable, a mounting point is damaged, or compatibility remains uncertain, stop and ask a qualified bicycle mechanic to inspect the actual components. Do not substitute a general online procedure for model-specific instructions.
Practice the loaded-bike routine
First rehearse mounting, holding, and parking the bicycle without the child. Then follow the carrier manual when loading the passenger, keeping control of the bicycle throughout. Practice starting, gentle turning, controlled braking, stopping, and dismounting in a traffic-free area. If the bike feels too large, the brakes are difficult to reach, or the rider cannot hold it securely at a stop, change the fit or carrying setup before proceeding.
Your next decision is concrete: choose the carrier type, write down the child and adult measurements, match the adult to a wheel-size starting point, and obtain written confirmation from the relevant manuals—or a qualified mechanic—that the exact bicycle, rack, and carrier can work together.
Bikes for your next adventure
-
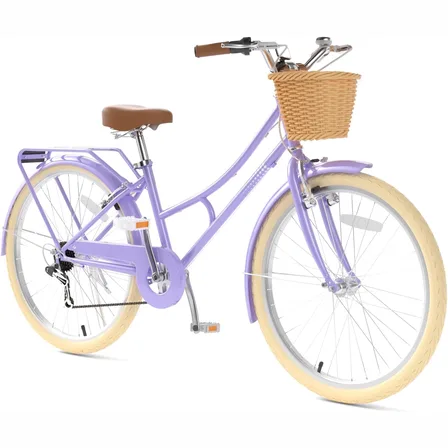
26-Inch XJD Beach Cruiser Bike for Girls – Purple, V-Brake
This XJD 26-inch purple beach cruiser is sized for big kids and teens — suggeste…$218.49
$229.99 -

Kids Bike Helmet by XJD for Boys & Girls – Black, Blue, Green, Pink, Purple
The XJD Kids Bike Helmet covers a wide 2-to-8-year age range thanks to two head-…$59.99
-

Kids Bike Helmet by XJD for Girls – Pink
The XJD Kids Bike Helmet in Pink is a lightweight multi-sport helmet for girls r…$59.99
$99