

How to help a kid learn to ride a bike
Help a kid learn to ride by choosing a bike they can control now, fitting a level helmet, and practicing balance, braking, steering and pedaling in small steps.
Measure the rider before choosing a bike
Measure the child’s standing height and inseam while they wear the shoes they will ride in. Height gives you a wheel-size starting point; inseam helps you judge stand-over clearance and whether the child can put their feet down confidently. Age is only a rough reference.
Have the child try the actual bicycle. Check that they can stand over it, reach the handlebar without stretching, turn it comfortably and operate the brakes with control. A bike bought oversized for future growth can make starting, stopping and steering harder. Current fit and confidence matter more than the age printed on a chart or implied by a product name.
Compare the wheel-size starting points
| Wheel size | Starting age | Rider height |
|---|---|---|
| 12 Inch | 3–4 | 34–40 in / 86–102 cm |
| 14 Inch | 3–6 | 37–45 in / 94–114 cm |
| 16 Inch | 4–7 | 40–48 in / 102–122 cm |
| 18 Inch | 5–9 | 43–52 in / 109–132 cm |
| 20 Inch | 7–12 | 48–60 in / 122–152 cm |
| 24 Inch | 10–14 | 54–64 in / 137–163 cm |
| 26 Inch | Youth and adults | Over 60 in / 153 cm |
Overlapping ranges are comparison points, not proof that two sizes fit equally well. If the rider falls between options, compare both in person and choose according to stand-over clearance, reach, brake control and confidence. Do not move up merely because the child is near the top of an age band.
Set up a safe, low-pressure practice area
Choose a broad, level space away from traffic, parked cars, steep slopes and busy paths. The surface should be predictable and give the child room to start, wobble and stop without needing a sharp turn. Keep each practice period short enough that attention and patience remain intact.
A bicycle helmet should fit properly, sit level and have its straps adjusted according to the helmet manufacturer’s instructions. Before every session, also check the bicycle for anything loose, damaged or difficult to operate. Follow the exact product manual for assembly and maintenance; if the instructions are missing or the setup is uncertain, use a qualified bicycle mechanic.
Teach one control at a time
- Feet and stopping: Begin with the child seated and able to stabilize themselves. Ask them to practice starting and coming to a deliberate stop before adding speed.
- Balance: Let the rider move slowly and look toward where they want to go. Walk nearby without pulling the handlebar, which lets the child feel and correct small leans.
- Steering: Use a wide, simple path with gentle turns. Encourage looking ahead rather than down at the front wheel.
- Braking: Have the child rehearse the bicycle’s braking controls at low speed until they can reach and use them predictably.
- Pedaling: Once starts, balance and stops are controlled, practice smooth pedal starts. Add distance gradually instead of adding speed first.
Give one brief instruction at a time. If the rider becomes tense, repeatedly loses control or cannot reach a control comfortably, stop and reassess the fit rather than treating fear as something to push through.
Decide whether training wheels are relevant
Training wheels can be relevant when a child needs support while learning pedaling, steering and braking, but they do not replace checking balance skills or individual bicycle fit. The supplied catalog option is useful because it offers several wheel-size labels within the XBikes starting ranges, allowing parents to compare a training-wheel bicycle against the rider’s measurements.
The Light Pink XJD Girls' Bicycle with Basket & Training Wheels is listed in 12 Inch, 14 Inch, 16 Inch and 20 Inch options. Those labels let you narrow the comparison using measured height, but they do not establish fit by themselves. The title’s wording is a catalog label, not evidence about which child should ride it.

This product is relevant only if a training-wheel bike suits the child’s current learning stage and one of its listed sizes passes an actual fit check. It is not a substitute for an 18 Inch, 24 Inch or 26 Inch bike when that different size is required. No supplied facts establish its weight, brake type, materials, load limit or assembly procedure; consult its exact manual or a qualified bicycle mechanic for those details.
Know when to progress or pause
Progress when the child can start with little help, look ahead, steer a planned line, use the brakes deliberately and stop under control. Reduce physical assistance gradually so the rider, rather than the adult, manages balance and direction.
Pause if the child cannot stand over the bicycle comfortably, strains to reach the handlebar or brakes, cannot put their feet down with confidence, or becomes less controlled as speed rises. Recheck the measurements and compare a more suitable size before continuing. The next action is simple: measure height and inseam, shortlist the matching wheel sizes, then have the child demonstrate reach, braking and control on the actual bike.
Bikes for your next adventure
-

Blue XJD Girls Bike with Training Wheels – 12/14/16 Inch
If you're shopping for a first pedal bike for a daughter roughly 3 to 8 years ol…$149
$169 -

XJD Kids Bike for Girls – Pink, 12/14/16/20 Inch with Training Wheels
The XJD Kids Bike for Girls in Pink is a training-wheel bike built to carry your…$139
$159 -
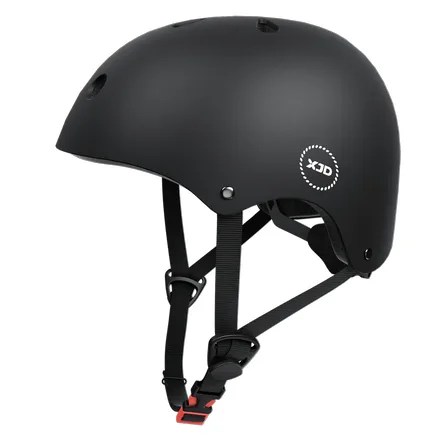
7-in-1 Kids Helmet & Protective Gear Set from XJD – Black or Blue
If you're outfitting one kid (or a couple of siblings) for biking, scootering, o…$59.99