

How to help kid learn to ride a bike
Help your child learn to ride a bike by checking fit first, practising balance and braking in a quiet area, and adding pedalling only when control feels comfortable.
Measure the rider before choosing a bike
Measure your child’s height and inseam while they are wearing the shoes they will ride in. Height gives you a wheel-size starting point; inseam helps you judge whether the child can stand over the bicycle comfortably. Then have the child try the actual bike.
A suitable bike should let the rider get on and off without struggling, reach the handlebar without stretching, steer with control and operate the brakes confidently. Do not buy an oversized bicycle merely to leave growing room. Age is only an initial reference because children of the same age can have different proportions, reach and confidence.
| Wheel size | Starting age | Rider height |
|---|---|---|
| 12 Inch | 3–4 | 34–40 in / 86–102 cm |
| 14 Inch | 3–6 | 37–45 in / 94–114 cm |
| 16 Inch | 4–7 | 40–48 in / 102–122 cm |
| 18 Inch | 5–9 | 43–52 in / 109–132 cm |
| 20 Inch | 7–12 | 48–60 in / 122–152 cm |
| 24 Inch | 10–14 | 54–64 in / 137–163 cm |
| 26 Inch | Youth and adults | Over 60 in / 153 cm |
Where ranges overlap, compare the child’s stand-over clearance, reach, brake control and confidence on each candidate. The table does not replace that individual fit check.
Prepare a simple, low-pressure practice area
Choose a flat, open space away from traffic, parked vehicles, steep slopes and obstacles. Fit a bicycle helmet before every session. It should fit properly, sit level and have its straps adjusted according to the helmet manufacturer’s instructions.
Check the bicycle before practice. Follow the exact product manual for assembly, adjustments, maintenance, load limits, compatibility and torque. If the instructions are missing, unclear or beyond your experience, use a qualified bicycle mechanic.
Teach control in a useful order
- Mount and stop: Let the child practise getting on, settling into position and getting off while you steady the bike.
- Balance: Encourage short, controlled glides where the setup permits. Ask the rider to look ahead rather than down and place their feet down whenever balance is lost.
- Brake: Before building speed, practise slowing and stopping in a straight line. Confirm that the child can reach and operate the bike’s brakes without losing steering control.
- Pedal: Once balance and stopping are repeatable, introduce smooth pedal starts. Support the child lightly at the torso if needed; avoid pulling the handlebar because that interferes with steering.
- Turn: Add wide turns, then simple start–ride–turn–stop sequences. Finish while the rider is still attentive rather than forcing a long session.
Use one brief cue at a time. If the child becomes tense, return to the last skill they could repeat comfortably. Progress is better measured by controlled starts, glides, turns and stops than by the number of minutes ridden.
Decide whether training wheels are useful
Training wheels can help a child practise sitting, steering and pedalling while receiving lateral support. They are less useful when the immediate goal is learning the balance required for independent two-wheel riding. If you use them, keep balance practice in the learning plan and follow the bicycle’s manual for correct setup.
These catalog options are relevant when a parent wants to compare training-wheel bicycles across the supplied wheel sizes. They provide 12-, 14- and 16-inch choices in both listings, while one listing also provides a 20-inch choice; fit still has to be confirmed on the actual bicycle.
 XJD Kids' Training Wheel Bike for Boys & Girls, 12/14/16 Inch – White
A training wheel bike offered with 12 Inch, 14 Inch and 16 Inch SKU labels. Use the rider’s measured height to choose a starting point, then verify stand-over position, reach, brake control and confidence on the actual bicycle.
 Girls' Training Wheel Bike by XJD, 12–20 Inch Wheels – Blue
A training wheel bike with 12 Inch, 14 Inch, 16 Inch and 20 Inch SKU labels. Its size range provides an additional 20 Inch comparison, but every choice still requires an individual fit and control check.
Compare the two supplied options
XJD Kids' Training Wheel Bike for Boys & Girls, 12/14/16 Inch – White is categorized as a training wheel bike and has 12 Inch, 14 Inch and 16 Inch SKU labels. Compare those labels with the rider’s measured height, then check stand-over position, reach and brake operation in person.
Girls' Training Wheel Bike by XJD, 12–20 Inch Wheels – Blue is also categorized as a training wheel bike. Its available SKU labels are 12 Inch, 14 Inch, 16 Inch and 20 Inch. The additional 20 Inch label makes it a catalog comparison point for riders whose measured height starts within the supplied 48–60 in / 122–152 cm range, subject to the same fit check.
Neither supplied product lists an 18-, 24- or 26-inch option. If the rider’s measurements and control indicate one of those sizes, these products are comparison points only, not equal-size substitutes.
Know what to do next
Record the child’s height and inseam, identify the starting wheel-size range, and arrange a real fit check. Choose only a bicycle the child can stand over, reach, steer and brake confidently. Then practise mounting, balance, braking, pedalling and turning in that order. If training wheels support today’s confidence, use them as a deliberate stage; if they distract from balance practice, focus on controlled gliding instead.
Bikes for your next adventure
-

Blue XJD Girls Bike with Training Wheels – 12/14/16 Inch
If you're shopping for a first pedal bike for a daughter roughly 3 to 8 years ol…$149
$169 -

XJD Kids Bike for Girls – Pink, 12/14/16/20 Inch with Training Wheels
The XJD Kids Bike for Girls in Pink is a training-wheel bike built to carry your…$139
$159 -
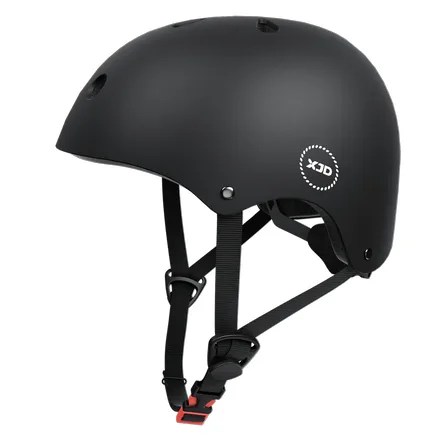
7-in-1 Kids Helmet & Protective Gear Set from XJD – Black or Blue
If you're outfitting one kid (or a couple of siblings) for biking, scootering, o…$59.99