

How to help your kid learn to ride a bike
Help your child learn to ride by choosing a bike they can control now, checking helmet fit, practising balance before pedalling, and progressing in short, calm sessions.
Measure the rider before choosing a bike
Measure your child’s standing height without shoes and compare it with the wheel-size starting points below. Age can narrow the search, but measured height, inseam, reach, brake control and confidence matter more.
Then have the child try the bicycle. They need comfortable stand-over clearance, an easy reach to the handlebar and the ability to operate the brakes confidently. The American Academy of Pediatrics advises against buying an oversized bicycle for a child to grow into: difficult control now can make learning harder.
| Wheel size | Starting age | Rider height |
|---|---|---|
| 12 Inch | 3–4 | 34–40 in / 86–102 cm |
| 14 Inch | 3–6 | 37–45 in / 94–114 cm |
| 16 Inch | 4–7 | 40–48 in / 102–122 cm |
| 18 Inch | 5–9 | 43–52 in / 109–132 cm |
| 20 Inch | 7–12 | 48–60 in / 122–152 cm |
| 24 Inch | 10–14 | 54–64 in / 137–163 cm |
| 26 Inch | Youth and adults | Over 60 in / 153 cm |
Compare the bike with the child, not just the chart
A chart cannot show whether a particular frame suits your child. During a supervised fit check, compare these practical signals:
- Stand-over: the child can stand securely over the bicycle rather than balancing on tiptoe.
- Reach: the handlebar can be held without an uncomfortable stretch or locked elbows.
- Brakes: the child can reach and operate the controls while maintaining a steady grip.
- Starting and stopping: the rider can place their feet down promptly and hold the bicycle upright.
- Confidence: the bicycle feels manageable rather than intimidating.
Make adjustments only as directed by the exact product manual. If fit, assembly or control operation is uncertain, use a qualified bicycle mechanic rather than improvising a procedure.
Prepare a safe place and a properly fitted helmet
Choose a flat, open area away from traffic, parked vehicles, steep slopes and obstacles. A smooth surface makes it easier to concentrate on steering, stopping and balance. Close supervision lets you pause before fatigue or frustration affects control.
Use a bicycle helmet that fits properly. Following U.S. Consumer Product Safety Commission guidance, position it level and fasten and adjust its straps according to the helmet manufacturer’s instructions. Replace guesswork with the instructions for that specific helmet.
Teach balance, braking and pedalling in that order
- Walk the bike: let the child hold the handlebar, move the bicycle and practise using the brakes while walking beside it.
- Practise controlled stops: ask the child to move slowly, stop on a clear marker and put both feet down.
- Develop balance: with the saddle adjusted according to the manual, let the rider push along and briefly glide when ready. If removing pedals would help, first confirm the procedure and compatibility in the product manual or ask a qualified mechanic.
- Add pedalling: support the child gently at the torso or upper back, not by steering the handlebar for them. Release support gradually as balance improves.
- Link the skills: practise looking ahead, starting, riding a short straight line, slowing and stopping under control.
Keep each attempt short enough that the child remains attentive. Finish after a controlled success—even a clean stop—rather than waiting for exhaustion.
Decide whether training wheels help this learner
Training wheels can provide initial stability while a child becomes familiar with pedalling, steering and stopping. They do not replace the need to develop two-wheel balance, so compare their effect with the learner’s current obstacle: a child struggling with pedalling may benefit differently from one who can pedal but needs balance practice.
The supplied catalog options are relevant because both are Kids’ BMX Bikes offered in 12 Inch, 14 Inch and 16 Inch choices, and both include training wheels. This lets parents compare an appropriate starting wheel size before deciding whether temporary added stability suits the learning plan.
 XJD Girls BMX Bike 12/14/16 Inch with Training Wheels – Pink Blue
A Kids’ BMX Bike offered in 12 Inch, 14 Inch and 16 Inch options with training wheels. It is relevant when the rider’s measurements and fit check support one of those sizes.
 XJD Boys & Girls BMX Bike with Training Wheels, 12/14/16" – Blue
A blue Kids’ BMX Bike offered in 12 Inch, 14 Inch and 16 Inch options with training wheels. Compare its listed wheel sizes with the child’s measured height and hands-on fit.
The XJD Girls BMX Bike 12/14/16 Inch with Training Wheels – Pink Blue and the XJD Boys & Girls BMX Bike with Training Wheels, 12/14/16" – Blue share the same supplied size choices: 12 Inch, 14 Inch and 16 Inch. Their catalog facts support comparison by title, color wording and available wheel size only; they do not establish individual fit.
These products are relevant only when the rider’s measurements and hands-on fit check point to 12, 14 or 16 inches and training wheels suit the next learning step. For a rider who needs 18, 20, 24 or 26 inches, neither product is a substitute.
Choose the next practice step
If the child cannot stand over the bike, reach comfortably or control the brakes, stop and change the fit or bicycle before teaching. If those checks pass, begin with walking and controlled stops, then practise gliding, and add pedalling only when balance is becoming steady. The right next step is the smallest skill the child can repeat calmly and under control.
Bikes for your next adventure
-

Blue XJD Girls Bike with Training Wheels – 12/14/16 Inch
If you're shopping for a first pedal bike for a daughter roughly 3 to 8 years ol…$149
$169 -

XJD Kids Bike for Girls – Pink, 12/14/16/20 Inch with Training Wheels
The XJD Kids Bike for Girls in Pink is a training-wheel bike built to carry your…$139
$159 -
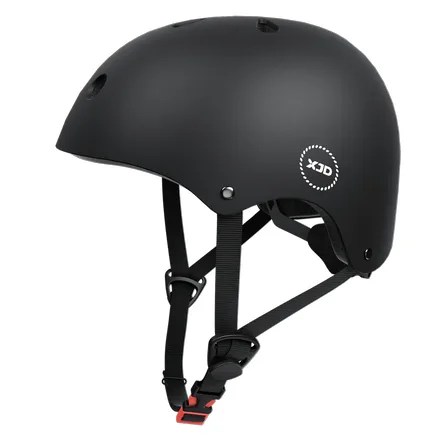
7-in-1 Kids Helmet & Protective Gear Set from XJD – Black or Blue
If you're outfitting one kid (or a couple of siblings) for biking, scootering, o…$59.99