

How to learn to ride a bike as a child
Teach a child to ride by choosing a bicycle they can control, fitting a helmet correctly, and practising balance before pedalling in a clear, level area.
Measure the child before choosing a bike
Measure the child’s height without shoes. Also check inseam, because two children of the same height may need different stand-over clearance. Age can suggest where to begin, but measured height, reach, brake control and confidence decide whether a bicycle actually fits.
| Wheel size | Starting age | Rider height |
|---|---|---|
| 12 Inch | 3–4 | 34–40 in / 86–102 cm |
| 14 Inch | 3–6 | 37–45 in / 94–114 cm |
| 16 Inch | 4–7 | 40–48 in / 102–122 cm |
| 18 Inch | 5–9 | 43–52 in / 109–132 cm |
| 20 Inch | 7–12 | 48–60 in / 122–152 cm |
| 24 Inch | 10–14 | 54–64 in / 137–163 cm |
| 26 Inch | Youth and adults | Over 60 in / 153 cm |
These are starting points, not permission to order without a fit check. Do not buy an oversized bicycle merely because the child may grow into it. A too-large bike can make starting, stopping and steering harder while the child is learning.
Compare fit and control in person
Have the child try the bicycle. First, check that the frame gives suitable stand-over clearance rather than pressing against the child. Then seat the child and confirm that the ground is reachable in a way that supports the learning method being used.
Next, watch the child hold the handlebar. They should not have to stretch, lock their elbows or twist forward to steer. Ask them to operate every fitted brake control several times. They must be able to reach and use it deliberately with their hands in a stable riding position.
If the child cannot mount, balance, turn the handlebar or operate the brakes confidently, compare a smaller or differently proportioned bicycle. Wheel diameter alone cannot confirm fit.
Prepare the child and practice area
Choose a level, open place away from vehicles, steep slopes, obstacles and other riders. Check the bicycle before each session. For assembly, adjustments, maintenance, compatibility and torque requirements, follow the exact product manual or ask a qualified bicycle mechanic.
A bicycle helmet should fit properly, sit level on the head and use its straps exactly as the helmet manufacturer instructs. Secure loose clothing and shoelaces, and use closed-toe footwear suitable for pushing against the ground.
Teach balance before pedalling
- Walk the bike: Let the child practise mounting, holding the handlebar, walking forward and stopping.
- Scoot and glide: With the seat set appropriately for the bicycle and learning method, have the child push with both feet, then lift them briefly. Repeat until gliding feels controlled.
- Practise stopping: Rehearse the bicycle’s fitted braking method at walking speed. The child should stop on request without panic or abrupt swerving.
- Add pedalling: Once balance and stopping are consistent, help the child place a pedal in a useful starting position, push off, look ahead and begin pedalling.
- Add gentle turns: Use wide, predictable loops before attempting tighter turns, slopes or busier spaces.
Avoid holding the handlebar while the child rides, because that can interfere with steering. If support is necessary, steady the child lightly and release gradually. Keep sessions short enough that fatigue and frustration do not replace concentration.
Know when to pause or progress
Pause when the child repeatedly looks down, cannot stop on command, loses control while turning or appears frightened. Return to walking, scooting or gliding rather than pushing ahead. Progress when the child can start, look forward, travel in a chosen direction and stop reliably in the practice area.
Adult supervision remains important after the first independent ride. Introduce new surfaces and surroundings one at a time so the child is not learning balance, braking and traffic awareness simultaneously.
When the supplied bicycle is relevant
The 24-Inch Purple XJD Beach Cruiser Bike with U-Brake is relevant only as a 24-inch comparison for a rider near the XBikes starting range of ages 10–14 and heights 54–64 in / 137–163 cm. Its Beach Cruiser Bikes category and U-brake named in the catalog title help identify what the family would be evaluating, but neither replaces an individual stand-over, reach and brake-control check.

If the learner is outside that height range or cannot confidently control this bicycle, compare the appropriate wheel-size starting point instead. Measure the child now, test the candidate bike in person, and begin the first lesson with walking, gliding and controlled stopping before adding pedals.
Bikes for your next adventure
-

Black XJD Kids Bike for Boys – 12, 14 & 16 Inch Sizes
For a son between roughly 3 and 8 years old, the XJD Kids Bike in Black covers t…$169
$199 -

Blue XJD Girls Bike with Training Wheels – 12/14/16 Inch
If you're shopping for a first pedal bike for a daughter roughly 3 to 8 years ol…$149
$169 -
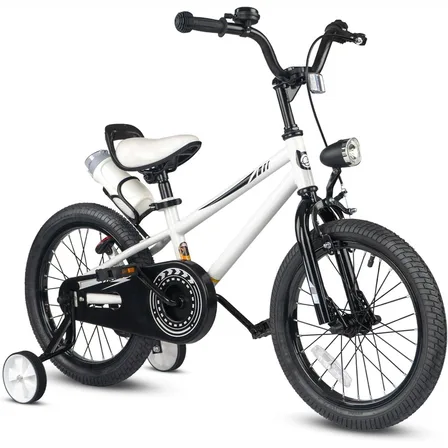
XJD Kids' Training Wheel Bike for Boys & Girls, 12/14/16 Inch – White
The XJD kids' training wheel bike in White is made for riders ages 3–8 (roughly …$169
$199