

How to learn your child to ride a bike
Teach your child to ride a bike by choosing a bike they can control, fitting a level helmet, lowering the pressure of the lesson, and practising balance before pedalling.
Measure the rider before choosing the bike
Measure your child’s height without shoes, then check inseam, reach and hand control on the actual bicycle. Age is only a starting point because children of the same age can have different proportions and confidence.
| Wheel size | Starting age | Rider height |
|---|---|---|
| 12 Inch | 3–4 | 34–40 in / 86–102 cm |
| 14 Inch | 3–6 | 37–45 in / 94–114 cm |
| 16 Inch | 4–7 | 40–48 in / 102–122 cm |
| 18 Inch | 5–9 | 43–52 in / 109–132 cm |
| 20 Inch | 7–12 | 48–60 in / 122–152 cm |
| 24 Inch | 10–14 | 54–64 in / 137–163 cm |
| 26 Inch | Youth and adults | Over 60 in / 153 cm |
Use these XBikes ranges to narrow the search, not to approve a bike automatically. Have your child try it. Do not buy an oversized bicycle for future growth: the rider needs enough stand-over clearance, a comfortable reach, reliable steering control and the ability to operate the brakes now.
Compare control, not just wheel size
With your child seated and holding the bars, check whether the riding position feels manageable rather than stretched. Ask them to turn the handlebar gently in both directions and reach each brake control without shifting the hand into an awkward position. They should be able to support and steady the bicycle confidently.
If they cannot stand over the bike comfortably, reach the controls, squeeze the brakes effectively or guide the front wheel at walking speed, choose another fit. Moving down a size can be more useful for learning than asking a nervous rider to manage a bicycle they will eventually grow into.
Prepare a simple, safe practice area
Choose a flat, open area away from traffic, parked cars, steep slopes and obstacles. Fit a bicycle helmet before every session. It should sit level, fit properly and have its straps adjusted according to the helmet manufacturer’s instructions.
Before practice, confirm that the bicycle is assembled and operating as intended. For assembly, maintenance, adjustments, compatibility, load limits or torque values, follow the exact product manual or ask a qualified bicycle mechanic. Do not improvise a technical procedure when the manufacturer’s directions are unavailable.
Teach balance before pedalling
- Start with walking: Let your child walk the bicycle while seated or standing over it. This establishes steering and stopping control.
- Practise gliding: When the setup permits it according to the bike’s manual, have the rider push along and briefly lift both feet. Aim for short, calm glides rather than distance.
- Add controlled stops: Ask the child to slow and stop at a visible marker. Practise brake use before increasing speed.
- Introduce pedalling: Once gliding and steering are consistent, help the rider set a pedal in a useful starting position, push off, look ahead and begin pedalling.
- Reduce support: If physical help is needed, steady the child without steering for them. Release gradually and tell them before changing your support.
Keep sessions short enough that technique does not collapse into frustration. Finish after a small success, such as a controlled stop or a straight glide, and repeat that skill at the next session.
Use the catalog option only when its sizes fit
The 26-Inch XJD Beach Cruiser Bike for Girls – Purple, V-Brake is listed in Beach Cruiser Bikes. Its available labels include Mint Green or Pink in 20, 24 and 26 Inch, plus Purple in 26 Inch. Those choices provide useful comparison points for taller children who fall near the supplied 20-, 24- or 26-inch starting ranges.
These catalog options help answer the fit question because a parent can compare three listed wheel sizes against measured height, then verify stand-over, reach, brake control and confidence on the actual bicycle.

This product is not relevant for a child whose measurements and control indicate a 12-, 14-, 16- or 18-inch starting point. Its 20-, 24- and 26-inch labels are not substitutes for those smaller sizes. Even within the stated height ranges, neither the product title nor a wheel-size label proves an individual fit.
Know when to pause or move forward
Pause and reassess if your child repeatedly looks down, cannot steer a predictable line, cannot stop on request, struggles to reach the brakes or appears afraid of the bicycle’s size. Recheck fit and return to walking or gliding instead of pushing into pedalling.
Move forward when the rider can look ahead, glide without immediate foot contact, steer around a simple marker and stop deliberately. Your next action is straightforward: measure height, test inseam and reach on the actual bike, confirm brake control, fit the helmet, then begin with walking and balance.
Bikes for your next adventure
-

Black XJD Kids Bike for Boys – 12, 14 & 16 Inch Sizes
For a son between roughly 3 and 8 years old, the XJD Kids Bike in Black covers t…$169
$199 -

Blue XJD Girls Bike with Training Wheels – 12/14/16 Inch
If you're shopping for a first pedal bike for a daughter roughly 3 to 8 years ol…$149
$169 -
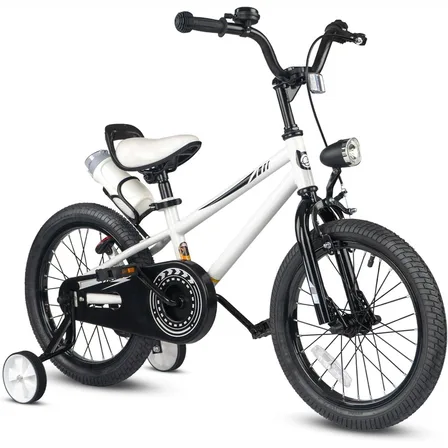
XJD Kids' Training Wheel Bike for Boys & Girls, 12/14/16 Inch – White
The XJD kids' training wheel bike in White is made for riders ages 3–8 (roughly …$169
$199