

How to pick a bike for a child
Pick a child’s bike by measuring height and inseam, then checking stand-over clearance, reach, brake control and confidence on the actual bike. Use age only as a starting point, and never size up merely for future growth.
Measure the rider before comparing bikes
Measure the child without shoes, standing straight against a wall. Record total height from floor to the top of the head. For inseam, place a book firmly between the legs to represent the saddle and measure from the floor to the book’s top edge.
Bring those measurements when shopping. Height helps narrow the wheel-size range, while inseam helps assess whether the child can stand over and manage the bike comfortably. Measurements identify candidates; they cannot confirm fit without a hands-on check.
Use wheel size as a starting point
| Wheel size | Starting age | Rider height |
|---|---|---|
| 12 Inch | 3–4 | 34–40 in / 86–102 cm |
| 14 Inch | 3–6 | 37–45 in / 94–114 cm |
| 16 Inch | 4–7 | 40–48 in / 102–122 cm |
| 18 Inch | 5–9 | 43–52 in / 109–132 cm |
| 20 Inch | 7–12 | 48–60 in / 122–152 cm |
| 24 Inch | 10–14 | 54–64 in / 137–163 cm |
| 26 Inch | Youth and adults | Over 60 in / 153 cm |
Where ranges overlap, begin with measured height rather than age. Compare the neighboring sizes in person, because frame proportions and the child’s control can make one easier to handle. A larger wheel label does not prove that the larger bike fits better.
Check the fit on the actual bicycle
Have the child try each candidate instead of relying on the package label. With the child standing over the bicycle, confirm that the frame does not prevent a comfortable, stable stance. Seated, the rider should reach the handlebar without stretching, twisting or locking the arms.
Ask the child to operate the brakes while maintaining a secure grip. Brake levers must be reachable and controllable by that individual rider. Also watch whether the child can start, stop, steer and balance without looking frightened or losing control. Current confidence matters alongside physical dimensions.
Do not buy an oversized bicycle solely to leave growing room. A bike that is difficult to mount, reach or stop today is the wrong current size, even if the child may grow into it later.
Decide whether training-wheel models are relevant
The two supplied XBikes options are relevant when the fit check points to 12, 14 or 16 Inch wheels and the family specifically wants a training-wheel bicycle. Their three available size labels make it possible to compare nearby starting points before confirming the child’s individual fit.
 Blue XJD Girls Bike with Training Wheels – 12/14/16 Inch
A training-wheel bicycle offered with 12 Inch, 14 Inch and 16 Inch SKU labels. It is relevant only when one of those sizes passes the child’s individual height, inseam, reach, brake-control and confidence checks.
 XJD Boys 12/14/16" Training Wheel Bike – Blue
Cataloged as a Training Wheel Bike with 12 Inch, 14 Inch and 16 Inch options. Consider it when training wheels are wanted and an in-person check confirms one of those wheel-size starting points fits the rider.
Blue XJD Girls Bike with Training Wheels – 12/14/16 Inch is cataloged as a Training Wheel Bike and is available in 12 Inch, 14 Inch and 16 Inch labels. XJD Boys 12/14/16" Training Wheel Bike – Blue has the same supplied category and size-label choices.
The words “Girls” and “Boys” in these exact catalog titles are product naming, not fit evidence. Choose between them only after applying the same height, inseam, reach, brake-control and confidence checks. The supplied facts do not establish differences in price, construction, components or performance, so those should not be assumed.
Neither product is relevant if the rider’s measurements and hands-on check indicate 18 Inch or larger wheels, or if a training-wheel model does not suit the child’s current riding needs. Do not force a choice from these products simply because the rider’s age overlaps a listed range.
Check control, setup and helmet fit
- Place the child on the correctly assembled bicycle and recheck stand-over position, seated reach and access to the brakes.
- Have the child demonstrate a controlled start, straight ride, turn and stop in a traffic-free area with close adult supervision.
- Confirm that the bicycle helmet fits properly, sits level and has its straps adjusted according to the helmet manufacturer’s instructions.
- Recheck fit as the child grows or if control, posture or confidence changes.
For assembly, adjustments, maintenance, load limits, compatibility and torque requirements, follow the exact product manual or use a qualified bicycle mechanic. Do not guess at an adjustment or substitute instructions from a different model.
Make the final choice
Write down height and inseam, use the table to shortlist a wheel size, and have the child try that size plus an overlapping neighboring option where appropriate. Buy only the bicycle the child can stand over, reach, brake and control confidently now. Consider either supplied XBikes model only if 12, 14 or 16 Inch is confirmed and training wheels are wanted.
Bikes for your next adventure
-
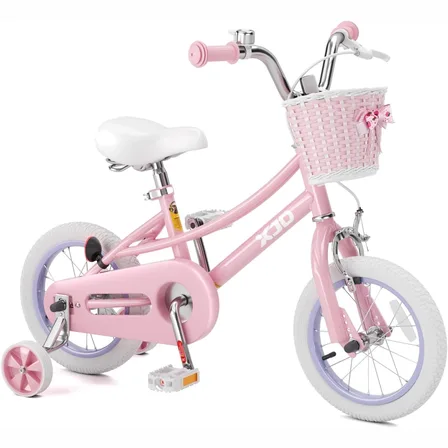
Pink 12/14/16/20" XJD Girls Bike with Training Wheels & Basket
The Pink XJD Girls Bike with Training Wheels & Basket is a first-bike pick f…$65.99
$75.99 -

Light Pink XJD Girls' Bicycle with Basket & Training Wheels
The Light Pink XJD Girls' Bicycle with Basket & Training Wheels is a retro-style…$109.99
$129.99 -

Black XJD Kids Bike for Boys – 12, 14 & 16 Inch Sizes
For a son between roughly 3 and 8 years old, the XJD Kids Bike in Black covers t…$169
$199