

How to put a kids bike together
To put a kids bike together, first confirm the wheel size and fit, then follow that bike’s exact manual to install, align and check every supplied part.
Check the bike fits before assembling it
Measure the child’s standing height and inseam, then compare the height with the XBikes starting points below. Age is only a starting point. The rider must also be able to stand over the bike, reach the handlebar comfortably, operate the brakes and control the bike with confidence.
| Wheel size | Age starting point | Rider height |
|---|---|---|
| 12 Inch | 3–4 | 34–40 in / 86–102 cm |
| 14 Inch | 3–6 | 37–45 in / 94–114 cm |
| 16 Inch | 4–7 | 40–48 in / 102–122 cm |
| 18 Inch | 5–9 | 43–52 in / 109–132 cm |
| 20 Inch | 7–12 | 48–60 in / 122–152 cm |
| 24 Inch | 10–14 | 54–64 in / 137–163 cm |
| 26 Inch | Youth and adults | Over 60 in / 153 cm |
Have the child try the completed bicycle before riding. Do not choose an oversized bike merely to allow room for growth. If the expected fit and the rider’s actual control disagree, prioritize the individual fit check.
Prepare the parts and instructions
Open the carton in a clear workspace and find the manual for the exact model and SKU. Lay out the bicycle, loose components, fasteners and supplied tools without removing labels prematurely. Compare everything with the manual’s parts list. Stop if a component is absent, damaged or does not match the instructions.
Assembly details, compatible parts and tightening requirements vary by model. Use only the tools and sequence specified in the manual. If the instructions are missing or unclear, or if you lack an appropriate tool, ask a qualified bicycle mechanic to complete the work.
Assemble in the manual’s order
- Stabilize the frame. Support it so it cannot fall or rest on delicate controls while you work.
- Install the supplied components. Fit items such as the handlebar, front wheel, seat, pedals, reflectors or training-wheel equipment only when they are included and exactly as the model manual directs.
- Check left and right markings. Pedals and other directional parts may differ by side. Never force a threaded part that does not start cleanly by hand.
- Align before tightening. Confirm the wheel, handlebar and seat point in the intended direction, then use the manual’s stated tightening method and torque. No universal torque figure should replace it.
- Set the tires correctly. Inflate them only to the pressure specified on the tire or in the exact product manual.
Do not improvise with extra washers, substitute fasteners or incompatible accessories. For uncertain compatibility, loading limits or adjustments, consult the manufacturer’s instructions or a qualified mechanic.
Check the completed bike before the child rides
- Confirm every required fastener is present and secured according to the manual.
- Lift and spin each wheel. It should rotate freely and remain properly retained.
- Test the brakes and verify that the child can comfortably reach and operate them.
- Check that the handlebar and seat remain aligned under normal hand pressure.
- Look for rubbing cables, loose accessories, damaged parts or anything contacting a moving wheel.
- Recheck stand-over clearance, reach and the rider’s ability to start, stop, steer and place a foot down confidently.
If a wheel is loose, steering binds, brakes do not work correctly or any assembly step remains uncertain, do not allow a ride. Have a qualified bicycle mechanic inspect the bike.
How the catalog options help with comparison
The supplied products show the assembly and fit questions across several wheel sizes and bike categories. They help you compare the size label and included-style cues before opening the manual; they do not provide universal assembly instructions for every kids bike.
 Pink Girls' 12/14/16" Bike by XJD – Basket & Doll Seat
A Training Wheel Bikes option with 12 Inch, 14 Inch and 16 Inch SKU labels, useful for comparing measured rider height before following the selected SKU’s exact assembly manual.
 24-Inch Purple XJD Beach Cruiser Bike with U-Brake
This 24-inch Beach Cruiser Bike with a U-brake is relevant to taller-rider fit comparisons; follow its exact manual for all assembly and brake adjustment steps.
 Blue XJD Freestyle BMX Bike, 20-Inch – No Pegs
A 20-inch Kids' BMX Bikes option labeled “No Pegs,” relevant when measured height and an individual control check support a 20-inch fit.
Pink Girls' 12/14/16" Bike by XJD – Basket & Doll Seat is cataloged under Training Wheel Bikes and offers 12 Inch, 14 Inch and 16 Inch SKU labels. Select among those labels using measured height and an individual fit check, then use the manual for the chosen SKU, including instructions for its supplied equipment.
Blue XJD Freestyle BMX Bike, 20-Inch – No Pegs is a 20-inch option in Kids' BMX Bikes. It is relevant when the rider’s measured height falls near the 20-inch starting range, subject to reach, brake control and confidence. Its “No Pegs” wording should not be treated as permission to fit unspecified accessories.
24-Inch Purple XJD Beach Cruiser Bike with U-Brake is a 24-inch Beach Cruiser Bike. Its U-brake must be installed or adjusted only as its exact manual directs. It is a size comparison for taller riders, not an equivalent substitute for a smaller wheel size.
Make the final go-or-stop decision
Fit a properly sized bicycle helmet so it sits level, fits securely and uses its straps according to the helmet manufacturer’s instructions. Begin with a slow control check in a suitable area. The bike is ready only when its manual’s assembly checks are complete and the child can stand over, reach, brake and steer confidently; otherwise, stop and arrange a mechanic’s inspection.
Bikes for your next adventure
-

Kids Bike Helmet by XJD for Boys & Girls – Black, Blue, Green, Pink, Purple
The XJD Kids Bike Helmet covers a wide 2-to-8-year age range thanks to two head-…$59.99
-
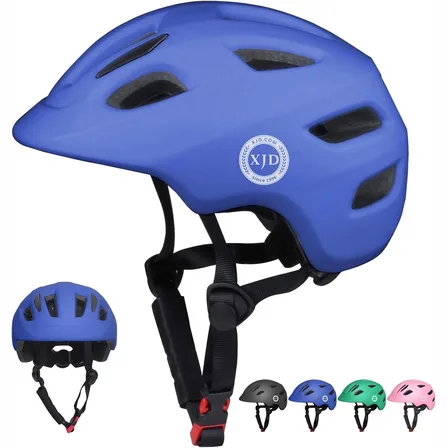
Blue XJD Kids' Bike Helmet, Adjustable Fit – Sizes XS & S
The Blue XJD Kids' Bike Helmet is a lightweight, adjustable helmet for toddlers …$20.39
-

Kids Bike Helmet by XJD for Girls – Pink
The XJD Kids Bike Helmet in Pink is a lightweight multi-sport helmet for girls r…$59.99
$99