

How to ride a bike video for kids
Teach a child to ride by practising the video sequence below: check fit and helmet, learn braking, glide without pedals, then add pedalling and turns.
Measure before starting the lesson
Measure the child’s standing height and inseam while they wear the shoes they will ride in. Compare height with the XBikes starting points below, but treat the result only as a shortlist for an individual fit check.
| Wheel size | Starting age | Rider height |
|---|---|---|
| 12 Inch | 3–4 | 34–40 in / 86–102 cm |
| 14 Inch | 3–6 | 37–45 in / 94–114 cm |
| 16 Inch | 4–7 | 40–48 in / 102–122 cm |
| 18 Inch | 5–9 | 43–52 in / 109–132 cm |
| 20 Inch | 7–12 | 48–60 in / 122–152 cm |
| 24 Inch | 10–14 | 54–64 in / 137–163 cm |
| 26 Inch | Youth and adults | Over 60 in / 153 cm |
Have the child try the actual bicycle. They should be able to stand over it appropriately, reach the handlebar without stretching, steer with control and operate the brakes confidently. Brake levers must be within comfortable reach. Do not choose an oversized bicycle merely to allow room for growth; measured fit and present control matter more than age.
Set up the bike, helmet and practice area
Use a wide, level, traffic-free paved area with plenty of stopping room. Avoid slopes for the first session. Check the bicycle according to its exact manual, including its assembly and pre-ride instructions. If anything is loose, damaged or unclear, stop and ask a qualified bicycle mechanic rather than inventing a repair or torque setting.
Use a properly fitting bicycle helmet. It should sit level and be secured with its straps exactly as the helmet manufacturer directs. Suitable closed-toe shoes and comfortable clothing help the child move without loose fabric getting caught.
Follow this learn-to-ride video sequence
- Walk and brake: Have the child walk beside the bicycle while practising the brake controls. Name the action clearly: slow, squeeze progressively and stop.
- Sit and scoot: With the child seated and able to put their feet down, let them push forward in short steps. Support the child only as much as necessary; do not pull the handlebar.
- Glide: Ask for two or three pushes, then feet up briefly. Look ahead rather than down. Repeat until the child can glide straight and put a foot down calmly.
- Start pedalling: Place one pedal in an easy starting position. The child pushes down on it while the other foot leaves the ground and finds the second pedal.
- Stop on command: Call for a planned stop well before the boundary. The child looks ahead, applies the brakes progressively and puts a foot down after slowing.
- Add broad turns: Use large loops before attempting tighter steering. Practise starting, turning and stopping in both directions.
Keep each attempt short. Pause when concentration or confidence falls. A successful session can end after one controlled glide or stop; pedalling need not happen immediately.
What a useful demonstration video should show
If you are choosing or recording a how-to video, use side and front views that show the child’s posture, hands, feet and stopping space. Include normal pauses and repeated attempts. The essential comparison is not whether the child copies another rider’s age or speed, but whether they can reach, balance, steer and brake on their own bicycle.
- Show the helmet level and straps secured.
- Show feet touching down during the scooting stage.
- Show hands reaching and operating the brake controls.
- Show a controlled stop before introducing tighter turns.
How the supplied bicycle helps with comparison
The supplied catalog option helps families compare three later wheel-size starting points and a stated brake configuration. It is relevant only when the child’s measurements and hands-on fit place them in one of those sizes; it does not replace trying the bicycle.

The XJD Pink Beach Cruiser for Girls – Rear Rack & V-Brake is listed as a beach cruiser in 20 Inch, 24 Inch and 26 Inch options. Using the XBikes starting points, compare 20 Inch with riders 48–60 in / 122–152 cm, 24 Inch with riders 54–64 in / 137–163 cm, and 26 Inch with youth or adults over 60 in / 153 cm.
Its title identifies a rear rack and V-brake, but the supplied facts do not establish rack load limits, assembly details or brake-adjustment procedures. Follow the exact product manual or consult a qualified bicycle mechanic for those matters. If the child needs a 12, 14, 16 or 18 Inch bicycle, these listed options are larger comparison points, not substitutes for the required wheel size.
Decide what to do next
First measure height and inseam, shortlist a wheel size, and arrange a hands-on fit check. Proceed with the lesson only when the child can stand over, reach, steer and operate the brakes comfortably while wearing a correctly fitted helmet. Then practise the sequence—walk and brake, scoot, glide, pedal, stop and turn—ending today’s session at the last step the child can repeat calmly and under control.
Bikes for your next adventure
-
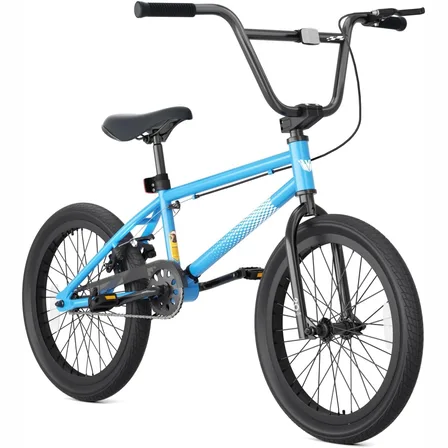
Blue XJD Freestyle BMX Bike, 20-Inch – No Pegs
The XJD 20-Inch Blue Freestyle BMX is an entry-level BMX bike for boys and girls…$189.99
-

Kids Bike Helmet by XJD for Boys & Girls – Black, Blue, Green, Pink, Purple
The XJD Kids Bike Helmet covers a wide 2-to-8-year age range thanks to two head-…$59.99
-

Kids Bike Helmet by XJD for Girls – Pink
The XJD Kids Bike Helmet in Pink is a lightweight multi-sport helmet for girls r…$59.99
$99