

How to teach your child to ride a bike video
Teach your child to ride by checking fit first, then practising balance, braking, steering and pedalling in short, calm sessions on a clear, level area.
Measure before the first practice
Measure your child’s height and inseam while they wear the shoes they will ride in. Use height to identify a starting wheel size, but have the child try the actual bicycle before deciding. Age is only a rough reference.
On the bicycle, check that the child can stand over it comfortably, reach the handlebar without stretching and operate the brakes with control. They should be able to start, stop and steady the bicycle without fighting its size or weight. Do not choose an oversized bicycle simply to allow room for growth.
| Wheel size | Starting age | Rider height |
|---|---|---|
| 12 Inch | Ages 3–4 | 34–40 in / 86–102 cm |
| 14 Inch | Ages 3–6 | 37–45 in / 94–114 cm |
| 16 Inch | Ages 4–7 | 40–48 in / 102–122 cm |
| 18 Inch | Ages 5–9 | 43–52 in / 109–132 cm |
| 20 Inch | Ages 7–12 | 48–60 in / 122–152 cm |
| 24 Inch | Ages 10–14 | 54–64 in / 137–163 cm |
| 26 Inch | Youth and adults | Over 60 in / 153 cm |
Set up the child and practice area
Choose a wide, level, traffic-free space without obstacles. The child should wear a bicycle helmet that fits properly, sits level and has its straps adjusted according to the helmet manufacturer’s instructions. Secure loose clothing and check that shoelaces cannot reach moving parts.
Before riding, follow the bicycle’s exact manual for assembly, adjustments and maintenance. If the instructions are missing, unclear or the bicycle does not operate correctly, use a qualified bicycle mechanic rather than guessing at compatibility, torque or procedures.
Teach the skills in this order
- Walking and braking: Have the child walk while holding the bicycle, then sit and move it with their feet. Ask them to stop using the bicycle’s controls so they learn what a controlled stop feels like.
- Balance: Let the child push off, lift their feet briefly and coast. Keep the goal small: relaxed hands, eyes looking ahead and feet ready to steady the bicycle.
- Steering: Practise gentle turns around widely spaced markers. Encourage looking toward the intended path instead of down at the front wheel.
- Pedalling: Once coasting is consistent, position a pedal for an easy first push. The child pushes, brings the other foot onto its pedal and continues looking ahead.
- Starting and stopping: Repeat complete cycles: prepare, look ahead, push, pedal, slow, brake and place a foot down. Independent riding matters less than predictable control.
How the adult should help
Stand beside the child and support their torso lightly if needed. Avoid steering the handlebar for them, because the child needs to feel and correct small balance changes. Release support gradually and say what you are about to do.
Use one short instruction at a time, such as look ahead or slow and brake. End the session when concentration or confidence drops. On the next attempt, restart with a skill the child already manages before adding difficulty.
When training wheels are relevant
Training wheels can help a child who is not yet ready to manage balance and pedalling together, but they do not replace an individual fit check. Compare their current confidence with the learning goal: if balance practice is the priority, use a setup and method that lets the child develop balance; if initial pedalling confidence is the immediate barrier, training-wheel options may be relevant.
The Black XJD Kids Bike for Boys – 12, 14 & 16 Inch Sizes is catalogued as a Training Wheel Bike and is offered in 12 Inch, 14 Inch and 16 Inch SKU labels. Those three options help you compare the child’s measured height with the corresponding XBikes starting points before arranging an actual fit check.

The title wording is a catalog name, not evidence that the bicycle fits a particular child. Select between its available sizes by measured height first, then confirm inseam clearance, reach, brake control and confidence on the actual bicycle. If the child falls outside those ranges or needs another wheel size, this product is a comparison point, not an equal substitute.
Know when to move forward
Progress from coasting to pedalling only when the child can look ahead, steer and stop under control. Move to a more open route only after starts, turns and stops are repeatable and the environment matches their ability.
Your next action is simple: measure height and inseam, compare the wheel-size starting points, perform an in-person fit and brake-reach check, then begin the practice sequence with walking and controlled stopping.
Bikes for your next adventure
-
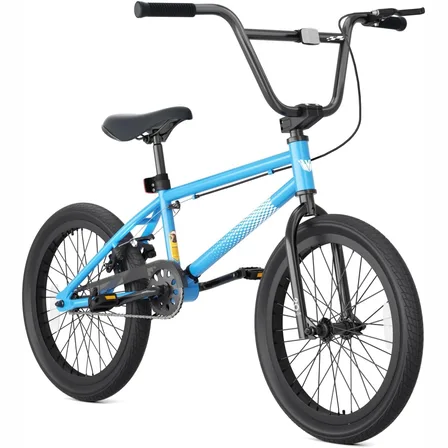
Blue XJD Freestyle BMX Bike, 20-Inch – No Pegs
The XJD 20-Inch Blue Freestyle BMX is an entry-level BMX bike for boys and girls…$189.99
-

Kids Bike Helmet by XJD for Boys & Girls – Black, Blue, Green, Pink, Purple
The XJD Kids Bike Helmet covers a wide 2-to-8-year age range thanks to two head-…$59.99
-

Kids Bike Helmet by XJD for Girls – Pink
The XJD Kids Bike Helmet in Pink is a lightweight multi-sport helmet for girls r…$59.99
$99