

How to turn on a bike for kids
To turn on a bike, a child should slow down before the corner, look toward the intended path, steer gently, keep control of the brakes, and ride through without a sudden handlebar movement.
Teach the turn in a clear sequence
Choose a flat, open area away from traffic, slopes and obstacles. Mark a wide curve rather than asking for a tight turn. Before moving, explain the sequence: look, slow, steer and continue.
- Look: The child turns their eyes and head toward where they want to finish, not toward the front wheel or an obstacle.
- Slow: They reduce speed before entering the curve. Braking hard in the middle of a turn can make control more difficult.
- Steer: They guide the handlebar smoothly into a broad arc. A beginner does not need an exaggerated lean.
- Continue: They hold a steady line through the curve, straighten the handlebar gradually and then resume normal pedaling.
Keep the pedals approximately level while coasting through the first practice turns. This helps prevent the inside pedal from being pushed downward near the ground. Once wide turns are controlled, practice in both directions and gradually make the path smaller.
Check the bike before teaching the skill
A child cannot learn a controlled turn well on a bicycle that is too large, difficult to reach across or hard to stop. Measure the rider’s standing height and inseam, then have the child try the actual bicycle. Age is only a starting point.
With the child standing over the bicycle, check that they can manage the bike without being trapped by the frame. Seated in a normal riding position, they should reach the handlebar comfortably, steer through each direction without stretching, and operate the brakes with control. They should also be able to start, stop and place a foot down confidently.
Do not choose an oversized bicycle merely to allow room for growth. If the rider cannot control its weight and reach, turn the handlebar smoothly or use the brakes reliably, select a more manageable fit.
Compare the measured rider with wheel-size starting points
| Wheel size | Starting age | Rider height |
|---|---|---|
| 12 Inch | 3–4 | 34–40 in / 86–102 cm |
| 14 Inch | 3–6 | 37–45 in / 94–114 cm |
| 16 Inch | 4–7 | 40–48 in / 102–122 cm |
| 18 Inch | 5–9 | 43–52 in / 109–132 cm |
| 20 Inch | 7–12 | 48–60 in / 122–152 cm |
| 24 Inch | 10–14 | 54–64 in / 137–163 cm |
| 26 Inch | Youth and adults | Over 60 in / 153 cm |
These ranges overlap intentionally and do not decide fit by themselves. Prioritize measured height, inseam, reach, brake control and current confidence. A rider near a boundary should try the relevant sizes rather than automatically moving up.
Use the supplied bikes as size comparisons
The catalog options below are relevant because each is a training-wheel bike offered with 12 Inch, 14 Inch, 16 Inch and 20 Inch SKU labels. They let a parent compare several starting sizes while checking whether training wheels suit the child’s present confidence.
 Girls' Training Wheel Bike by XJD, 12–20 Inch Wheels – Blue
A blue Training Wheel Bikes option with supplied 12 Inch, 14 Inch, 16 Inch and 20 Inch SKU labels, useful for comparing measured rider fit across those sizes.
 XJD Girls' Bike with Training Wheels, 12/14/16/20 Inch – Purple
A purple training-wheel bike offered in the supplied 12 Inch, 14 Inch, 16 Inch and 20 Inch labels; individual reach, stand-over and brake control still determine fit.
 XJD Kids Bike for Girls – Pink, 12/14/16/20 Inch with Training Wheels
A pink Training Wheel Bikes option with listed 12 Inch, 14 Inch, 16 Inch and 20 Inch choices, relevant when training wheels match the child’s current confidence.
Girls' Training Wheel Bike by XJD, 12–20 Inch Wheels – Blue is listed in the Training Wheel Bikes category with 12 Inch, 14 Inch, 16 Inch and 20 Inch options. XJD Girls' Bike with Training Wheels, 12/14/16/20 Inch – Purple has the same supplied size labels and category. XJD Kids Bike for Girls – Pink, 12/14/16/20 Inch with Training Wheels also provides those four listed choices.
The supplied facts distinguish these products by exact title and color wording, but do not establish differences in brakes, materials, weight or other equipment. None offers a supplied 18 Inch, 24 Inch or 26 Inch option. If the fit check points to one of those sizes, these bikes are nearest-size comparison points only, not substitutes.
Practice control before making turns tighter
Begin with straight starts and controlled stops. Next, have the child ride around a large marker, first in the easier direction and then the other way. Encourage eyes up and quiet hands. If the child stares at the marker, grabs the brakes abruptly, puts a foot down repeatedly or cannot hold the intended arc, enlarge the turn and lower the pace.
Training wheels may support a child who is still developing balance, but they do not replace steering and braking practice. Follow the exact product manual for assembly, adjustment, maintenance, compatibility and any torque or load requirements. If the instructions are missing or the setup is uncertain, use a qualified bicycle mechanic.
Make the go-or-pause decision
Before every session, use a properly fitting bicycle helmet that sits level, with its straps adjusted according to the helmet manufacturer’s instructions. Pause the lesson if the bicycle fit prevents comfortable reach or brake operation, if equipment appears loose or damaged, or if the child is too anxious to follow the turning sequence.
If fit and controls are manageable, the next action is simple: mark one wide turn in a traffic-free space and have the child repeat “look, slow, steer, continue” until they can complete it smoothly in both directions.
Bikes for your next adventure
-

Kids Bike Helmet by XJD for Boys & Girls – Black, Blue, Green, Pink, Purple
The XJD Kids Bike Helmet covers a wide 2-to-8-year age range thanks to two head-…$59.99
-
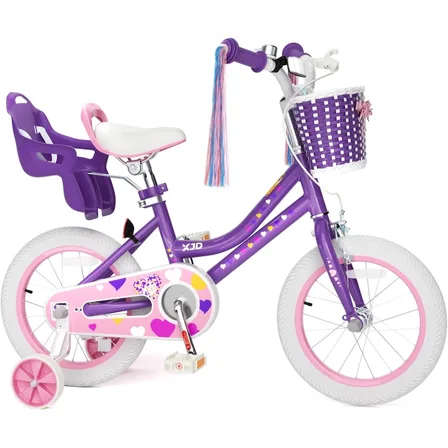
Purple XJD Girls' Bike with Doll Seat & Basket
For girls 71–122 cm tall (about ages 3–7), this XJD girls' bike in Purple pairs …$75.99
$99.99 -
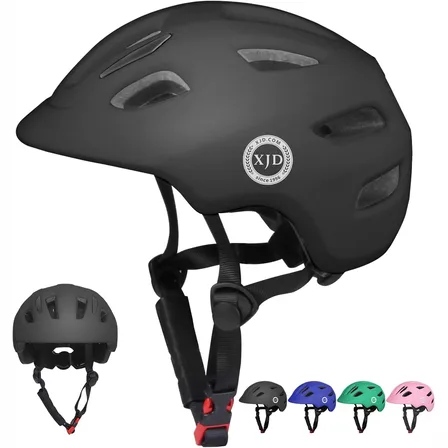
Black XJD Toddler Bike Helmet, Adjustable – Kids' Protective Helmet
The XJD Toddler Bike Helmet in black is an adjustable protective helmet for kids…$20.39