

How yo add a child to a bicycle
To add a child to a bicycle, use a purpose-built child seat, trailer, or child-carrying cycle that is approved for your exact bicycle and child. Never place a child on a rack, handlebar, top tube, or other improvised perch.
Decide whether the child will ride or be carried
First clarify what “add a child” means. If the child will be a passenger, you need a compatible carrying system. If the child will pedal independently, choose a correctly fitted child’s bicycle instead. The supplied XBikes products are independent training-wheel bicycles; they are not passenger seats, trailers, or attachments for an adult bicycle.
Before buying a passenger system, record the child’s current measurements and check the carrier manufacturer’s stated fit limits. Measure height and weight, and note whether the child can meet every developmental or positioning requirement in that product’s manual. Do not guess from age or assume that a child who fits clothing of a certain size will fit a carrier.
Check the bicycle and carrier together
Compare the exact bicycle model, frame design, wheel size, rack or mounting points, and any other compatibility conditions named by the carrier manufacturer. A carrier may attach to a frame, rack, or another designated location, but that does not mean it fits every bicycle with a similar-looking part.
- Confirm that the bicycle manufacturer permits the intended passenger system.
- Check the carrier’s child-fit and load limits in its current manual.
- Verify that pedals, wheels, steering, brakes, cables, and moving parts remain unobstructed.
- Use only the specified hardware and follow the stated assembly and torque instructions.
If compatibility, assembly, load limits, maintenance, or torque information is missing, do not invent a workaround. Ask the manufacturer or have a qualified bicycle mechanic inspect and install the system.
Fit the child and prepare for the first ride
Follow the carrier manual to position and secure the child, including every harness, foot support, guard, buckle, and retention feature it specifies. Check the fit before each ride and adjust it as the child grows. Loose clothing, straps, or belongings must not be able to reach a wheel or another moving component.
The child needs a properly fitting bicycle helmet. It should sit level, with its straps adjusted and used according to the helmet manufacturer’s instructions. The adult rider also needs to be able to mount, balance, steer, stop, and support the newly loaded bicycle confidently.
For the first check, keep the bicycle stationary while another adult helps stabilize it. Then practise away from traffic in a controlled area. A passenger changes balance, stopping, turning, and low-speed handling. Stop if the bicycle feels unstable, the child cannot remain correctly secured, or any mount shifts or interferes with control.
When an independent bicycle is the right next step
If the goal is to have the child ride alongside you rather than travel as a passenger, measure the child’s standing height and inseam, then have the child try the bicycle. Check stand-over clearance, reach, brake control, and present confidence. Do not buy an oversized bicycle merely to allow room for growth.
| Wheel size | XBikes starting point |
|---|---|
| 12 Inch | Ages 3–4; 34–40 in / 86–102 cm |
| 14 Inch | Ages 3–6; 37–45 in / 94–114 cm |
| 16 Inch | Ages 4–7; 40–48 in / 102–122 cm |
| 18 Inch | Ages 5–9; 43–52 in / 109–132 cm |
| 20 Inch | Ages 7–12; 48–60 in / 122–152 cm |
| 24 Inch | Ages 10–14; 54–64 in / 137–163 cm |
| 26 Inch | Youth and adults over 60 in / 153 cm |
These figures are starting points, not proof of fit. When age and measured size suggest different choices, prioritize measured height, inseam, reach, brake control, and the child’s current confidence.
How the supplied XBikes options compare
The Blue XJD Girls Bike with Training Wheels – 12/14/16 Inch and the XJD Boys 12/14/16" Training Wheel Bike – Blue each offer catalog size labels of 12 Inch, 14 Inch, and 16 Inch. They help compare independent training-wheel bicycles within those three size bands, but neither product is equipment for attaching or carrying a child on another bicycle.
If your child’s measurements point to 18, 20, 24, or 26 Inch, these two products are nearest-range comparison points only, not substitutes for the required wheel size. Their title wording is also only a catalog label; it does not establish fit.
 Blue XJD Girls Bike with Training Wheels – 12/14/16 Inch
An independent training-wheel bicycle offered in 12 Inch, 14 Inch, and 16 Inch catalog sizes; relevant when the child will ride rather than be carried on another bicycle.
 XJD Boys 12/14/16" Training Wheel Bike – Blue
A blue training-wheel bicycle with 12 Inch, 14 Inch, and 16 Inch catalog size options; use the child’s measurements and an individual fit check before choosing.
Make the final decision
Choose a passenger carrier only after its manual confirms compatibility with both the exact bicycle and the measured child, and use a mechanic when installation details are uncertain. If the child is ready to pedal, use the table to shortlist a wheel size and complete an in-person control check. The next step is therefore specific: measure the child, identify the bicycle model, and verify one complete carrying system—or fit an independent bicycle—before riding together.
Bikes for your next adventure
-

XJD Boys 12/14/16" Training Wheel Bike – Blue
The XJD Boys Bike in Blue is a training wheel bike for riders 71–122 cm tall—rou…$169
$199 -
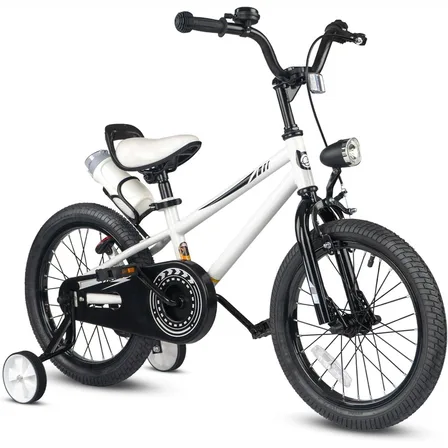
XJD Kids' Training Wheel Bike for Boys & Girls, 12/14/16 Inch – White
The XJD kids' training wheel bike in White is made for riders ages 3–8 (roughly …$169
$199 -
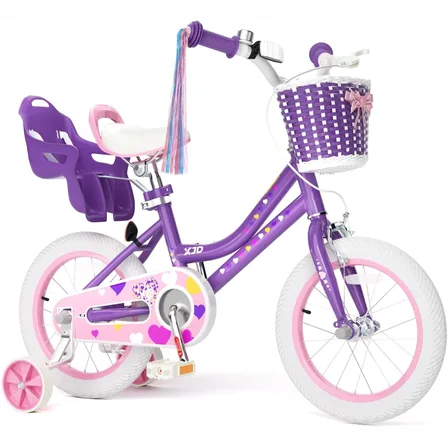
XJD Light Purple Girls Bike with Basket, Training Wheels, 12/14/16/20 Inch
The XJD Girls Bike with Basket in Light Purple is a single-speed training-wheel …$99.99
$119.99