

How to Make Kids' Bike Brakes Easier to Pull
Parents asking how to make kids' bike brakes easier to pull are usually seeing one of two problems: the lever is too far from a small hand, or the brake system has excess resistance. Those problems need different solutions. A closer lever cannot fix a damaged cable, and lubricating random parts cannot correct poor fit. Begin with observation and the exact brake instructions.
Separate reach from pulling force
With the bicycle stationary and supported by an adult, ask the child to hold the grip normally and place fingers on the lever. If the palm leaves the grip just to touch the lever, reach is the first issue. If the lever is reachable but barely moves, resistance or adjustment may be involved. Test every fitted brake separately.

Inspect without dismantling
Look for a kinked or frayed cable, damaged housing, a lever that touches the grip, a wheel that rubs and brake arms that do not return evenly. After a fall, also check whether the lever or handlebar rotated. Do not ride when a cable is damaged, the brake does not release, or stopping is inconsistent.

Use only the approved adjustment
Some child-sized levers include a reach adjuster, but turning it changes available lever travel. The brake must still engage before the lever reaches the grip. Cable tension, pad alignment and component lubrication are system-specific jobs. Follow the bicycle manual or ask a qualified mechanic instead of bending a lever or weakening a return spring.
Retest at walking speed
After adjustment or service, an adult checks the brake first. Then the child walks beside the bicycle and operates the lever while keeping a secure grip. Move to one slow straight stop in a flat traffic-free area only when the wheel rolls freely and the brake response is repeatable.
Recheck as the rider grows
Hand position can change after a saddle or handlebar adjustment. Repeat the reach test after growth, transport, a fall or any repair. A child who suddenly avoids one lever may be reporting a real fit or mechanical problem even when the bicycle looks normal.
How current product examples clarify the choice
The blue 12/14/16-inch training-wheel model lists a front hand brake with a rear coaster brake, while the 20-inch freestyle BMX uses hand-operated U-brakes. These current examples show why the exact control layout must be identified before anyone changes lever reach or cable tension.
Practical checklist
- Keep the palm on the grip during the reach test.
- Stop for frayed cables, rubbing or inconsistent return.
- Follow the exact brake instructions.
- Repeat a controlled low-speed stop after service.
Frequently asked questions
Can I spray lubricant into a stiff brake lever?
Do not guess. Some products can contaminate braking surfaces or damage materials; use only the procedure and product specified for that system.
Should the lever touch the handlebar grip?
No. The brake should operate reliably before the lever reaches the grip.
Before making the final choice, revisit the exact route or driving area at the time it will normally be used. A setup that works during a quiet test may need more room, visibility or adult support when other people and everyday obstacles are present.
Bottom line
Use the answer to make kids' bike brakes easier to pull as a decision process, not a shortcut. Confirm the live product data and manual, match the rider to the controls and setting, and favor repeatable control over a larger size or higher performance label.
Bikes for your next adventure
-

Black XJD Kids Bike for Boys – 12, 14 & 16 Inch Sizes
For a son between roughly 3 and 8 years old, the XJD Kids Bike in Black covers t…$169
$199 -
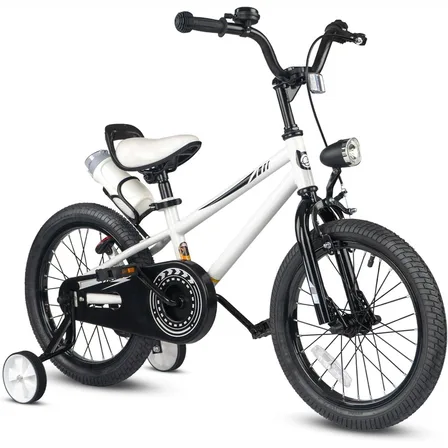
XJD Kids' Training Wheel Bike for Boys & Girls, 12/14/16 Inch – White
The XJD kids' training wheel bike in White is made for riders ages 3–8 (roughly …$169
$199 -

XJD Boys 12/14/16" Training Wheel Bike – Blue
The XJD Boys Bike in Blue is a training wheel bike for riders 71–122 cm tall—rou…$169
$199