

What's the best toddler bike seat
The best toddler bike seat is one that lets the child sit securely, reach the controls and handle a correctly sized bicycle with confidence. Measure the child and check the fit in person; do not choose by age or extra growing room alone.
What “best” means for a toddler
For a toddler riding their own bicycle, the seat cannot be judged separately from the frame. Its height and position must support stable starts and stops without making the child stretch toward the handlebar or controls. A suitable seat on an oversized bicycle is still a poor fit.
If “bike seat” means a child-carrying seat fitted to an adult bicycle, none of the supplied products is relevant: all three are complete children’s training-wheel bicycles. Choose a carrier only after checking its stated child limits, bicycle compatibility and installation manual. Use a qualified bicycle mechanic if compatibility or assembly is uncertain.
Measure before comparing
- Standing height: Measure without shoes, with the child standing straight against a wall.
- Inseam: Measure from the floor to the crotch while the child stands naturally. Compare this with the bicycle’s stand-over clearance and usable seat-height range during an actual fit check.
- Reach: With the child seated, check that the handlebar and controls can be reached without locking the elbows, leaning excessively or leaving the seat.
- Brake control: Confirm that the child can operate the bicycle’s supplied stopping controls comfortably and consistently. The catalog facts do not identify brake types, so inspect the exact bicycle rather than assuming.
- Current confidence: Watch the child start, steer, stop and dismount. A hesitant rider may need an easier-to-manage fit even when a size chart appears to allow a larger wheel.
Use wheel size only as a starting point
XBikes lists these starting points for the wheel sizes offered by the supplied products. They narrow the search, but the child’s measurements and control of the bicycle decide the fit.
| Wheel size | Starting age | Rider height |
|---|---|---|
| 12 Inch | 3–4 | 34–40 in / 86–102 cm |
| 14 Inch | 3–6 | 37–45 in / 94–114 cm |
| 16 Inch | 4–7 | 40–48 in / 102–122 cm |
| 20 Inch | 7–12 | 48–60 in / 122–152 cm |
The overlapping ranges are not interchangeable promises. Begin with measured height, then have the child try the bicycle. Check stand-over room, seat adjustment, reach, stopping control and confidence. Do not move to a larger size merely to extend the period before the child outgrows it.
How the three XBikes options compare
These catalog options help because each is a complete training-wheel bicycle available in multiple labeled wheel sizes, including 12 Inch and 14 Inch starting points that may be relevant to some toddlers after measurement. They do not provide evidence about saddle dimensions, seat-height ranges, brakes or individual fit.
 XJD Girls' Bike with Training Wheels, 12/14/16/20 Inch – Purple
A complete purple training-wheel bicycle offered in 12, 14, 16 and 20 Inch labels. Its 12- or 14-inch version may be a comparison option after measuring the child, but no supplied fact establishes its seat dimensions or fit.
 XJD Kids Bike for Girls – Pink, 12/14/16/20 Inch with Training Wheels
A complete pink training-wheel bicycle with 12, 14, 16 and 20 Inch labels. Use the relevant XBikes height starting point and an individual fit check; the catalog facts do not establish any seat or performance advantage.
 XJD Pink Girls' Bike – Kids 12/14/16 Inch Training Wheel Bicycle
A pink training-wheel bicycle offered in 12, 14 and 16 Inch labels. The 12- and 14-inch options may be relevant comparison points for a measured toddler, while the supplied facts provide no saddle dimensions or seat-height range.
XJD Girls' Bike with Training Wheels, 12/14/16/20 Inch – Purple and XJD Kids Bike for Girls – Pink, 12/14/16/20 Inch with Training Wheels have the same supplied size-label range: 12, 14, 16 and 20 Inch. Based on the available facts, the stated color and exact product title distinguish them; no performance or fit advantage is established.
XJD Pink Girls' Bike – Kids 12/14/16 Inch Training Wheel Bicycle offers 12, 14 and 16 Inch labels, but not 20 Inch. That narrower catalog range does not make its seat more or less suitable. Compare the exact size that fits the measured rider, not the number of variants attached to a listing.
Any age-related wording inside a product title is only a catalog label. Use the XBikes starting points above and require an individual fit check before choosing.
Complete the in-person fit check
- Let the child sit on and try the exact bicycle size rather than extrapolating from another variant.
- Confirm comfortable stand-over, balanced posture and an unstrained reach.
- Check that the child can steer, stop and get on and off under close adult supervision.
- Reject a size that compromises control, even if it offers more growing room.
- Fit a bicycle helmet level on the head, with its straps adjusted according to the helmet manufacturer’s instructions.
Follow the exact product manual for seat adjustment, assembly, maintenance and any limits not listed here. Do not guess at fastener torque or substitute a procedure from another model; ask a qualified bicycle mechanic when the instructions or fit remain unclear.
The decision to make now
Measure height and inseam, shortlist the corresponding 12- or 14-inch starting point when appropriate, and have the toddler try that exact bicycle. Choose only when the child has comfortable stand-over, reach and stopping control. If you meant an adult-bike child carrier, skip these three bicycles and compare purpose-built carrier seats using their manuals and verified compatibility instead.
Bikes for your next adventure
-
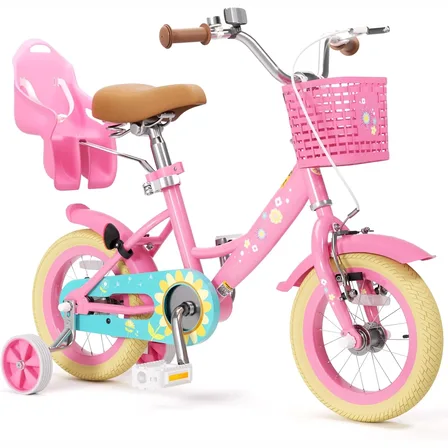
Flower Pink XJD Girls Bike with Doll Seat & Basket
The XJD Flower Pink girls' bike is made for riders 71–122 cm tall (roughly ages …$69.99
-
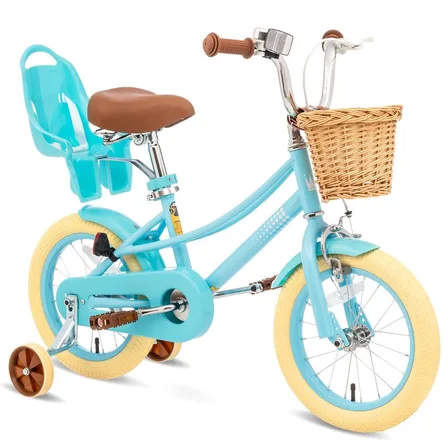
Girls' Training Wheel Bike by XJD, 12–20 Inch Wheels – Blue
This XJD girls' training wheel bike in Blue covers one of the widest fit ranges …$139
$159 -
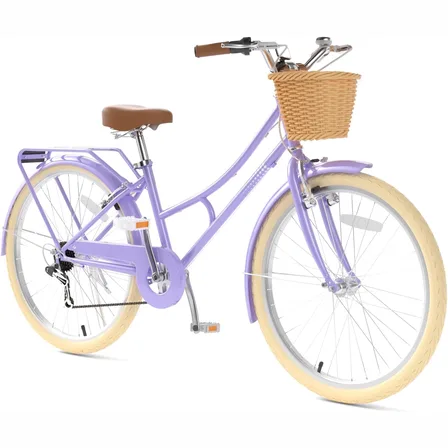
26-Inch XJD Beach Cruiser Bike for Girls – Purple, V-Brake
This XJD 26-inch purple beach cruiser is sized for big kids and teens — suggeste…$218.49
$229.99