

When can my toddler ride a bike
A toddler can ride their own bike when they fit it now and can steer, stop and stay in control—not simply when they reach a certain birthday.
Start with readiness, then check size
For the bikes supplied here, the earliest XBikes starting point is a 12-inch wheel bike at ages 3–4 and a rider height of 34–40 in (86–102 cm). Age is only an initial guide. A three-year-old who cannot comfortably reach the controls is not ready for that bike, while another child of the same age may fit it well.
Before choosing, watch whether your toddler can follow a simple stop instruction, hold the handlebar without stretching, look ahead while moving and remain calm enough to respond when the bike changes direction. Training wheels can provide lateral support, but they do not replace steering, braking or attentive adult supervision.
Measure your toddler before comparing bikes
Measure height without shoes, with the child standing straight against a wall. Measure inseam from the floor to the crotch while the child stands with feet slightly apart. Record both measurements rather than relying on clothing size or age.
Then have the child try the actual bicycle. Check that they can stand over it comfortably, mount and dismount without becoming trapped, reach the handlebar without leaning excessively, turn it in both directions and operate the brakes as intended. The exact clearance and adjustment method depend on the bicycle, so follow its manual or ask a qualified bicycle mechanic.
Compare the relevant XBikes starting points
| Wheel size | Age starting point | Rider-height starting point | What it means here |
|---|---|---|---|
| 12 Inch | 3–4 | 34–40 in / 86–102 cm | The first size to compare for many toddlers who meet the individual fit and control checks. |
| 14 Inch | 3–6 | 37–45 in / 94–114 cm | Worth comparing when measured height fits this range; it is not automatically preferable for growth. |
| 16 Inch | 4–7 | 40–48 in / 102–122 cm | Generally relevant to taller or older children, subject to the same hands-on fit check. |
Where ranges overlap, do not decide from height alone. Compare stand-over room, reach, brake control and current confidence on each candidate. Do not buy an oversized bicycle merely so the child can grow into it.
How the supplied training-wheel bikes help
All three supplied options are training-wheel bikes offered in 12 Inch, 14 Inch and 16 Inch labels. That makes them useful comparison points after you have measured your child: Blue XJD Girls Bike with Training Wheels – 12/14/16 Inch, XJD Boys 12/14/16" Training Wheel Bike – Blue, and Black XJD Kids Bike for Boys – 12, 14 & 16 Inch Sizes. Their titles differ, but the supplied fit-relevant catalog information is the same set of wheel-size labels; the wording “girls” or “boys” is not evidence of fit.
 Blue XJD Girls Bike with Training Wheels – 12/14/16 Inch
A training-wheel bike offered in 12 Inch, 14 Inch and 16 Inch labels. Compare the child’s measured height and individual fit; the title’s “Girls” wording is not fit evidence.
 XJD Boys 12/14/16" Training Wheel Bike – Blue
A blue training-wheel bike with 12 Inch, 14 Inch and 16 Inch labels. It is relevant once the rider’s height, stand-over, reach, brake control and confidence are checked.
 Black XJD Kids Bike for Boys – 12, 14 & 16 Inch Sizes
A black training-wheel bike offered in 12 Inch, 14 Inch and 16 Inch sizes. Use those labels as starting points, then require a hands-on fit and control check.
These products are relevant only if your toddler fits one of those sizes and can control the particular bike during a supervised try. The catalog facts do not provide frame geometry, brake type, weight, load limits or component details, so those points cannot be inferred from the titles. Consult the exact product manual or a qualified bicycle mechanic for assembly, adjustments, maintenance, compatibility and limits.
Perform a short hands-on fit check
- Stand over: Confirm the child can stand securely over the bicycle and get off without obstruction.
- Reach: Check that both hands can remain on the handlebar through comfortable turns without the child stretching or losing posture.
- Brake control: Have the child demonstrate that they can reach and operate the bicycle’s braking controls as designed.
- Movement: In a flat, traffic-free area, confirm that the child can start, steer, stop and respond to you without panic.
- Confidence: Stop if the child freezes, repeatedly loses control or resists continuing. Readiness can be revisited later.
Prepare for the first ride
Use a bicycle helmet that fits properly, sits level and has straps adjusted according to the helmet manufacturer’s instructions. Choose a controlled area away from traffic, driveways, slopes, water and other hazards. Keep the first session short and remain close enough to intervene.
Your next step is simple: measure height and inseam, compare the 12-inch starting range first if appropriate, and arrange an actual fit check. Let your toddler ride only when stand-over, reach, braking, steering and confidence all work on the bike they will use today.
Bikes for your next adventure
-
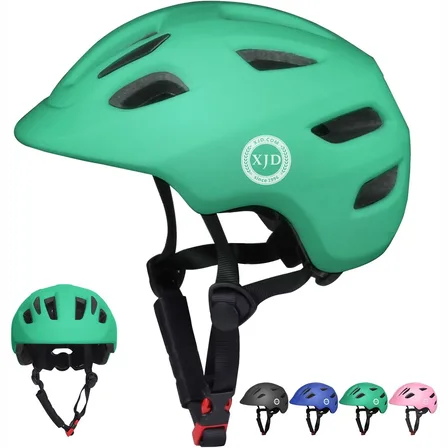
Green XJD Toddler Bike Helmet with Adjustable Fit, XS (46–51 cm)
The XJD toddler bike helmet in Green is built for the youngest riders — the size…$20.39
$23.99 -

Kids Bike Helmet by XJD for Boys & Girls – Black, Blue, Green, Pink, Purple
The XJD Kids Bike Helmet covers a wide 2-to-8-year age range thanks to two head-…$59.99
-

Kids Bike Helmet by XJD for Girls – Pink
The XJD Kids Bike Helmet in Pink is a lightweight multi-sport helmet for girls r…$59.99
$99