

When do most children learn to ride a bike
Most children learn to ride during the preschool or early elementary years, but there is no required age. A practical window is about ages 3–7; readiness, measured fit and control matter more than the birthday.
What “ready to ride” actually means
A child is ready to learn when they can follow simple directions, stay engaged, and comfortably control a correctly fitted bicycle. Confidence can arrive earlier or later than it does for siblings or friends. Reluctance is a reason to slow down, not to move up to a larger bicycle.
Before practice, look for the ability to get on and off without being lifted, hold the handlebar without stretching, turn it deliberately, and reach and operate the brakes. The child should also be able to place their feet where the bicycle’s instructions require for starting, stopping and standing over it.
Measure before choosing a wheel size
Measure the child’s standing height without shoes. Also measure inseam from the floor to the crotch, using a firm, level object to represent the saddle area. Record both measurements rather than relying on clothing size or age.
Use height to identify a starting wheel size, then have the child try the actual bicycle. Inseam, frame shape, saddle adjustment, reach and brake access can differ, so a height match alone does not prove a good fit.
| Wheel size | Starting age | Rider height |
|---|---|---|
| 12 Inch | 3–4 | 34–40 in / 86–102 cm |
| 14 Inch | 3–6 | 37–45 in / 94–114 cm |
| 16 Inch | 4–7 | 40–48 in / 102–122 cm |
| 18 Inch | 5–9 | 43–52 in / 109–132 cm |
| 20 Inch | 7–12 | 48–60 in / 122–152 cm |
| 24 Inch | 10–14 | 54–64 in / 137–163 cm |
| 26 Inch | Youth and adults | Over 60 in / 153 cm |
Overlapping ranges are intentional starting points, not proof that every listed size will fit. Prioritize measured height, inseam, reach, brake control and current confidence. The American Academy of Pediatrics advises having the child try the bicycle and not buying an oversized model merely for future growth.
How to check the bicycle in person
- Check stand-over: Have the child straddle the bicycle and confirm that the position allows comfortable, controlled mounting and dismounting.
- Check reach: With hands on the handlebar, the child should not have to strain forward or lock their arms.
- Check brakes: Confirm that the child can reach and operate the controls while maintaining a secure grip.
- Check handling: Ask the child to walk the bicycle, turn it, and stop it. Watch for tipping, stretching or fear caused by the fit.
- Check confidence: Choose the size the child can control now, even if a larger one appears more economical for future growth.
Where the supplied training-wheel bicycle fits
The XJD Girls' Bike with Training Wheels, 12/14/16/20 Inch – Purple is relevant because its catalog options cover four starting points in the XBikes chart: 12 Inch, 14 Inch, 16 Inch and 20 Inch. Those choices help a parent compare measured height with several wheel sizes while considering a training-wheel bicycle.

For a child in the common early-learning window, the 12 Inch option starts at ages 3–4 and 34–40 in / 86–102 cm; 14 Inch starts at ages 3–6 and 37–45 in / 94–114 cm; and 16 Inch starts at ages 4–7 and 40–48 in / 102–122 cm. The 20 Inch option starts at ages 7–12 and 48–60 in / 122–152 cm.
This product is not an exact comparison for an 18 Inch, 24 Inch or 26 Inch need because those sizes are not among its supplied options. Its neighboring sizes may help show where the child sits in the chart, but they are comparison points, not substitutes. The product title is a catalog name; it does not override the individual fit check.
Practice without making age the deadline
Begin in a flat, open area away from traffic and obstacles. Keep sessions short enough that concentration and confidence remain intact. Work first on mounting, looking ahead, controlled starts, straight riding, gentle turns and predictable stops. Progress when the child repeats a skill calmly, not merely because a certain birthday has passed.
Training wheels may be relevant when the family wants the supplied training-wheel bicycle options, but the catalog facts do not establish whether they suit every learner or how they should be adjusted. Follow the exact product manual for assembly, adjustments, maintenance, compatibility, load limits and torque. If anything is unclear, use a qualified bicycle mechanic.
Helmet and final decision
A bicycle helmet must fit properly, sit level and have its straps adjusted according to the helmet manufacturer’s instructions, consistent with U.S. Consumer Product Safety Commission guidance. Recheck the fit whenever the child grows or the straps move.
For the question of when to teach, use ages 3–7 as a practical starting window, then let readiness decide the day. Measure height and inseam, compare the wheel-size ranges, test stand-over, reach and braking on the actual bicycle, and choose only the size the child can confidently control now.
Bikes for your next adventure
-

Black XJD Kids Bike for Boys – 12, 14 & 16 Inch Sizes
For a son between roughly 3 and 8 years old, the XJD Kids Bike in Black covers t…$169
$199 -

Blue XJD Girls Bike with Training Wheels – 12/14/16 Inch
If you're shopping for a first pedal bike for a daughter roughly 3 to 8 years ol…$149
$169 -
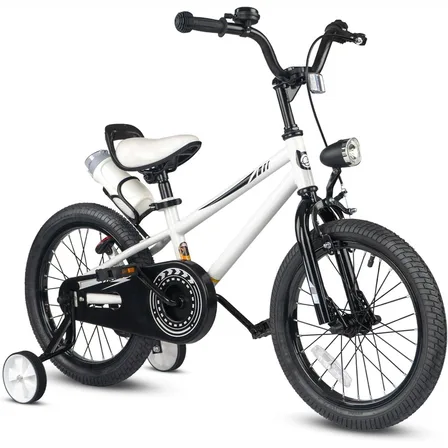
XJD Kids' Training Wheel Bike for Boys & Girls, 12/14/16 Inch – White
The XJD kids' training wheel bike in White is made for riders ages 3–8 (roughly …$169
$199