

Why can't my child learn to ride a bike
Most children struggle to learn because the bike does not fit, balancing and pedaling are being taught together, or fear is interrupting practice. Measure fit first, simplify the skill, and rebuild confidence in short sessions.
Check whether the bicycle is making learning harder
Start with the child’s measured height, then check inseam, reach, brake control and confidence on the actual bicycle. Age is only a starting point. The child should be able to stand over the bike comfortably, hold the controls without stretching, turn the handlebar while balanced and reach and operate the brakes reliably.
Do not buy or use an oversized bicycle merely to leave room for growth. A bike that is too large can make starting, stopping and catching a wobble more difficult. A bike can also be too small if the rider feels cramped or cannot steer and pedal comfortably.
| Wheel size | Starting age | Starting rider height |
|---|---|---|
| 12 Inch | 3–4 | 34–40 in / 86–102 cm |
| 14 Inch | 3–6 | 37–45 in / 94–114 cm |
| 16 Inch | 4–7 | 40–48 in / 102–122 cm |
| 18 Inch | 5–9 | 43–52 in / 109–132 cm |
| 20 Inch | 7–12 | 48–60 in / 122–152 cm |
| 24 Inch | 10–14 | 54–64 in / 137–163 cm |
| 26 Inch | Youth and adults | Over 60 in / 153 cm |
These are XBikes starting points, not proof of fit. If height suggests one size but the child cannot stand over, reach, brake or control it confidently, the individual fit check decides.
Separate balancing from pedaling
A child who must balance, steer, pedal, look ahead and stop all at once may appear unable to ride when the lesson is simply too complex. On a clear, level area away from traffic, first let the child practise getting on, looking forward, steering gently and stopping under control.
Next, work on balance without demanding continuous pedaling. The goal is a calm glide with feet ready to support the rider, followed by a controlled stop. Only add starting and pedaling after the child can repeatedly hold a line and stop without panic. Follow the bicycle’s exact manual for adjustments or component removal; if the required setup is unclear, use a qualified bicycle mechanic.
Compare the symptom with the likely obstacle
- They tip immediately: recheck bike size, stand-over room and reach, then practise gliding before pedaling.
- They cannot start: rehearse the starting position and the first push as a separate exercise.
- They veer sharply: ask them to look toward a nearby destination rather than down at the front wheel.
- They panic when gaining speed: return to slower glides and predictable stopping.
- They stop trying after one mistake: shorten the session and finish after one repeatable success.
Persistent difficulty is not evidence that the child is lazy or incapable. If pain, unusual weakness, vision difficulty or coordination concerns appear beyond bicycle practice, pause and discuss them with an appropriate healthcare professional.
Use training wheels for the right problem
Training wheels can provide support while a child becomes familiar with pedaling, steering and stopping, but they do not teach two-wheel balance in the same way as gliding. If the child can pedal yet cannot balance, more supported pedaling may not address the missing skill. If fear of tipping prevents any useful practice, temporary support may help confidence while the adult keeps a clear plan for progressing toward balance.
The Pink 12/14/16/20" XJD Girls Bike with Training Wheels & Basket offers catalog size choices of 12, 14, 16 and 20 inches, so it is relevant when comparing a training-wheel format across those sizes. The Blue XJD Freestyle BMX Bike, 20-Inch – No Pegs is a 20-inch kids’ BMX option and provides a contrasting no-pegs format for a rider whose measurements and control support 20 inches. These particular options help clarify whether size, support format or current skill is the real obstacle; neither title alone proves individual fit.
 Blue XJD Freestyle BMX Bike, 20-Inch – No Pegs
A 20-inch kids’ BMX comparison option for riders whose measured fit, reach, brake control and confidence support that wheel size; the catalog specifies no pegs.
 Pink 12/14/16/20" XJD Girls Bike with Training Wheels & Basket
Relevant when temporary training-wheel support is appropriate, with catalog wheel-size choices of 12, 14, 16 and 20 inches; each still requires an individual fit check.
Make practice easier to repeat
- Choose a level, open practice space away from vehicles and fixed obstacles.
- Fit a bicycle helmet so it sits level, fits properly and uses its straps according to the helmet manufacturer’s instructions.
- Set one small goal, such as three controlled glides or three calm stops.
- Keep instructions brief and avoid holding the child so tightly that they cannot feel their own balance.
- Stop before fatigue or frustration turns practice into a contest.
Inspect and assemble the bicycle according to its exact product manual. For maintenance, compatibility, load limits or adjustments not stated there, consult a qualified bicycle mechanic rather than guessing.
Decide what to do next
Measure the child’s height, check inseam and stand-over room, then observe reach, brake control and confidence on the actual bike. If fit fails, change the bicycle or setup before another lesson. If fit passes, spend the next session on gliding and stopping rather than demanding full riding. Choose a supplied product only when its listed wheel size and format match that measured need; otherwise, keep looking for an option the child can control now.
Bikes for your next adventure
-
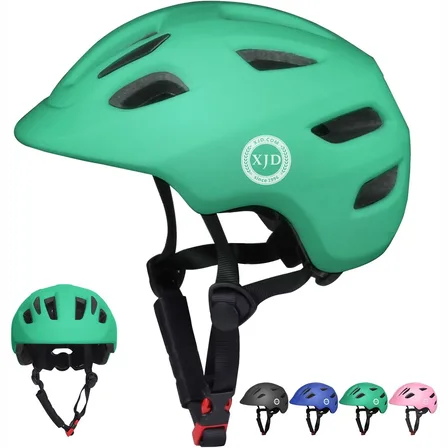
Green XJD Toddler Bike Helmet with Adjustable Fit, XS (46–51 cm)
The XJD toddler bike helmet in Green is built for the youngest riders — the size…$20.39
$23.99 -

Kids Bike Helmet by XJD for Boys & Girls – Black, Blue, Green, Pink, Purple
The XJD Kids Bike Helmet covers a wide 2-to-8-year age range thanks to two head-…$59.99
-

Kids Bike Helmet by XJD for Girls – Pink
The XJD Kids Bike Helmet in Pink is a lightweight multi-sport helmet for girls r…$59.99
$99