

Why do girls bikes have a lower bar
Girls’ bikes often have a lower top bar to make stepping onto and off the bicycle easier, especially when clothing or limited confidence makes a high bar awkward. It is a frame-style choice, not a different fit rule for girls.
Why the bar is lower
The lower or sloping bar comes from the traditional “step-through” frame. It provides more open space between the saddle and handlebars, so the rider does not need to swing a leg as high over the bicycle. Historically, this style was associated with skirts and dresses, which is why it became common on bicycles marketed to girls.
Today, the label is mostly a catalog and styling convention. Any child may prefer an open frame for easier mounting, while another may be comfortable with a higher or straighter top bar. The important question is not whether the frame says “girls,” but whether the individual rider can stand over, start, stop and steer the bicycle confidently.
What to measure before comparing bikes
Measure the child’s height without shoes, then measure the inseam from the floor to the crotch. Height provides a wheel-size starting point; inseam helps you judge the actual stand-over space. Because frame shapes vary, wheel diameter alone cannot tell you whether the top bar will clear the rider comfortably.
- Stand-over: Have the child straddle the frame with feet flat on the ground. The bar should not press into the body.
- Reach: Check that the child can hold the handlebars without stretching, locking the elbows or leaning excessively.
- Brake control: If the bicycle has hand controls, the child must be able to reach and operate them. Confirm the controls on the exact bicycle rather than assuming a type.
- Confidence: Ask the child to mount, begin riding, turn and stop. A low bar can help mounting, but it cannot correct a bicycle that is too large.
Have the child try the bicycle whenever possible. Do not choose an oversized model merely to allow room for growth; current control matters more than future use.
How wheel size changes the comparison
Use measured height before age. These XBikes ranges are starting points, not a substitute for checking inseam, stand-over, reach, brake control and confidence on the exact frame.
| Wheel label | Starting age | Rider height |
|---|---|---|
| 12 Inch | 3–4 | 34–40 in / 86–102 cm |
| 14 Inch | 3–6 | 37–45 in / 94–114 cm |
| 16 Inch | 4–7 | 40–48 in / 102–122 cm |
The ranges overlap, so age cannot settle a close choice. When a child falls within two ranges, compare both bicycles in person if possible. Favor the option on which the child has comfortable clearance and can reach and control everything now.
How the supplied girls’ bike is relevant
The Purple XJD Girls' Bike with Doll Seat & Basket is listed as a Training Wheel Bike and has 12 Inch, 14 Inch and 16 Inch SKU labels. Those three options make it useful for comparing adjacent starting sizes while considering the lower-bar question, but the catalog facts do not supply frame measurements. You must still compare the child’s inseam and reach with the exact selected bicycle.

Its doll seat and basket are supplied catalog features, but they do not establish fit. Likewise, the “Girls’ Bike” wording identifies how the product is presented; it does not mean girls require that frame style or that every girl will fit it. If the rider’s measured height falls outside all three listed starting ranges, this product is not a size substitute simply because its frame may be easier to step through.
What a lower bar does—and does not—solve
A lower bar can reduce the height a child must clear while mounting and can provide more space when standing over the frame. That may be reassuring for a hesitant beginner. It does not make excessive handlebar reach acceptable, guarantee that feet can be placed securely, or make inaccessible brakes usable.
Training wheels are the supplied category for the catalog bicycle, but their presence does not prove that the frame fits. Assess stand-over and controls independently. For assembly, adjustment, maintenance, compatibility, load limits or torque requirements, follow the manual for the exact product or ask a qualified bicycle mechanic; no universal procedure should be guessed.
Make the final check
- Record the child’s barefoot height and inseam.
- Use height to identify the relevant 12, 14 or 16 Inch starting range.
- Have the child straddle and try the exact bicycle.
- Compare clearance, reach, brake operation and present confidence—not color or gender labeling.
- Choose a properly fitting bicycle now instead of sizing up for growth.
Before riding, add a properly fitting bicycle helmet. It should sit level and its straps should be used according to the helmet manufacturer’s instructions. The practical answer to a lower bar is therefore simple: choose it when it helps this child mount and stand comfortably, but buy only when the complete bicycle also fits and remains controllable.
Bikes for your next adventure
-

Light Pink XJD Girls' Bicycle with Basket & Training Wheels
The Light Pink XJD Girls' Bicycle with Basket & Training Wheels is a retro-style…$109.99
$129.99 -
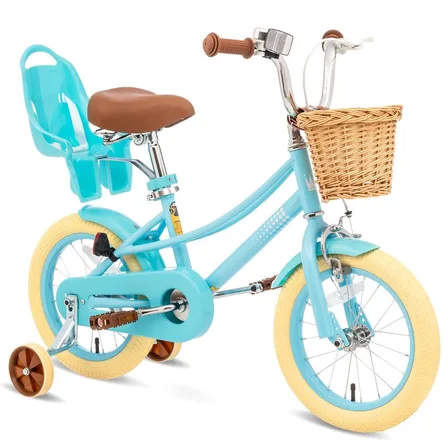
Girls' Training Wheel Bike by XJD, 12–20 Inch Wheels – Blue
This XJD girls' training wheel bike in Blue covers one of the widest fit ranges …$139
$159 -
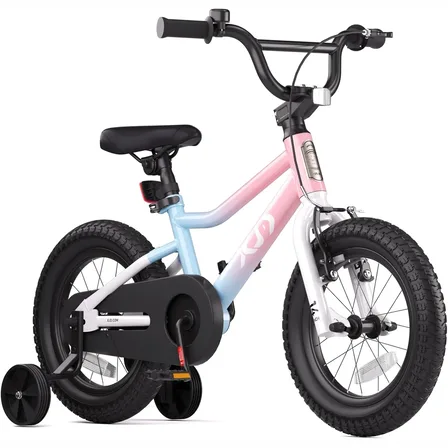
XJD Girls BMX Bike 12/14/16 Inch with Training Wheels – Pink Blue
The XJD Girls BMX Bike in Pink/Blue is built as a first pedal bike for kids roug…$99.99
$119.99