

Can child seats attach to a cruiser bike
Yes, some child seats can attach to a cruiser bike, but only when the seat’s mounting system, the bicycle, and any rack are explicitly compatible.
Start with the child seat’s mounting type
Identify the exact seat model before evaluating the cruiser. Child seats commonly use a rear-rack mount, a frame mount near the seat tube, or a front mount near the handlebar and stem area. These systems need different attachment points and clearances, so a cruiser that accepts one type may reject another.
Read both the child-seat manual and the bicycle manual. Confirm that the bicycle’s intended use permits carrying a child and that the manufacturer approves the relevant mounting location. Follow every stated load limit, compatibility rule, fastener requirement and torque specification. If either manual is unclear or unavailable, ask the manufacturers or have a qualified bicycle mechanic inspect the combination.
Measure the proposed mounting area
Do not judge compatibility from wheel size or appearance. Record the tube diameter and usable straight-tube length wherever a frame-mounted bracket would sit. For a front seat, measure the available mounting space and check whether the bracket would interfere with steering, cables or controls.
For a rear-mounted seat, measure the space from the saddle area to the rear wheel and compare it with the seat maker’s clearance requirements. If the seat attaches to a rack, identify the rack’s exact model, dimensions, approved load and child-seat compatibility. A rack being present does not by itself mean it can carry a child seat.
- Compare the bicycle and seat manuals for an explicit match.
- Check tube shape, diameter and unobstructed mounting length.
- Check tire, fender, saddle, pedal and heel clearance.
- Turn the handlebar fully both ways and look for interference.
- Confirm that cables and brake operation remain unrestricted.
Compare the seat, rack and bicycle as one system
The lowest stated limit in the complete system governs use. That system includes the bicycle, child seat, mounting hardware and rack when a rack carries the seat. Never assume a rack’s general cargo rating establishes child-passenger compatibility, and do not improvise adapters or substitute hardware.
Cruiser geometry can place the rider upright and may leave different amounts of space around the saddle, rear wheel and handlebar. Those traits do not prove compatibility. After installation according to the manuals, a qualified mechanic should check mounting security, wheel clearance, steering, brake function and whether the adult rider can start, stop and balance the loaded bicycle confidently.
How the supplied cruiser options help
The catalog choices are useful as comparison points because they show different wheel-size labels and rear-brake descriptions, while one title also identifies a rear rack. Those facts help narrow the questions to ask, but they do not establish child-seat approval, rack load capacity or mounting compatibility.
 XJD Pink Beach Cruiser for Girls – Rear Rack & V-Brake
Its title identifies a rear rack and V-brake, and 20 Inch, 24 Inch and 26 Inch labels are offered. The rack’s presence helps focus the compatibility check but does not prove child-seat approval or load capacity.
 24-Inch Purple XJD Beach Cruiser Bike with U-Brake
This title identifies a 24-inch cruiser with a U-brake. Because the supplied facts do not identify a rear rack or child-seat approval, its manual and physical mounting points must be checked before considering attachment.
XJD Pink Beach Cruiser for Girls – Rear Rack & V-Brake
This model is offered with 20 Inch, 24 Inch and 26 Inch SKU labels, and its title identifies a rear rack and V-brake. The rack makes rack compatibility an obvious question, not a confirmed answer. Obtain the exact rack and bicycle manuals, then verify that both approve the intended child seat and load.
24-Inch Purple XJD Beach Cruiser Bike with U-Brake
This model has a Default SKU label, while its exact title identifies it as 24-inch and describes a U-brake. No rear rack or child-seat mounting approval is supplied in the catalog facts. Do not infer either one; inspect the actual bicycle and consult its manual or a qualified mechanic.
Do not confuse host-bike size with passenger fit
If a child will ride one of these cruisers independently rather than sit in a passenger seat, use wheel size only as a starting point. XBikes places 20 Inch at ages 7–12 and heights 48–60 in / 122–152 cm; 24 Inch at ages 10–14 and 54–64 in / 137–163 cm; and 26 Inch for youth and adults over 60 in / 153 cm.
Measured height matters more than age. The child should try the bicycle and demonstrate suitable stand-over clearance, reach, brake control and confidence. Do not buy an oversized bicycle merely for growth. These rider-fit ranges do not determine whether that bicycle can safely host a passenger seat.
Make the final attachment decision
- Write down the bicycle, rack and child-seat model information.
- Measure every mounting point and required clearance.
- Match those measurements against both manufacturers’ instructions.
- Confirm approved use, all applicable load limits, hardware and torque requirements.
- Have a qualified bicycle mechanic resolve any uncertainty and inspect the installed system.
Before every ride, follow the manuals’ inspection instructions. The adult rider should use a properly fitted helmet, and the child needs an appropriate bicycle helmet that sits level with its straps adjusted according to the helmet manufacturer’s instructions. Attach the child seat only if the documented compatibility and measured clearances agree; otherwise, choose a different approved seat-and-bicycle combination.
Bikes for your next adventure
-

Blue XJD Girls Bike with Training Wheels – 12/14/16 Inch
If you're shopping for a first pedal bike for a daughter roughly 3 to 8 years ol…$149
$169 -

Light Pink XJD Girls' Bicycle with Basket & Training Wheels
The Light Pink XJD Girls' Bicycle with Basket & Training Wheels is a retro-style…$109.99
$129.99 -
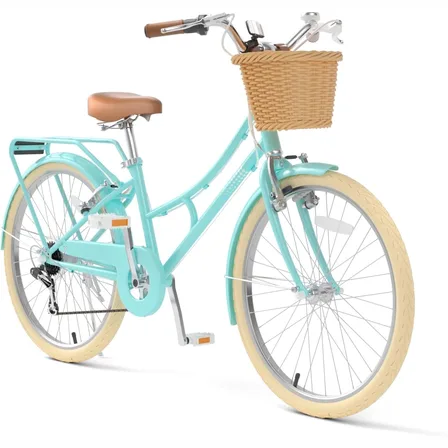
XJD Kids Beach Cruiser Bicycle, Rear Rack & V-Brakes, Mint Green
The XJD Beach Cruiser in Mint Green is a geared, multi-speed cruiser bike for ol…$179.99
$209.99