

Do little child's bike seat
A little child’s bike seat should let the rider start, stop, balance and reach the controls confidently. Measure the child and test the actual bike; do not choose an oversized bicycle for future growth. If “child’s bike seat” means a passenger seat fitted to an adult bicycle, neither supplied product is relevant.
What to measure before adjusting or buying
Measure the child’s height while they stand straight without shoes. Also measure inseam from the floor to the crotch, using the clothing and footwear they normally ride in. Height provides a wheel-size starting point, while inseam helps you evaluate stand-over space and saddle position on the actual frame.
Do not make the decision from age alone. Two children of the same age can differ in leg length, reach, hand strength and confidence. The child should try the bicycle whenever possible.
How should the seat fit?
Set the saddle so the child can get on and off without struggling and can stop without feeling trapped above the bike. A new or cautious rider may need easier foot contact with the ground than a confident rider. The exact position depends on the bicycle’s geometry and the rider’s ability, so there is no universal seat-height number.
With the child seated and holding the handlebar, check these points:
- The child can start, stop and balance without leaning the bicycle sharply to one side.
- The riding position does not force an uncomfortable stretch toward the handlebar.
- The child can steer through turns while remaining in control.
- The child can reach and operate the bicycle’s brakes, if fitted, without releasing control of the handlebar.
- When standing over the bicycle, the child has usable clearance and does not feel wedged against the frame.
If correct saddle adjustment cannot produce this result, the frame or wheel size may be unsuitable. Do not compensate for a bicycle that is too large by lowering the saddle beyond its permitted adjustment range.
Use wheel size only as a starting point
| Wheel size | XBikes age starting point | Rider-height starting point |
|---|---|---|
| 12 Inch | Ages 3–4 | 34–40 in / 86–102 cm |
| 14 Inch | Ages 3–6 | 37–45 in / 94–114 cm |
| 16 Inch | Ages 4–7 | 40–48 in / 102–122 cm |
| 18 Inch | Ages 5–9 | 43–52 in / 109–132 cm |
| 20 Inch | Ages 7–12 | 48–60 in / 122–152 cm |
Overlapping ranges are normal and do not make the sizes interchangeable. Prioritize measured height, inseam, reach, brake control and current confidence. If the child falls near a boundary, compare both neighboring sizes in person rather than automatically sizing up.
How the catalog options relate
The Pink 12/14/16/20" XJD Girls Bike with Training Wheels & Basket is useful for comparing four listed wheel-size options: 12 Inch, 14 Inch, 16 Inch and 20 Inch. The Blue XJD Freestyle BMX Bike, 20-Inch – No Pegs is a Kids’ BMX Bikes option with a 20-inch wheel listing and no pegs. These products help compare available size labels, but their titles alone do not establish fit.
 Blue XJD Freestyle BMX Bike, 20-Inch – No Pegs
A 20-inch Kids’ BMX Bikes comparison with no pegs. It is relevant only when the rider’s measurements and individual fit check support the XBikes 20-inch starting range.
 Pink 12/14/16/20" XJD Girls Bike with Training Wheels & Basket
Offers 12 Inch, 14 Inch, 16 Inch and 20 Inch labels, making it useful for comparing several XBikes wheel-size starting points. Each option still requires an individual fit check.
For a child below the 20-inch starting range, the Blue XJD Freestyle BMX Bike, 20-Inch – No Pegs should be treated only as a larger comparison point, not an equivalent substitute for a smaller wheel. The 20 Inch version of the Pink 12/14/16/20" XJD Girls Bike with Training Wheels & Basket requires the same individual fit check. Training wheels named in that title do not make an oversized bicycle fit correctly.
Test control before accepting the fit
- Choose candidate wheel sizes from measured height, then compare the child’s inseam with the actual frame’s stand-over position.
- Adjust the saddle only within the limits marked or described by the exact product manual.
- Have the child mount, dismount, start, stop, steer and reach the brakes in a controlled area.
- Reject a size if the child appears stretched, cannot stop confidently, lacks suitable stand-over clearance or cannot operate the brakes.
A properly fitting bicycle helmet is also essential: it should sit level and its straps should be used according to the helmet manufacturer’s instructions.
What to do next
Record height and inseam, identify the two closest wheel-size starting points, and arrange a supervised fit check. Follow the exact bicycle manual for assembly, saddle limits, maintenance and torque requirements; use a qualified bicycle mechanic when those instructions are unavailable or unclear. Select the bike only when the child—not merely the catalog age label—can stand over it and demonstrate comfortable control.
Bikes for your next adventure
-
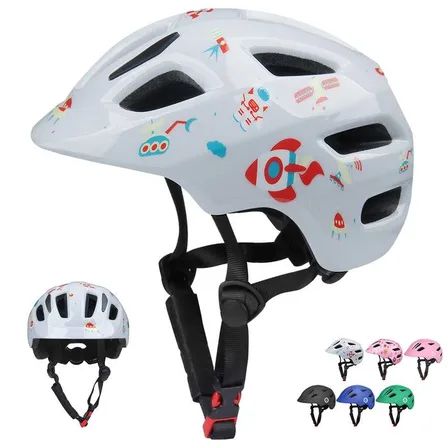
White Astronaut Bike Helmet for Kids by XJD – Toddler to Youth Sizes
4 reviews
The XJD White Astronaut kids' bike helmet is made for toddlers through younger e…$59.99
-
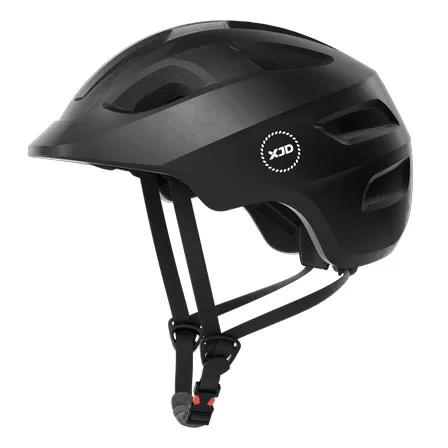
Kids Multi-Sport Bike Helmet by XJD – Black
7 reviews
The XJD Kids Multi-Sport Bike Helmet in Black is a lightweight, adjustable helme…$59.99
$49 -

Light Pink XJD Girls' Bicycle with Basket & Training Wheels
The Light Pink XJD Girls' Bicycle with Basket & Training Wheels is a retro-style…$109.99
$129.99