

How to carry a child on a bicycle
Carry a child by using a child-passenger system that fits the adult bicycle, the child, and the intended trip—not by placing them on the handlebar, top tube, or an ordinary rear rack.
Choose the carrying method first
The practical choices are a front-mounted child seat, rear-mounted child seat, bicycle trailer, or purpose-built cargo bicycle. Compare them by the child size permitted by the manufacturer, attachment requirements, bicycle compatibility, passenger restraint, foot protection, stability, and whether the adult can start, steer, brake, and stop confidently with the added load.
A front seat keeps a younger passenger visible but can affect the rider’s knee room, steering space, and mounting position. A rear seat places the passenger behind the rider and may change balance substantially, especially while parking or starting. A trailer has its own attachment and handling considerations and makes the bicycle combination longer and wider. A cargo bicycle is designed around carrying loads, but its passenger equipment must still be compatible and used within the maker’s limits.
Do not guess at load limits, attachment points, rack suitability, hardware, or installation torque. Check the exact manuals for both the bicycle and carrying system. If either manual is missing, unclear, or conflicts with the other, ask a qualified bicycle mechanic before carrying the child.
Measure and compare before buying
Record the child’s current height and weight, then compare both measurements with the passenger system’s manual. Also check the system’s stated requirements for sitting ability, restraint fit, helmet clearance, and any other developmental condition. Age alone is not a reliable substitute for these checks.
Next, identify the adult bicycle’s exact make, model, frame size, wheel size, rack model if present, and brake or cable locations around the proposed mounting area. Compare those details with the child seat or trailer manufacturer’s compatibility instructions. An accessory merely fitting around a tube or appearing to attach securely does not establish compatibility.
- Child: current height, weight, restraint position, foot containment, and helmet clearance.
- Bicycle: exact model, attachment area, approved rack or frame requirements, and manufacturer restrictions.
- Adult rider: reach, mounting clearance, steering room, braking control, and ability to support the loaded bicycle while stopped.
- Route: surface, hills, traffic exposure, turns, narrow barriers, and parking space.
Fit the helmet and passenger system
The child needs a properly fitting bicycle helmet. It should sit level, and its straps must be adjusted according to the helmet manufacturer’s instructions. Recheck the fit after the child is seated because a high seat back, padding, or trailer enclosure can push the helmet forward.
Install and use every restraint, foot guard, buckle, hitch, secondary retention device, and other supplied component exactly as its manual directs. Loose clothing, straps, shoelaces, and feet must not reach a wheel or moving part. Never add cushions, improvised brackets, or substitute hardware unless the manufacturer explicitly permits them.
Before each ride, check that the attachment is secure, restraints close correctly, tires and brakes are ready, and nothing interferes with steering or pedaling. Maintenance procedures and torque values must come from the applicable manuals or a qualified bicycle mechanic.
Test the loaded bicycle before entering traffic
First practice without the child, using only a test load if the carrying-system manufacturer allows it and explains how. Then make the first child-carrying ride short and in a traffic-free area. Start, make wide and tight turns, brake progressively, stop, dismount, and park. If the bicycle feels difficult to hold upright or the rider cannot steer and brake predictably, stop and change the setup rather than adapting on a public road.
Loading and unloading deserve the same care. Stabilize the bicycle exactly as the manufacturer instructs, keep one hand controlling it, and never leave a child unattended in a mounted seat or cargo area. Remember that extra length or width changes gaps, corners, and stopping decisions.
When the supplied bicycle is relevant
The 24-Inch Purple XJD Beach Cruiser Bike with U-Brake is a 24-inch beach cruiser bicycle. It does not establish child-seat, trailer, rack, cargo-passenger, or load compatibility, so it should not be selected as a carrying bicycle from its title alone. Its useful role here is as a comparison for a child who may be ready to ride independently instead of being carried.
This catalog option helps answer the title by showing the independent-riding alternative: XBikes places 24-inch bicycles at a starting point of ages 10–14 and rider height 54–64 inches (137–163 cm), subject to an individual fit check. It is not evidence that the bicycle can carry a passenger.

Decide whether to carry or let the child ride
If considering independent riding, measure the child’s height and inseam, then have them try the bicycle. Check stand-over clearance, reach, brake control, and present confidence; do not buy an oversized bicycle merely for growth. Age is only a starting point. The child must be able to control the specific bicycle comfortably.
Choose the carrying route only when the bicycle manual and passenger-system manual clearly confirm compatibility, every child measurement meets the stated limits, and the adult can control the loaded setup. Otherwise, consult a qualified bicycle mechanic or choose another transport method. If the child is considering the supplied 24-inch bicycle, arrange an individual fit check rather than treating it as passenger equipment.
Bikes for your next adventure
-

XJD Kids Bike for Girls – Pink, 12/14/16/20 Inch with Training Wheels
The XJD Kids Bike for Girls in Pink is a training-wheel bike built to carry your…$139
$159 -

XJD Boys 12/14/16" Training Wheel Bike – Blue
The XJD Boys Bike in Blue is a training wheel bike for riders 71–122 cm tall—rou…$169
$199 -
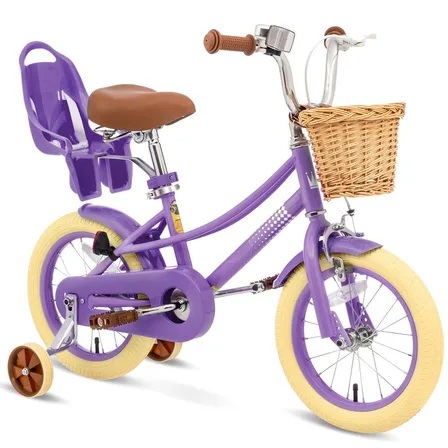
XJD Girls' Bike with Training Wheels, 12/14/16/20 Inch – Purple
The XJD girls' bike with training wheels in Purple is built to grow with your ri…$139
$159