

How to carry a baby on a bike
Carry a baby only in a purpose-built child bicycle seat or bicycle trailer that is compatible with the adult bike, suitable for the child, and installed exactly as its manual specifies. Never use a basket, doll seat, handlebar, top tube or wearable baby carrier as a bicycle passenger seat.
Choose the carrying system before choosing the bike
A child seat and a trailer affect a bicycle differently. A mounted seat places the passenger’s weight on the bicycle and can change balance, mounting and stopping. A trailer adds width and length and needs an approved attachment point. Compare the two systems using the manufacturer’s stated child requirements, load limit, bicycle compatibility and installation instructions.
Do not guess about rack strength, frame compatibility, axle fittings, fasteners or torque. Those details are not universal. Check the exact manuals for the bicycle and carrier, or ask a qualified bicycle mechanic to confirm the complete setup.
Check the baby and equipment requirements
Before riding, confirm that the child meets every developmental, size and weight requirement stated by the carrier manufacturer. The child must be able to use the required restraint and helmet as intended throughout the trip. If developmental readiness is uncertain, ask the child’s pediatric clinician before cycling.
- Use every supplied restraint, buckle and foot-retention feature as directed.
- Fit a bicycle helmet that sits level and uses its straps according to the helmet manufacturer’s instructions.
- Keep loose clothing, straps, fingers and feet away from wheels and moving parts.
- Do not add cushions, adapters or accessories unless the carrier manufacturer approves them.
- Do not exceed any load limit stated in the applicable manuals.
Measure and inspect the adult rider’s setup
The adult rider must control the loaded bicycle confidently. Check that the rider can mount without tilting the bike toward the passenger, reach the handlebars and brakes naturally, place a foot down promptly, and start, steer and stop without struggling.
With the bicycle stationary and supported, compare the carrier’s mounting requirements with the actual frame, rack, axle or other attachment area. Confirm clearance around the wheel, brakes, cables, pedals and steering. Follow the manual for assembly, maintenance and fastener checks; use a mechanic where compatibility or installation is unclear.
Practise before carrying the baby
- Inspect the bike, helmet, carrier attachment and restraints before each trip.
- Practise mounting, starting, turning, braking and stopping with the carrier empty in a traffic-free area.
- If the carrier manual permits it, repeat with an appropriate secured practice load that does not exceed its instructions.
- Load and unload the child only while the bicycle is stable and held securely.
- Choose a short, familiar route and avoid conditions beyond the rider’s current confidence.
Stop immediately if the bicycle becomes difficult to balance or control, the carrier shifts, a restraint loosens, or any part contacts a wheel or moving component. Recheck the manuals or have the setup inspected rather than improvising a repair.
How the supplied XBikes products relate
These catalog bicycles are useful comparison points for a child’s later independent riding, not evidence of a baby-carrying system. Their supplied facts do not state child-seat or trailer compatibility, passenger load limits or approved attachments. The product cards below therefore help distinguish wheel-size choices for riders from equipment intended to carry a baby.
 Pink Girls' 12/14/16" Bike by XJD – Basket & Doll Seat
A Training Wheel Bike offered in 12 Inch, 14 Inch and 16 Inch labels. Its basket and doll seat are not verified passenger equipment, so the supplied facts do not support using them to carry a baby.
 24-Inch Purple XJD Beach Cruiser Bike with U-Brake
This 24-inch Beach Cruiser Bike is a comparison point for an independently riding child. The supplied catalog facts do not establish child-seat or trailer compatibility, passenger capacity or approved attachment details.
 Blue XJD Freestyle BMX Bike, 20-Inch – No Pegs
This 20-inch Kids' BMX Bike has no pegs and is relevant only as an independent-rider comparison. Its supplied facts provide no baby-carrier compatibility, passenger limit or approved mounting information.
The Pink Girls' 12/14/16" Bike by XJD – Basket & Doll Seat is offered in 12 Inch, 14 Inch and 16 Inch labels within Training Wheel Bikes. Its basket and doll seat must not be treated as passenger equipment: the supplied facts provide no approval for carrying a baby.
The Blue XJD Freestyle BMX Bike, 20-Inch – No Pegs is a 20-inch Kids' BMX Bike. The 24-Inch Purple XJD Beach Cruiser Bike with U-Brake is a 24-inch Beach Cruiser Bike. Neither listing supplies baby-carrier compatibility or passenger specifications, so neither should be selected for this purpose without explicit confirmation from the exact manuals and, when needed, a qualified mechanic.
If the child is ready to ride independently
For future bicycle fit, measure the child’s standing height and inseam, then check stand-over clearance, reach, brake control and confidence on the actual bicycle. Have the child try it; do not buy an oversized bicycle merely for growth. XBikes starting points are 12 Inch for 34–40 in (86–102 cm), 14 Inch for 37–45 in (94–114 cm), 16 Inch for 40–48 in (102–122 cm), 20 Inch for 48–60 in (122–152 cm), and 24 Inch for 54–64 in (137–163 cm). Measured fit and control take priority over age.
For carrying a baby now, set these children’s bicycles aside and choose a documented, mutually compatible adult bicycle and purpose-built carrier. Verify the child requirements, installation and helmet fit before the first ride; if any requirement cannot be confirmed, do not carry the baby by bicycle.
Bikes for your next adventure
-

XJD Kids Bike for Girls – Pink, 12/14/16/20 Inch with Training Wheels
The XJD Kids Bike for Girls in Pink is a training-wheel bike built to carry your…$139
$159 -

XJD Boys 12/14/16" Training Wheel Bike – Blue
The XJD Boys Bike in Blue is a training wheel bike for riders 71–122 cm tall—rou…$169
$199 -
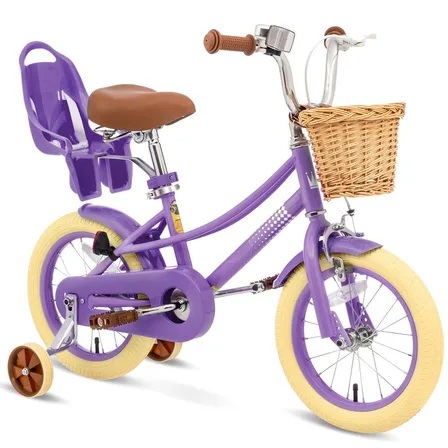
XJD Girls' Bike with Training Wheels, 12/14/16/20 Inch – Purple
The XJD girls' bike with training wheels in Purple is built to grow with your ri…$139
$159