

How to get on a bike with a child seat
To get on a bike with a child seat, secure the bicycle first, load and buckle the child as directed by the seat manual, then mount without tilting the bike toward the child.
Check the bicycle and child seat first
Before loading your child, confirm that the bicycle, seat and mounting system are compatible. Check the seat manual for its approved bicycle types, mounting points, child size and load limits. Inspect the attachment hardware, straps, foot restraints and wheel guards before every ride. If the instructions are missing, the fit is uncertain or any part moves unexpectedly, do not carry the child; ask the manufacturer or a qualified bicycle mechanic.
Also check the bicycle itself: tires, steering and brakes should operate correctly. Follow the bicycle and child-seat manuals for assembly, maintenance, fasteners and torque. Do not guess at settings that affect how the seat remains attached.
Choose a stable place to load
Load and mount on level, firm ground away from traffic. Remove loose bags or clothing that might catch on the saddle, pedals, child seat or wheels. Plan where each foot and hand will go before placing the child in the seat.
A kickstand may help hold an unloaded bicycle, but do not assume it can safely support a child. Keep physical control of the bicycle throughout loading and unloading. When possible, have another adult steady the bike until you know how its balance changes with the occupied seat.
Load the child before mounting
- Stand beside the bicycle and hold it securely with both wheels on the ground.
- Place the child into the seat without releasing control of the bicycle. A second adult can make this easier.
- Fasten the harness, foot restraints and other retention features exactly as the child-seat manufacturer directs.
- Check that clothing, laces, fingers and feet cannot reach moving parts.
- Put a properly fitted bicycle helmet on the child. The U.S. Consumer Product Safety Commission advises that a helmet should sit level and that its straps should be used according to the manufacturer’s instructions.
Never leave a child unattended in a bicycle seat, even briefly. The raised load can make a stationary bicycle tip much more easily.
Mount while keeping the bike upright
Apply a brake if you can do so while maintaining a secure grip, face forward and keep the bicycle as upright as possible. Use the mounting method you already perform confidently without a child. Avoid a wide leg swing near a rear-mounted seat; use a step-through opening or another manufacturer-approved method if the bicycle’s design provides one.
Settle onto the bike with at least one foot securely supporting you before releasing any extra support. Confirm that you can reach the handlebar, operate both brakes and start smoothly without the child seat obstructing your body. If mounting requires the bike to lean sharply, your foot slips, or you cannot clear the seat, stop. A different compatible bicycle or seat arrangement may be necessary.
Measure and compare before riding
The adult rider needs adequate stand-over clearance, comfortable reach and immediate brake control while managing the extra load. Measure the rider’s height and inseam, then perform an individual fit check on the fully assembled bicycle. Do not select an oversized bike merely to gain clearance around the child seat.
For a child who rides a separate bicycle, XBikes uses these wheel-size starting points. Age is secondary to measured height, inseam, reach, brake control and current confidence.
| Wheel size | Starting age | Rider height |
|---|---|---|
| 12 Inch | 3–4 | 34–40 in / 86–102 cm |
| 14 Inch | 3–6 | 37–45 in / 94–114 cm |
| 16 Inch | 4–7 | 40–48 in / 102–122 cm |
| 18 Inch | 5–9 | 43–52 in / 109–132 cm |
| 20 Inch | 7–12 | 48–60 in / 122–152 cm |
| 24 Inch | 10–14 | 54–64 in / 137–163 cm |
| 26 Inch | Youth and adults | Over 60 in / 153 cm |
The American Academy of Pediatrics advises having the child try the bicycle, checking stand-over, control and brake reach, and avoiding an oversized bike bought for growth.
Understand the supplied catalog comparison
The 24-Inch Purple XJD Beach Cruiser Bike with U-Brake is a 24-inch bicycle in the Beach Cruiser Bikes category. It helps illustrate the difference between a child riding independently and a parent carrying a child in a seat. The catalog facts do not establish child-seat compatibility, load limits or a mounting method, so it is not a substitute for a bicycle confirmed as compatible with your exact seat.
This particular catalog option is therefore useful only as a separate-bike, 24-inch comparison point for riders who fit that starting range and pass an individual fit check; it does not answer child-seat compatibility by itself.

Practise before the first shared ride
First rehearse mounting, starting, braking and dismounting without the child, using a safe traffic-free area. Then repeat with another adult steadying the occupied bike. Stop if steering feels difficult, the seat shifts, your heel or body contacts it, or you cannot put a foot down predictably.
Your next decision is simple: proceed only when the manuals confirm compatibility, the child is correctly restrained and helmeted, and you can mount the loaded bicycle while keeping it controlled and nearly upright. Otherwise, pause and have the complete setup checked by a qualified bicycle mechanic.
Bikes for your next adventure
-
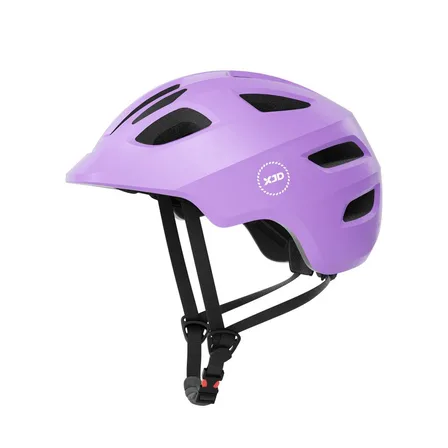
Girls' Bike Helmet from XJD – Purple
The XJD kids bike helmet in purple is a multi-sport helmet built for toddlers an…$59.99
$49 -

XJD Boys 12/14/16" Training Wheel Bike – Blue
The XJD Boys Bike in Blue is a training wheel bike for riders 71–122 cm tall—rou…$169
$199 -

Light Pink XJD Girls' Bicycle with Basket & Training Wheels
The Light Pink XJD Girls' Bicycle with Basket & Training Wheels is a retro-style…$109.99
$129.99