

How to get on bike with child seat
To get on a bike with a child seat, stabilize the bicycle, secure the child as the seat manual directs, hold the brakes, and step through or bring your leg over the front of the saddle—not over the occupied rear seat. If you cannot mount and stop without the bicycle leaning sharply, do not ride yet.
Check the setup before loading the child
A child seat changes the bicycle’s balance, especially at low speed. Confirm that the exact seat and mounting system are compatible with the bicycle. Check the seat manual for permitted frame or rack types, child and load limits, required clearances, fastener checks and installation instructions. These details cannot be inferred from wheel size or appearance.
Inspect the tires, brakes, seat attachment and any foot or strap restraints before each trip. If the manual is missing, compatibility is uncertain or the mount moves, ask a qualified bicycle mechanic to inspect it. Do not guess at torque settings or substitute hardware.
Measure the space you need to mount
With the unloaded seat installed, stand over the bicycle and rehearse mounting while holding both handlebar grips. Compare three things:
- Stand-over clearance: Can you straddle the frame and put your feet down promptly?
- Leg path: Can your foot clear the frame without passing over or striking the child seat?
- Control reach: Can you reach and operate both brakes while keeping the bicycle upright?
A step-through frame may provide an easier leg path, but frame style alone does not establish seat compatibility. Front-mounted seats can affect knee and handlebar space; rear-mounted seats block the usual high leg swing. Test the movement without a child first.
Use a controlled mounting sequence
- Choose level ground away from traffic, slopes and loose surfaces.
- Follow the child-seat manufacturer’s instructions for loading and securing the child. A second adult can steady the bicycle while you learn the sequence.
- Hold the handlebars and apply the brakes so the wheels cannot roll freely.
- Keep the bicycle as upright as possible. Step through a low frame, or move your leg over the frame in front of the saddle while avoiding the seat.
- Settle onto the saddle only after you have stable contact and full steering and brake control.
- Start smoothly in a low-traffic practice area. If balance feels uncertain, stop, put both feet down and reassess.
Never rely on an unattended bicycle or kickstand to hold a seated child. When stopping, secure your footing before releasing either hand. Use the loading, restraint and unloading order specified in the exact seat manual.
Confirm the child’s restraint and helmet fit
Use every restraint supplied with the seat exactly as its manufacturer directs, including foot restraints where provided. Clothing, laces and straps must remain away from moving parts. Do not carry a child who falls outside the seat manufacturer’s stated limits.
The child needs a properly fitting bicycle helmet. It should sit level, with its straps adjusted according to the helmet manufacturer’s instructions. Check helmet fit on the actual child rather than relying only on a labeled size.
Know when these XBikes products are relevant
The supplied catalog options are children’s bicycles, not child seats or adult bicycles equipped to carry one. They therefore do not solve the mounting task. They help only when comparing a later transition to an independently ridden bike, using the child’s measured fit and confidence.
 Blue XJD Freestyle BMX Bike, 20-Inch – No Pegs
This 20-inch Kids’ BMX Bike is relevant only when considering a child’s transition to independent riding; it is not a child seat or a substitute for a compatible adult carrying setup.
 Pink 12/14/16/20" XJD Girls Bike with Training Wheels & Basket
This Training Wheel Bike offers 12-, 14-, 16- and 20-inch labels for an independent-bike fit comparison. It does not help mount an adult bicycle with a child seat.
Blue XJD Freestyle BMX Bike, 20-Inch – No Pegs is a 20-inch Kids’ BMX Bike. Under the XBikes starting points, 20-inch bicycles correspond to rider heights of 48–60 inches (122–152 cm) and ages 7–12. Height, inseam, reach, brake control and confidence still decide whether it fits.
Pink 12/14/16/20" XJD Girls Bike with Training Wheels & Basket is a Training Wheel Bike offered in 12-, 14-, 16- and 20-inch labels. Those choices allow a closer wheel-size comparison, but they do not establish fit and are not substitutes for a child seat.
| Wheel label | XBikes height starting point | Age starting point |
|---|---|---|
| 12 Inch | 34–40 in / 86–102 cm | 3–4 |
| 14 Inch | 37–45 in / 94–114 cm | 3–6 |
| 16 Inch | 40–48 in / 102–122 cm | 4–7 |
| 20 Inch | 48–60 in / 122–152 cm | 7–12 |
Have the child try any independent bicycle. Check stand-over clearance, reach, brake operation and control; do not select an oversized bike merely to allow room for growth.
Make the ride-or-adjust decision
Ride only if the seat is confirmed compatible, the child is within its stated limits, all restraints and the helmet fit correctly, and you can mount, start and stop while maintaining control. Otherwise, pause and use the exact manuals or a qualified bicycle mechanic. For today’s decision, rehearse the complete mount without the child first; if it is not calm and repeatable, adjust the setup before carrying them.
Bikes for your next adventure
-
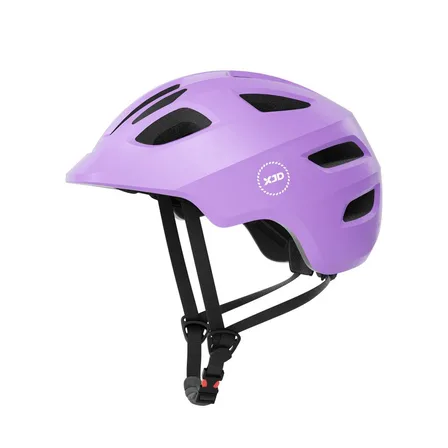
Girls' Bike Helmet from XJD – Purple
The XJD kids bike helmet in purple is a multi-sport helmet built for toddlers an…$59.99
$49 -

XJD Boys 12/14/16" Training Wheel Bike – Blue
The XJD Boys Bike in Blue is a training wheel bike for riders 71–122 cm tall—rou…$169
$199 -

Light Pink XJD Girls' Bicycle with Basket & Training Wheels
The Light Pink XJD Girls' Bicycle with Basket & Training Wheels is a retro-style…$109.99
$129.99