

Where does baby ride in bike seat
A baby rides in a compatible child seat attached in the exact position approved for that seat and bicycle—usually at the front or rear, never improvised on the frame, rack or handlebar.
Choose the position from the two manuals
Do not decide by appearance alone. First identify the bicycle’s exact model and the child seat’s exact model. Compare both manufacturers’ instructions. The bicycle must permit that type of child-seat installation, and the seat must include hardware intended for the approved mounting point.
A front-mounted seat places the child ahead of the adult rider, while a rear-mounted seat places the child behind. Either position changes steering, balance, braking and the space available to mount and dismount. The correct choice is the configuration explicitly permitted by both manuals and one that the adult can control confidently.
If compatibility, assembly, load limits or torque settings are missing or unclear, do not guess. Ask the manufacturers or have a qualified bicycle mechanic inspect the complete setup.
Measure and compare before installation
Record the baby’s current weight and height, then compare them with the child seat manual’s stated limits and readiness requirements. Check every limit printed for the seat, mounting hardware and bicycle; the lowest applicable limit governs. Do not invent extra capacity by changing the mounting position.
Also examine the bicycle where the seat would attach. Note the frame or rack model, tube shape, available clearance, cable routing and any existing accessories. Compare these observations with the diagrams and compatibility exclusions in the manuals. A rack-mounted seat requires the exact rack compatibility specified by its maker; the presence of a rack alone is not proof.
Check the baby and adult together
A dimensional match is only the first check. The baby must satisfy every developmental and positioning requirement in the seat instructions. If readiness is uncertain, pause and ask the child’s pediatrician rather than using age alone as proof.
With the bicycle held securely and before riding, confirm that the harness can be adjusted as directed, feet remain in the intended restraints, and the child’s body cannot contact wheels or other moving parts. Nothing should obstruct steering, pedaling or braking.
The adult should then assess control with the added load in a quiet, traffic-free place. If the bicycle becomes difficult to hold upright, steer, stop, mount or dismount, that setup is not suitable for that rider. Never leave a baby in the seat on a parked bicycle, even when a stand is fitted.
Helmet and pre-ride checks
The U.S. Consumer Product Safety Commission advises that a bicycle helmet must fit properly, sit level and have its straps used according to the helmet manufacturer’s instructions. Check that the child seat does not push the helmet forward or prevent a level fit.
Before each ride, inspect the attachment, harness, foot restraints and all parts identified by the seat manual. Follow the exact manual for maintenance and tightening procedures. Stop using the setup if anything is loose, damaged, missing or behaving differently; consult the maker or a qualified bicycle mechanic.
Why the listed kids’ bikes are different
The catalog options below help clarify an important distinction: they are training-wheel bicycles for children riding independently, not baby seats or evidence that a baby can ride on an adult bicycle. They become relevant only when choosing a child’s own bike after the child is ready, measured and individually fit.
 Girls' Training Wheel Bike by XJD, 12–20 Inch Wheels – Blue
A blue training-wheel bicycle offered in 12, 14, 16 and 20 Inch sizes. It is relevant only as a later child-rider option, not as a baby seat or proof of carrying compatibility.
 XJD Girls' Bike with Training Wheels, 12/14/16/20 Inch – Purple
A purple training-wheel bicycle with 12, 14, 16 and 20 Inch size labels. Compare a ready child’s measured height and individual fit; it does not answer adult-bicycle child-seat compatibility.
 XJD Kids Bike for Girls – Pink, 12/14/16/20 Inch with Training Wheels
A pink kids’ training-wheel bicycle available in 12, 14, 16 and 20 Inch sizes. It is for comparison when selecting a child’s own bicycle, not for transporting a baby.
Girls' Training Wheel Bike by XJD, 12–20 Inch Wheels – Blue, XJD Girls' Bike with Training Wheels, 12/14/16/20 Inch – Purple, and XJD Kids Bike for Girls – Pink, 12/14/16/20 Inch with Training Wheels share the same supplied size choices: 12 Inch, 14 Inch, 16 Inch and 20 Inch. Their colors and catalog wording do not establish fit, child-seat compatibility or suitability for carrying a baby.
If you are choosing the child’s own bike
Use measured rider height as a starting point, not age alone. XBikes lists 12 Inch for 34–40 in (86–102 cm), 14 Inch for 37–45 in (94–114 cm), 16 Inch for 40–48 in (102–122 cm), and 20 Inch for 48–60 in (122–152 cm). Those are starting ranges rather than permission to skip a fit check.
Have the child try the bicycle. Check stand-over clearance, reach, brake control and current confidence. Following American Academy of Pediatrics guidance, do not buy an oversized bicycle merely for future growth. Overlapping height ranges mean trying both candidate sizes may be useful; they do not make the sizes interchangeable.
Your next decision
- For carrying a baby, find the bicycle and seat manuals, measure the child, verify every compatibility and readiness requirement, and arrange a mechanic’s inspection if anything is uncertain.
- For a child ready to pedal independently, compare the listed 12, 14, 16 and 20 Inch options against measured height, then test stand-over, reach and braking before choosing.
If the manuals do not explicitly approve the baby-seat position on that bicycle, do not ride with the baby in that setup.
Bikes for your next adventure
-
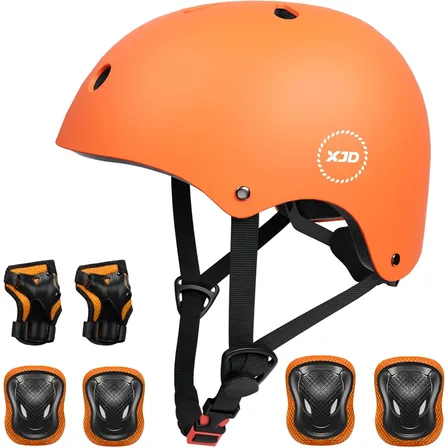
Orange Kids Helmet & Pad Set by XJD – Sizes S & M
The Orange XJD Kids Helmet & Pad Set is built for children around 3 to 8 years o…$24.64
-

XJD Boys 12/14/16" Training Wheel Bike – Blue
The XJD Boys Bike in Blue is a training wheel bike for riders 71–122 cm tall—rou…$169
$199 -
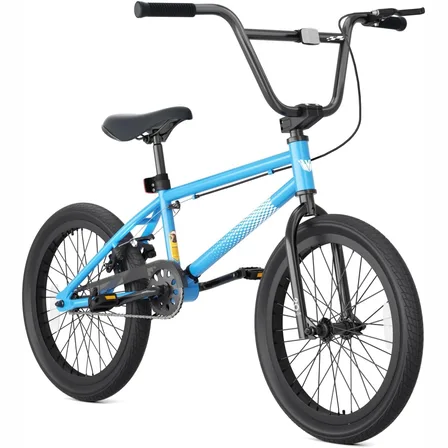
Blue XJD Freestyle BMX Bike, 20-Inch – No Pegs
The XJD 20-Inch Blue Freestyle BMX is an entry-level BMX bike for boys and girls…$189.99