

Which child bike seat do i have
To identify which child bike seat you have, find its brand, model or serial label, then record how it mounts and measure its key attachment points. Do not identify it by colour or appearance alone.
First decide what “bike seat” means
If you mean a child-carrying seat attached to an adult bicycle, look for identifying information on the underside, back, mounting bracket and footrests. If you mean the bicycle your child rides, check the tyre marking for its nominal wheel size and complete the individual fit checks below.
The supplied XBikes products are complete children’s bicycles, not identified child-carrying seats. They are relevant only as wheel-size comparison points when the question is about a child’s own bike; they cannot identify or replace an adult-bike child carrier.
 Blue XJD Freestyle BMX Bike, 20-Inch – No Pegs
A complete 20-inch Kids’ BMX Bike with a Default SKU label. It is useful only as a 20-inch bicycle comparison, not for identifying or replacing an attached child carrier.
 Pink 12/14/16/20" XJD Girls Bike with Training Wheels & Basket
A complete training-wheel bicycle offered with 12 Inch, 14 Inch, 16 Inch and 20 Inch SKU labels. These labels help compare a child’s bicycle wheel size but do not identify a child-carrying seat.
How to identify an attached child carrier
- Photograph every label. Capture the brand, exact model name, serial or batch code, warnings and any approval markings without relying on memory.
- Record the mounting position. Note whether the seat is in front of or behind the adult rider.
- Inspect the attachment. Describe whether its bracket connects around the bicycle frame, to a rear rack or by another arrangement. Do not assume similar-looking brackets are interchangeable.
- Measure the interface. With the seat removed only if its manual permits, record bracket width, bolt spacing, rail spacing and the bicycle tube or rack dimensions at the attachment point. Note exactly where each measurement was taken.
- Compare with documentation. Match the label, mounting arrangement and measurements to the exact manufacturer’s manual. The manual—not appearance—must determine compatibility, load limits, assembly and torque.
If the label is missing, damaged or produces more than one possible model, stop using the seat until its identity and installation can be confirmed by the manufacturer or a qualified bicycle mechanic. Do not combine a seat with a bracket merely because the parts seem to fit.
If you meant your child’s bicycle size
Read the nominal size printed on the tyre sidewall, such as 12, 14, 16 or 20 inches. Because tyre outside diameters vary, a casual edge-to-edge wheel measurement may not reliably identify the marketed size. If the marking is unreadable, photograph it and ask a qualified bicycle mechanic to identify the wheel and compatible replacement parts.
| Wheel size | XBikes starting point |
|---|---|
| 12 Inch | Ages 3–4; height 34–40 in / 86–102 cm |
| 14 Inch | Ages 3–6; height 37–45 in / 94–114 cm |
| 16 Inch | Ages 4–7; height 40–48 in / 102–122 cm |
| 18 Inch | Ages 5–9; height 43–52 in / 109–132 cm |
| 20 Inch | Ages 7–12; height 48–60 in / 122–152 cm |
| 24 Inch | Ages 10–14; height 54–64 in / 137–163 cm |
| 26 Inch | Youth and adults over 60 in / 153 cm |
These figures are starting points, not a substitute for trying the bicycle. Prioritise measured height and inseam, comfortable reach, reliable brake control and the child’s current confidence. The child should have appropriate stand-over clearance and must not be placed on an oversized bicycle simply to allow room for growth.
How the two catalog bicycles compare
Pink 12/14/16/20" XJD Girls Bike with Training Wheels & Basket is listed in 12 Inch, 14 Inch, 16 Inch and 20 Inch SKU labels. Those choices let you compare the tyre’s nominal size with four catalog size labels, but the title and available labels do not establish an individual fit.
Blue XJD Freestyle BMX Bike, 20-Inch – No Pegs is a Kids’ BMX Bike with a Default SKU label and 20-inch wording in its exact title. It is relevant only when the identified bicycle size is 20 inches and the child passes the fit check; it provides no evidence about child-carrier compatibility.
If your bicycle is 18, 24 or 26 inches, neither supplied product has that exact wheel size. They are nearest-size comparison points only, not substitutes; one wheel size must never be treated as equal to another.
Check fit and safety before the next ride
- Have the child try the bicycle rather than deciding from age alone.
- Confirm stand-over clearance, balanced control, comfortable reach and the ability to operate the brakes.
- Use a properly fitting bicycle helmet that sits level, with straps adjusted according to its manufacturer’s instructions.
- For any carrier installation, bicycle assembly, maintenance, compatibility, load limit or torque question, follow the exact product manual or use a qualified bicycle mechanic.
Your next decision
If it is a child carrier, identify the exact label and bracket before using it. If it is the child’s bicycle, read the tyre size, measure the rider, perform the control checks, and consider the supplied bicycles only when their labeled wheel size matches.
Bikes for your next adventure
-

Blue XJD Girls Bike with Training Wheels – 12/14/16 Inch
If you're shopping for a first pedal bike for a daughter roughly 3 to 8 years ol…$149
$169 -
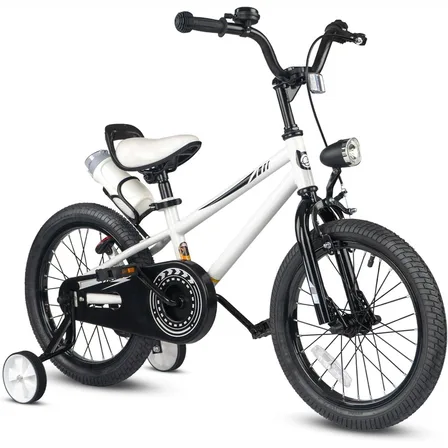
XJD Kids' Training Wheel Bike for Boys & Girls, 12/14/16 Inch – White
The XJD kids' training wheel bike in White is made for riders ages 3–8 (roughly …$169
$199 -
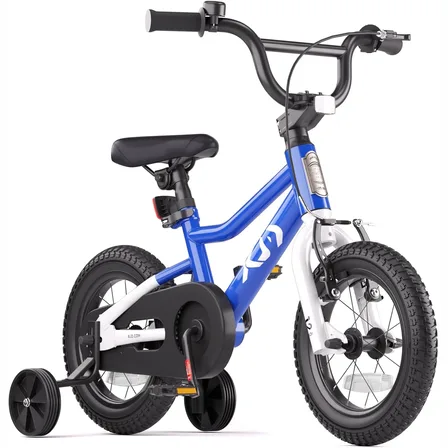
XJD Boys & Girls BMX Bike with Training Wheels, 12/14/16" – Blue
The XJD Boys & Girls BMX Bike in Blue is a first pedal bike for kids roughly age…$99.99
$119.99